I believe the last time we talked craft room I left you with this photo:
Yes? Does this make you as happy as it does me? I love seeing colorful things in my craft room. Which brings me to the next part of organizing your craft space: deciding what kind of containers to use.
Now don’t get me wrong, I do NOT want you to go out and buy all new craft storage. What you need to do now is think about and decide on what KIND of storage works for you. Do you like to have everything out in the open, where you can easily see your supplies? Do you want your storage pieces open and visible, or closed and tucked away? Do you need everything to match or do you prefer an eclectic mix?
Since I have been collecting ideas for quite awhile on my pinterest board, and have had a dedicated scrapping space since day one, I know that I like my storage to be either closed and visible (think glass jars) or open and opaque (think buckets and baskets.) I know that I like to have things I use often close at hand, and I want to be able to poke through my stash easily, which means portable containers or bins.
Let me show you some of my storage solutions, so you get an idea of what I mean.
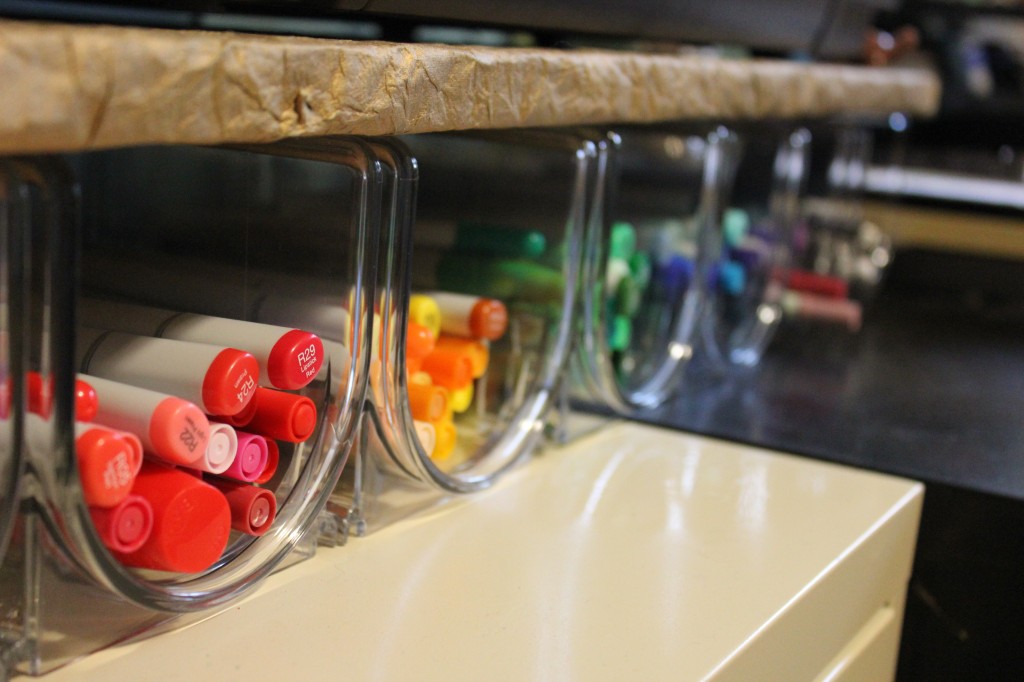
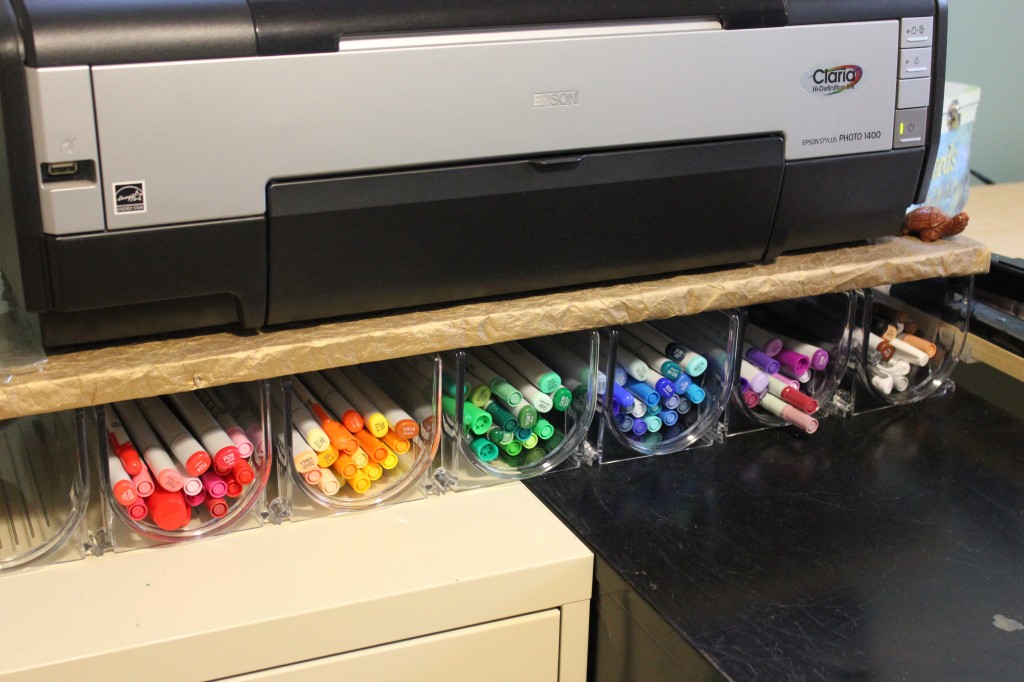
First up, my markers:
At the old house, I started out with a pen holder that came with the set of zig writers I got on clearance. That didn’t work very well for me–it was too difficult to find the right spot to put the marker back, and I kept scraping my knuckles on it. I next tried a basket, and that worked fairly well, but I found I kept using the same pen over and over again, rather than taking advantage of all the colors I’d gotten on sale! I also couldn’t add my new copic markers, there just wasn’t enough room for them in the basket. Then I saw this idea on pinterest that used a wine rack and plastic cups to hold markers by color family. I loved that idea, so I priced out various options while putting all the big pieces together in my new room. Once everything was in my room, it really felt like I was running out of table space, but then I remembered the piece of plywood I had covered with handmade paper. I had used it for many different things in the old house, but had no idea what to do with it here. I turned it into a shelf for my printer, and used these plastic stackable wine holders as shelf supports. I love it! Color makes me happy.
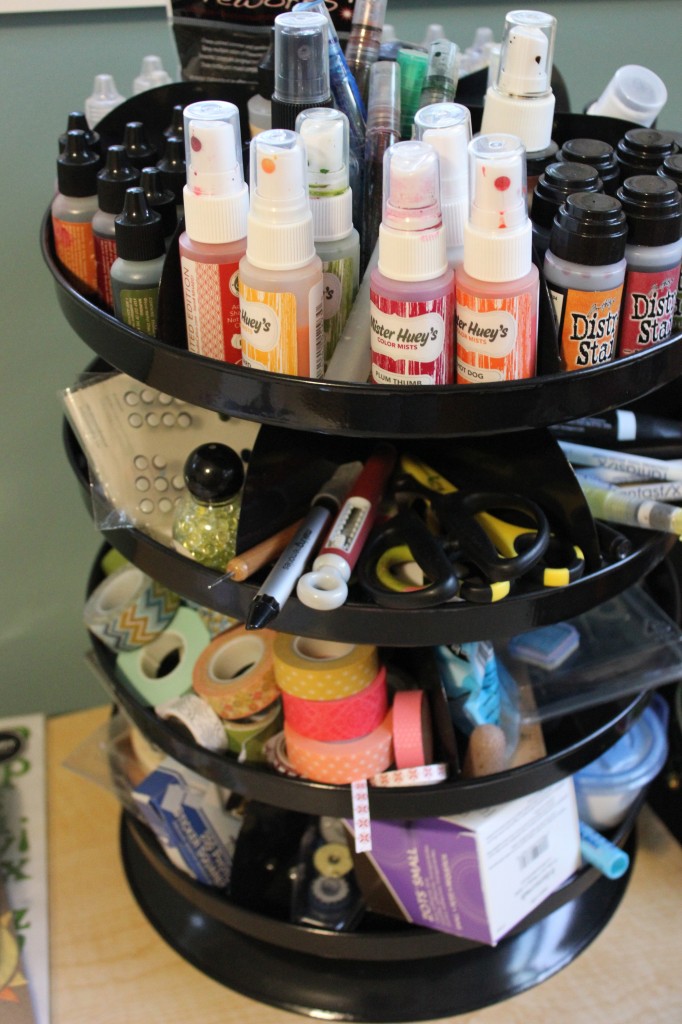
Next up is this tool caddy from Harbor Freight. Someone from Studio Calico had used one in her craft space, and it looked like a great way to store tools and product I use on a regular basis, as well as small items I want to use more often. Right now I’ve got adhesives on the bottom, washi tape and sponges for inking and random tools on the next round, scissors and brushes and distressers on the third round, and distress stains and mists and stickles on the top round. It’s working fairly well, except for the items that fall over when I turn a level. (My Smooch sprays really don’t want to stay put!)
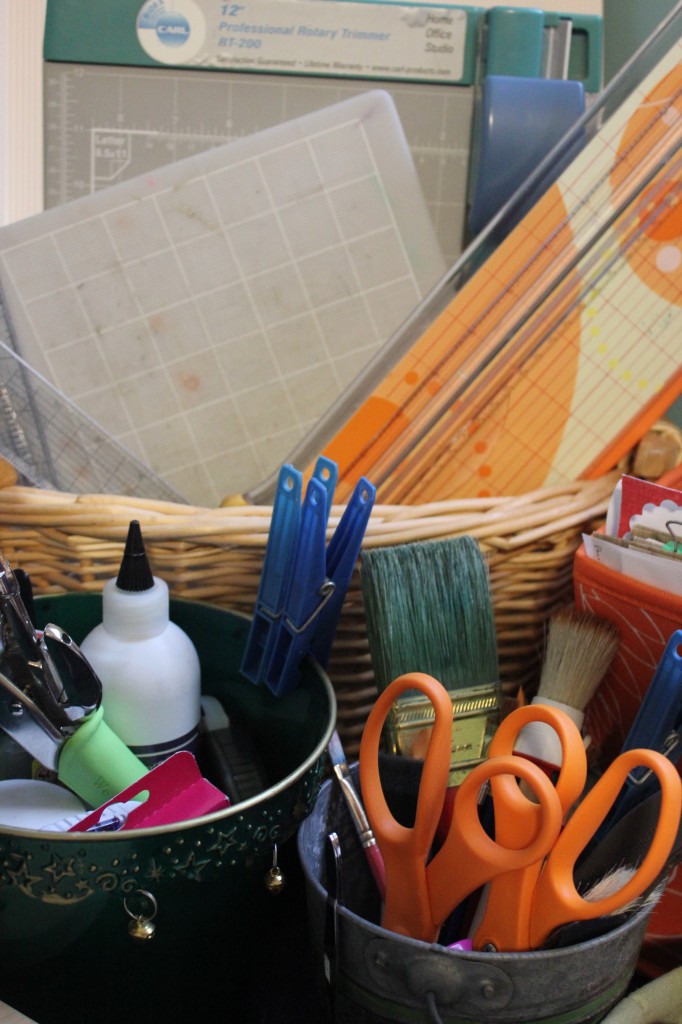
I have a larger basket to hold my trimmers and cutting mats, and buckets to hold my liquid adhesives (I buy large bottles of the stuff) and larger tools. (Say “hello!” to my scissors from Lain!) I also have a couple baskets to hold journaling cards and sketch ideas, a paper sorter with the latest product I want to use, and a fabric bin with my Twelve files. I really need to go through my Twelve materials and see what I have done, and what I else I want to do, but that’s a project for another day.
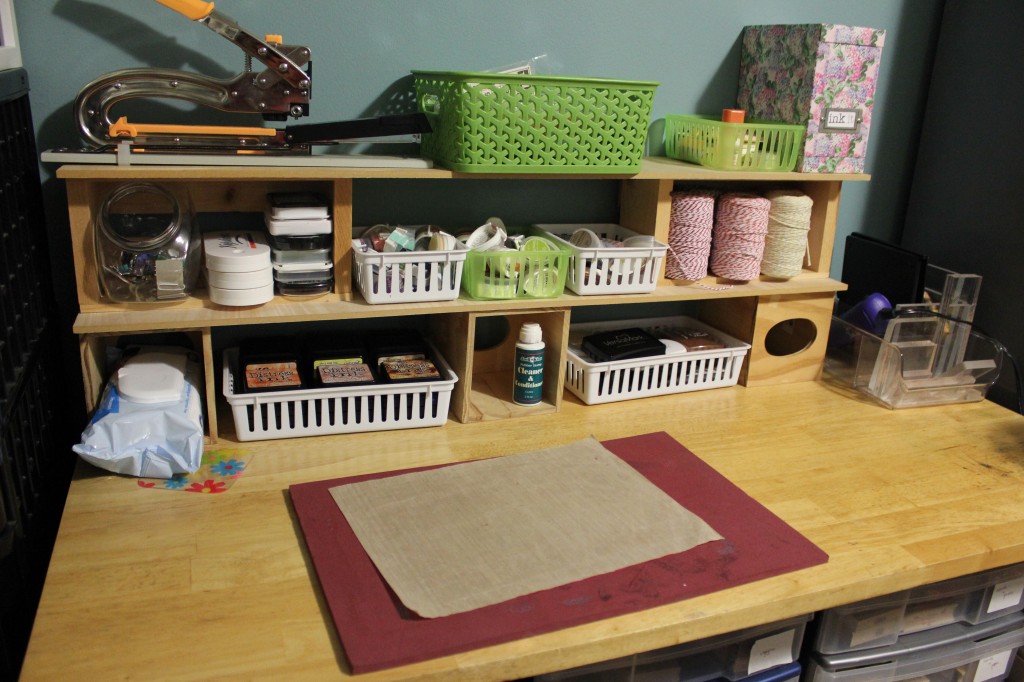
This is the workspace at my stamping station. It’s a breakfast bar, so it is counter high, which is good for when I want to do a lot of stamping. I keep my most used ink pads in baskets on these jury-rigged shelves. I have a small plastic divided bin that I keep my acrylic blocks and heat gun in at the end of the shelves, and some big tools that I use fairly often but they don’t fit right next to my desk very well. The green basket on top holds my Twelve embellishments. I keep forgetting to add them to my pages!
Oh, and those two flat things on the table are very useful if you stamp or use inks at all. The brown mat is a non-stick, heat-resistant craft mat from Ranger. I’ve had mine for over ten years now, and it still is great for messy or sticky projects. The pink-ish mat is a foam surface for stamping on. If you put this under any item you are stamping with a clear or unmounted stamp, you will get a better impression than on a simple hard surface.
That’s all I’ve got for this week. Next week, I’ll pull up some references for you, so maybe you can find some other ideas that will work for you. If you have any questions or ideas, please add them below, or to this message board. I would love to see what kind of space you have to create in, and you can show me in this gallery.
See you next week!
–Heather

