
My Current Passion: Organizing My Crafty World
I’ve heard several friends say they liked organizing their supplies almost as much as using them. That’s certainly true for me! In the same way I’m inspired to cook more interesting meals after organizing my kitchen and “discovering” exotic spices I’d forgotten about, I’m also inspired to create differently when I discover a long-hidden product that I’d forgotten about because it wasn’t “handy”. Now there’s a good term to focus on: handy. It implies that when I’m in the midst of something and I extend my hand, I can get to it and use it. That’s simplistic but it’s at the core of what I’ve embarked upon as I organize my crafty world.
Core Objectives and List of Areas
Aside from having things “handy”, whatever that means in each area, my overriding objective is to do this without spending any money — to use bins and baskets and shelves and containers that I already own or that I can make from household items. Let’s face it — I’ve been at this for a while and I’ve accumulated not only lots of “stuff” but also lots of “things to put the stuff into or onto”. I’m partial to “open storage” where items are displayed rather than stashed away. Fortunately my hubby doesn’t seem to mind living in a giant craft room that happens to have a kitchen and a TV. He has his desk and his seat on the couch and the rest doesn’t seem to bother him. Besides, if I see it, I will use it. And that’s the name of the game here. Oh, and perhaps making the house look a little more like a place to relax and live! The general areas I plan to address (and these may lead to more detailed projects) are the following:
- Mixed Media Supplies & My “Handy Shelf”
- Creating a dedicated “Cutting Station” & Organizing Dies
- Albums — filling them, labeling them and organizing them
- The “Closet” that somehow is involved in every other project
- Embellishments & All That That Implies: so many kinds, and they’re so small!
- Stencils & Stamps & Embossing Folders — they’re EVERYWHERE!
- Paper – including Kits & Collections & Themed & Specialty Papers

It's blurry, but that might be the point.....
It’s hard for me to believe, but I didn’t take a “before” photo of the most urgent area to address when I decided to embark upon this journey. The pic above is a screen shot from the opening of a video I made touring the “before” areas I planned to address this past week. That colorful metal shelf is my lifeline to supplies that MUST be handy. But the sad truth was that only about half of what was stored there gets used frequently and there were many more useful items stored in other locations. Similarly, my “mixed media cart” was filled with “stuff”, and the stuff I needed easy access to was covered by the latest stuff I’d found to create texture or move paint around — stuff I want but not at the expense of hiding other “stuff”.
SO I MADE THESE VIDEOS.....
To test my process and gauge the pace and schedule I might be able to sustain, I did my most important area — the stuff that needs to be handy as I’m crafting and especially as I’m filming myself crafting. I’ve decided to tackle one area per week, releasing a “before” video on Tuesday and an “after” video on Saturday. It’s not a sophisticated process, but it’s a realistic, real-time, warts-and-all look at where I’m starting and what I end up with in each area. Here are links to my first two videos that went live on Saturday September 19:
First is the “before” tour of my handy shelf and mixed media supplies: https://youtu.be/OevKgfa1J7s
And here’s a link to the “after” tour — including what I didn’t quite get around to. And I simply couldn’t be happier: https://youtu.be/9YjHXLLMOu4
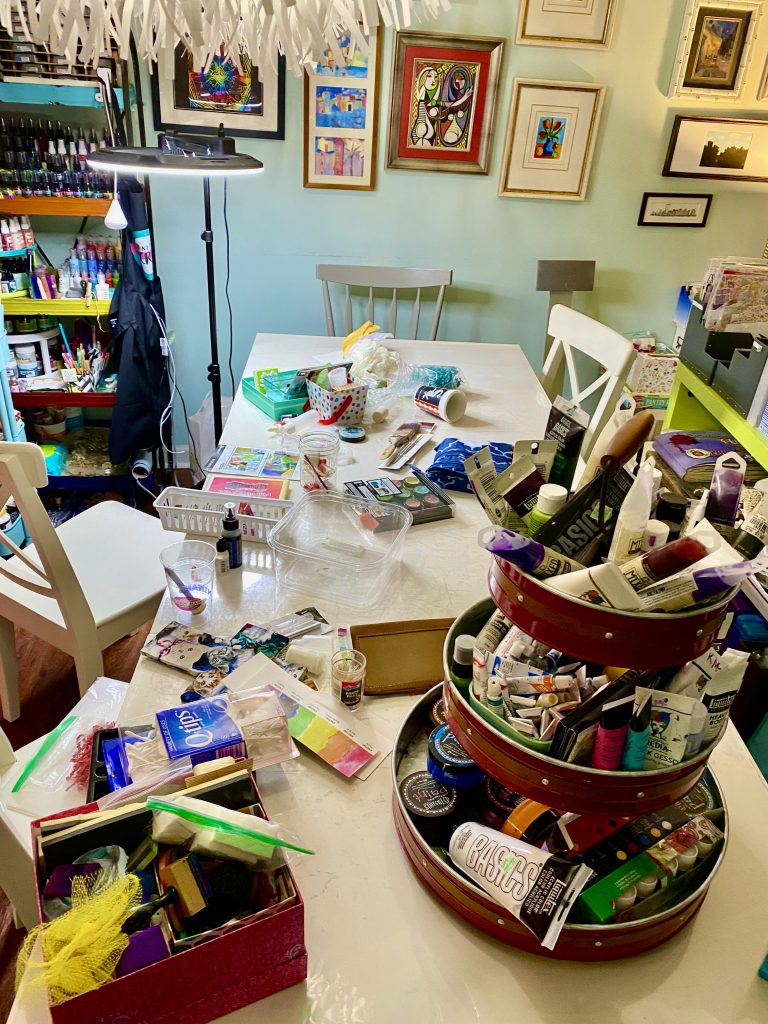
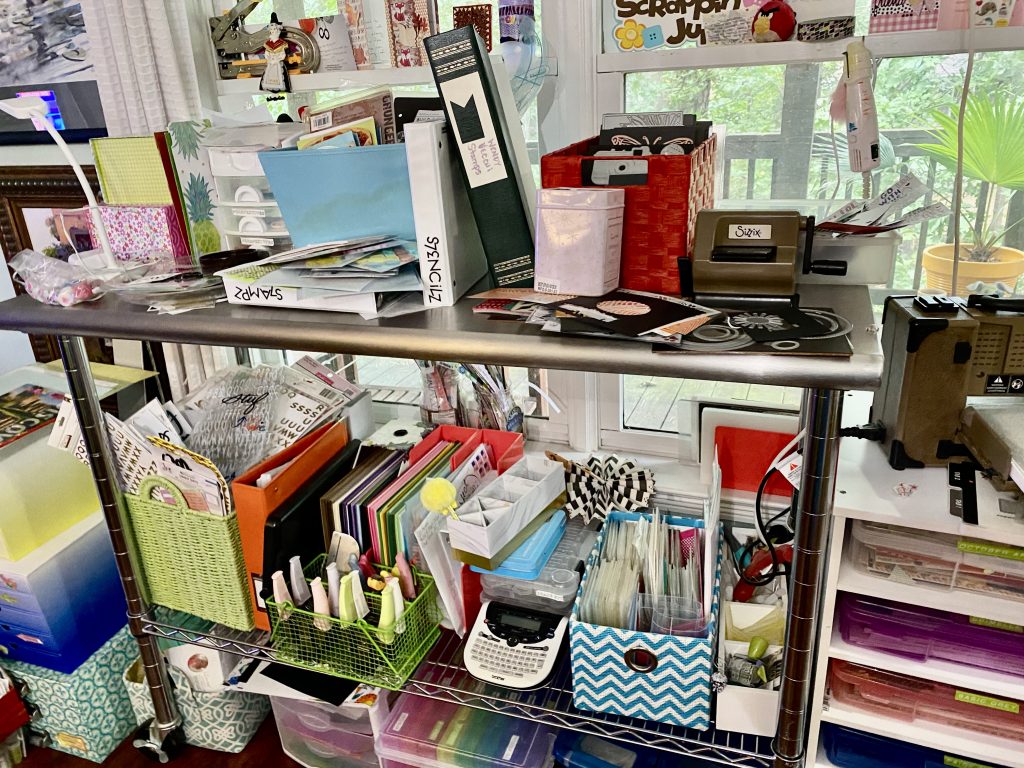
So it had to get worse before it got better, right?
The above photo makes me laugh and cringe at the same time. With plastic protecting my dining table (aka my work table) I first emptied the shelf and pulled in what I wanted in it from other areas and then scrounged around for the proper storage bins and carousels and spice shelves, etc. And then I did the same with the IKEA Raskog cart that is a moveable “second tier” of mixed media supplies — rolled up to the table when I need them and tucked away when I don’t.
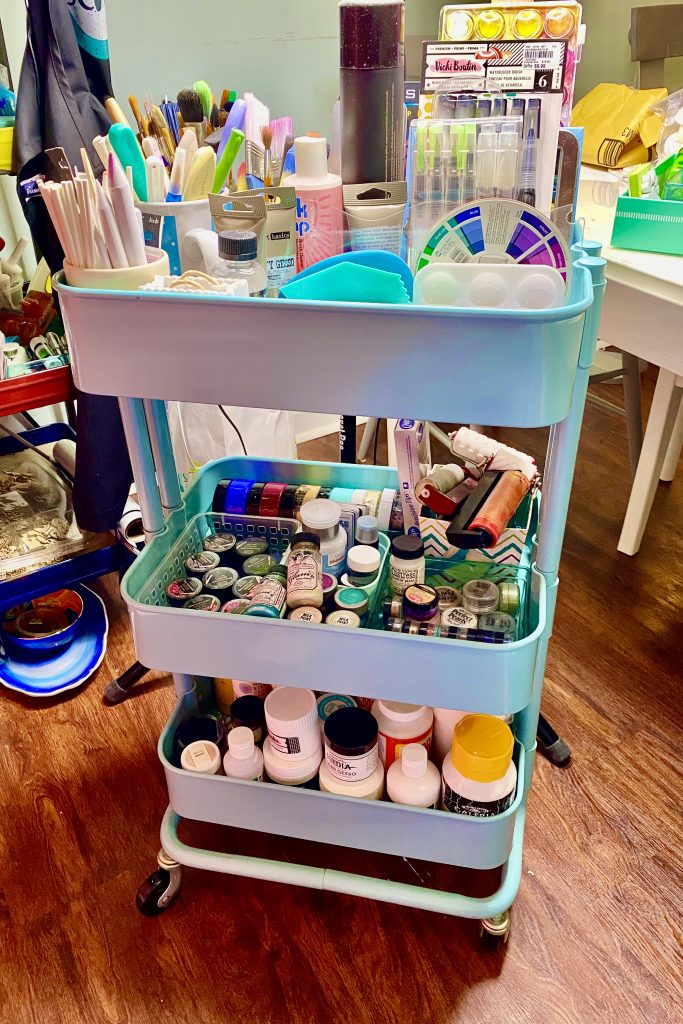
AFTER -- Dream Come True with More to Come....
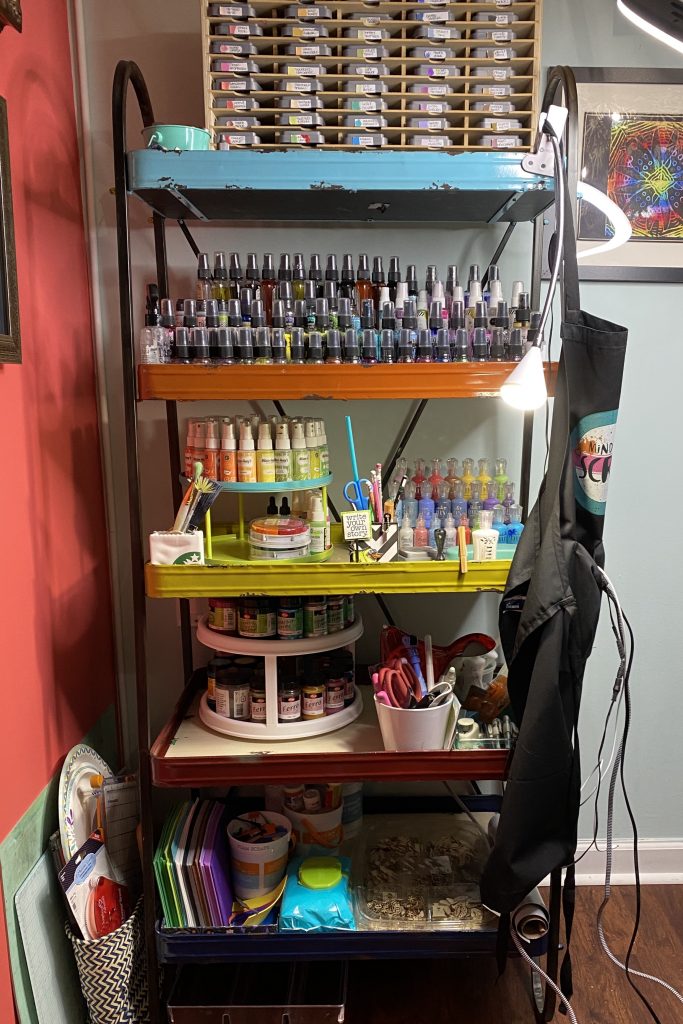
The shelf now has all my most-used mixed media in addition to essentials like my trimmer, scissors, journaling pens, tape runner, tiny attacher, liquid adhesive, baby wipes and foam sheets.
The cart now has easily accessible watercolors, art crayons, art pencils on the top tier, shimmery and dimensional coloring mediums on the second and gesso, gel mediums and other finishing products on the lower tier.
A few tweaks but all in all, definitely worth it!
I’ve made and filmed the process for 4 layouts since this work was done and it has made SUCH a difference! I used several products I hadn’t used in a while and I found the new arrangement actually saved time. I have moved my black, white and gold spray inks more to the right of the shelf so I can grab them without looking as I’m finishing off a filmed layout process. Likewise I’ve moved the foam more to the right because I use it on every layout. I plan to do some editing of supplies and as that frees up space in the cart, I’ll likely move my gelatos off the shelf and onto the cart. So now these two areas actually reflect the changes in my crafty world since I first loaded them: I’m doing lots more mixed media on layouts — it’s not just an occasional bit of play in my art journals — it’s part of nearly every page I make. And now I don’t have to hunt in 3 or 4 places for the supplies I need –– I just extend my hand and they’re there!
NEXT UP: A Dedicated Cutting Station!
Yep, it’s a horrible mess now. And yes, that IS indeed the point. It’s really awesome storage and the perfect height for actually doing work on the top but the top is full of stuff, some to do with cutting and a lot that belongs anywhere but here. Second only to the shelf and cart, this CAN and WILL be a great facilitator in my crafty pursuits. My Silhouette Cameo is on a kitchen shelf with its cords. It belongs on this table. The way my dies are stored encourages what you see here — an accumulation of used dies lying on the table instead of being put back where they belong. It would take all day to list what’s wrong here so I’ll just touch on the obvious stuff. On Tuesday September 22 I filmed and published the “before” video that’ll dive into a bit more detail and then I set to work on the transformation. It’s going well so far, but this one hasn’t been easy! Here’s a link to my “before” video showing my starting point(s) and talking about my hopes and dreams! https://youtu.be/4o2tjUtoFFE
It's ALL about the closet....
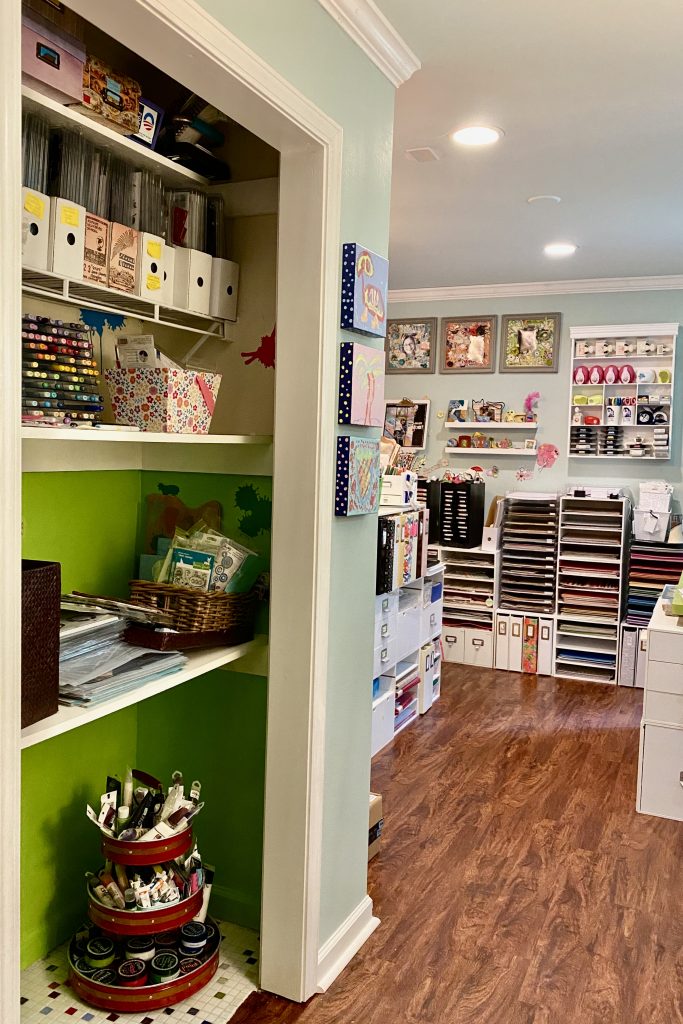
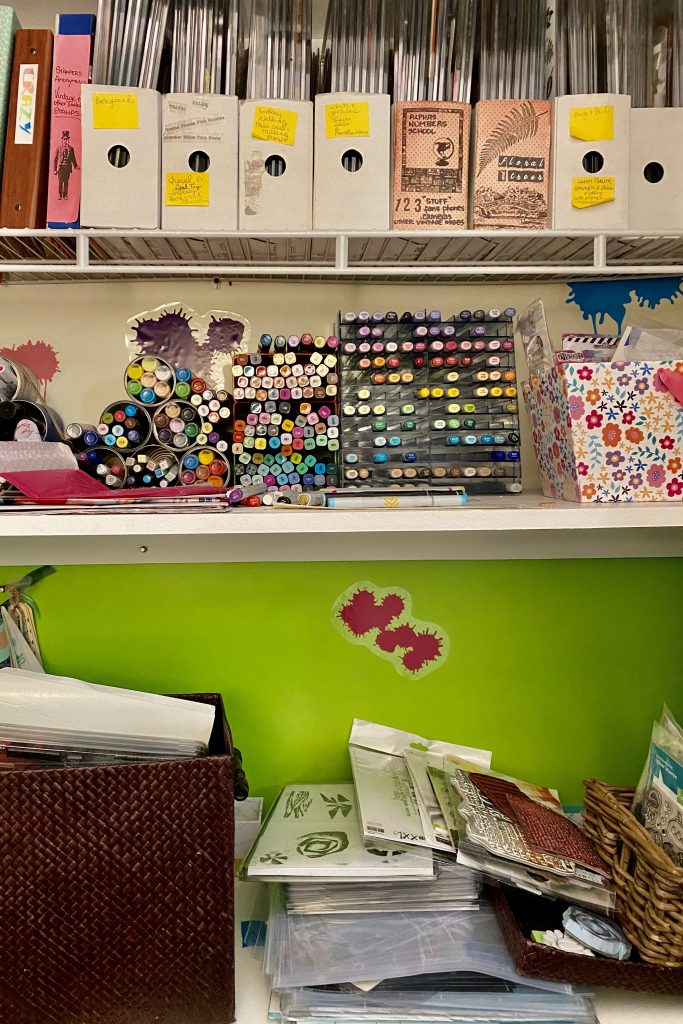
I love this closet. It used to be a coat closet. I removed the door, added shelves and tiled the floor where there once was carpet before I’d laid the vinyl flooring in the rest of the space. This closet has been re-organized more times than I can count in the 3 years since. That really messy bottom shelf holds “stuff” that was on the floor and it’ll be moved to a temporary holding area so that it can ultimately hold lots of what is now in my future cutting station — possibly becoming a “card-making” supply shelf. The stamp storage area above it will get some attention down the road, as will the top shelf that now holds photo boxes that I’ve finished scanning and scrapping. I don’t have a clear vision of where I’m headed here but I want it to be both functional and attractive since it’s one of the first things you see as you enter our space after descending the stairs.
Down the road a bit.......
After the cutting station, I think it will behoove me to take on “albums” and all that THAT implies…. It’s not just that I need to file the 100+ layouts that I have put into page protectors and sorted into target albums. It’s also that I need to make labels to replace the sticky notes on so many albums now, and I need to decide on how and where to store the albums. I love the array of colors and patterns and I think my album storage is attractive, although I realize it’d probably drive others crazy. I’m not up for rearranging or moving heavy furniture, but I may rearrange a few storage cubes to consolidate album storage in some way. I may do this project in two phases and I’ll detail that in my “before” video. After that will be the broad category of “embellishments”. This will include stamps and stencils as well as stickers and ephemera. This may take two weeks to do and it may take some time to design my “system” for addressing this. It will somewhat tie in to the “paper” area insofar as some of my current storage is by designer. And there’s that tub of alphas I’ve used but haven’t put away, the miscellaneous sticker sheets and chipboard, kits, both homemade and subscriptions…Lots to rethink.
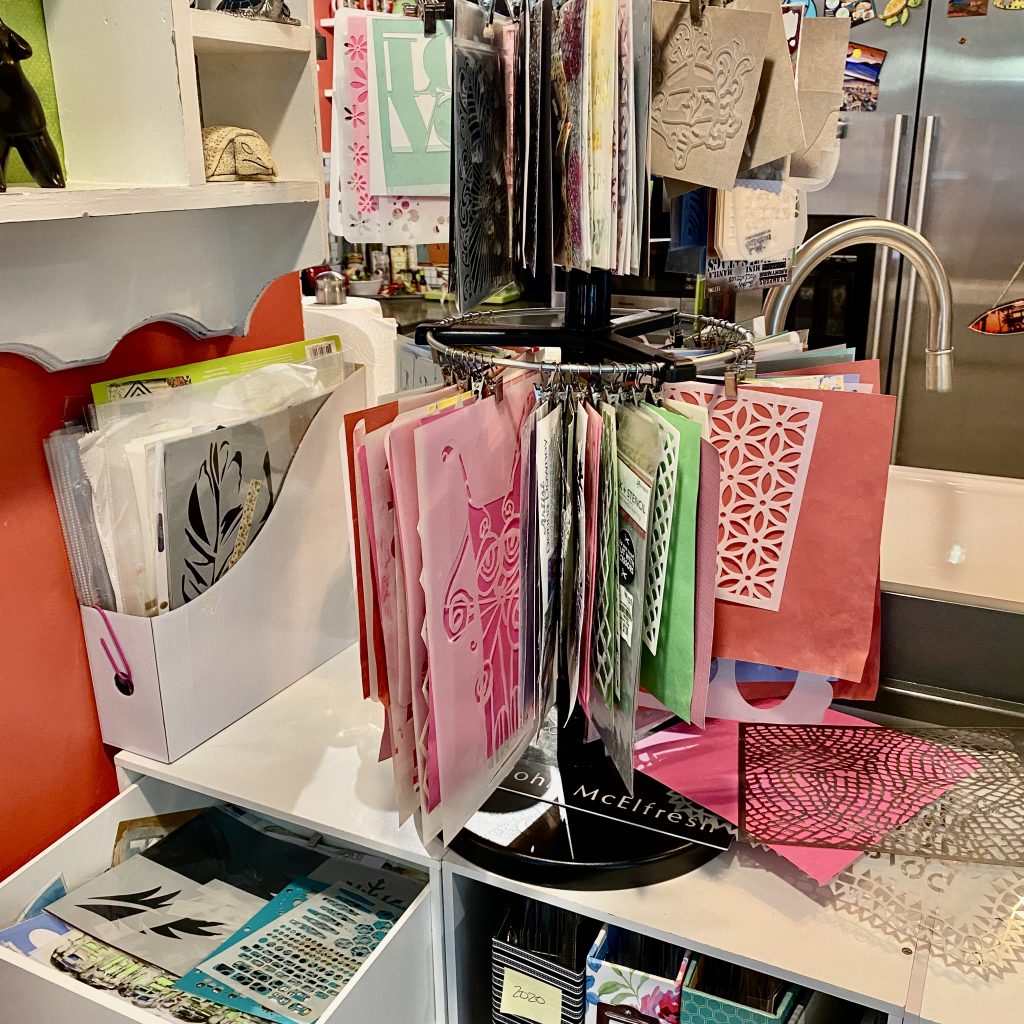
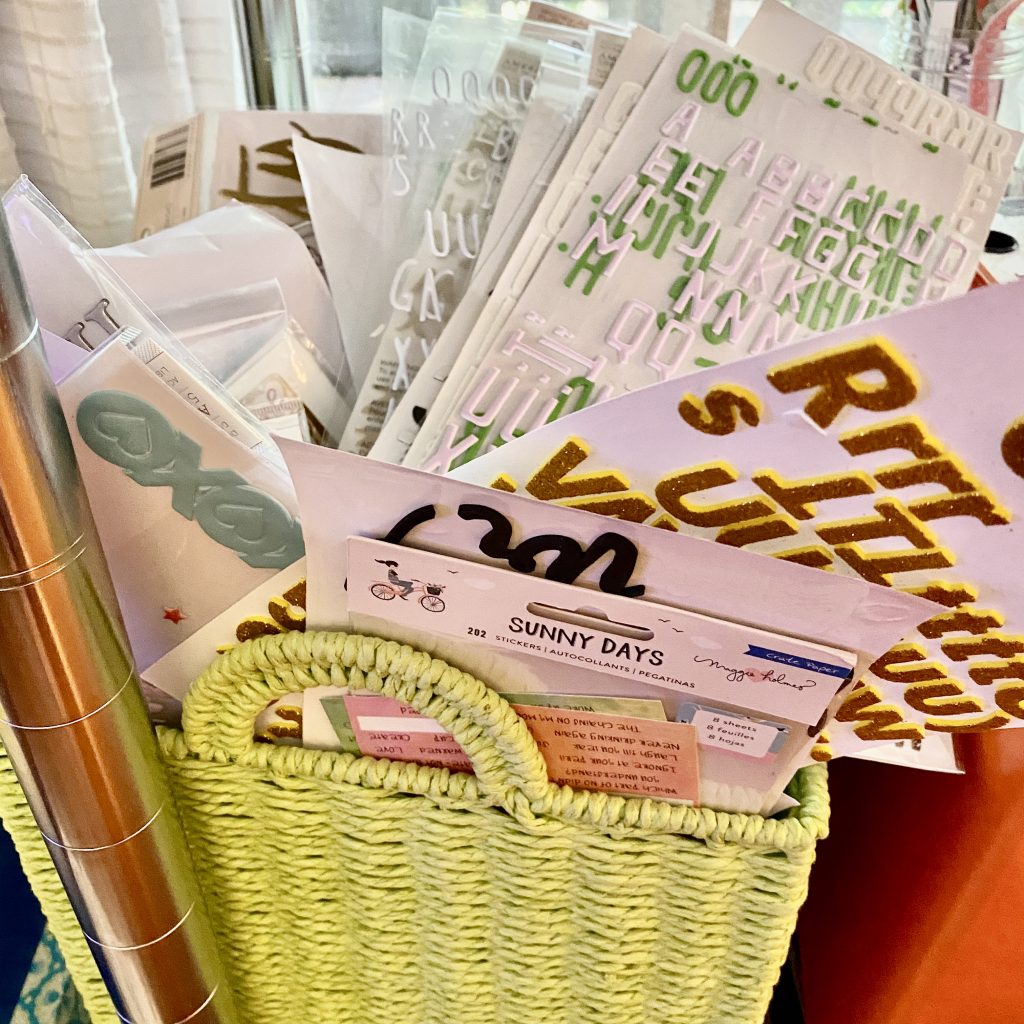
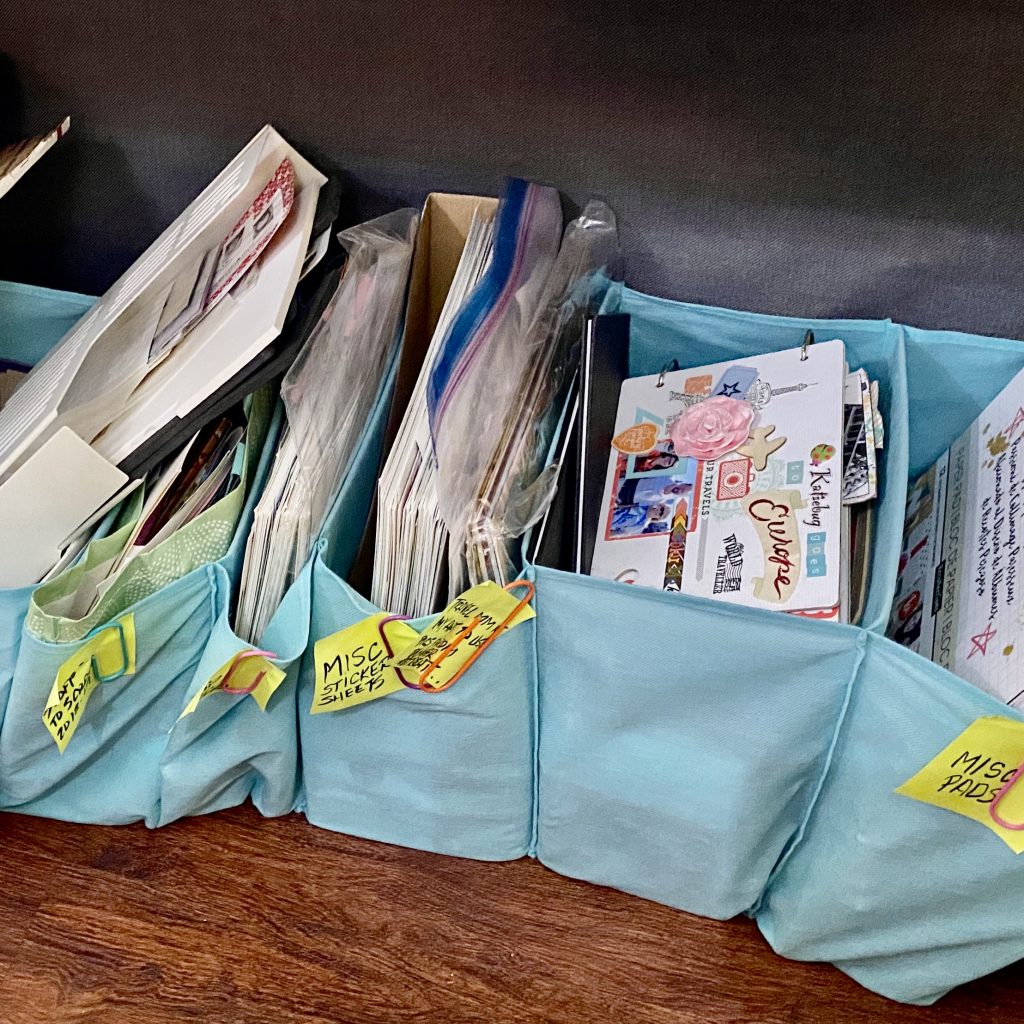
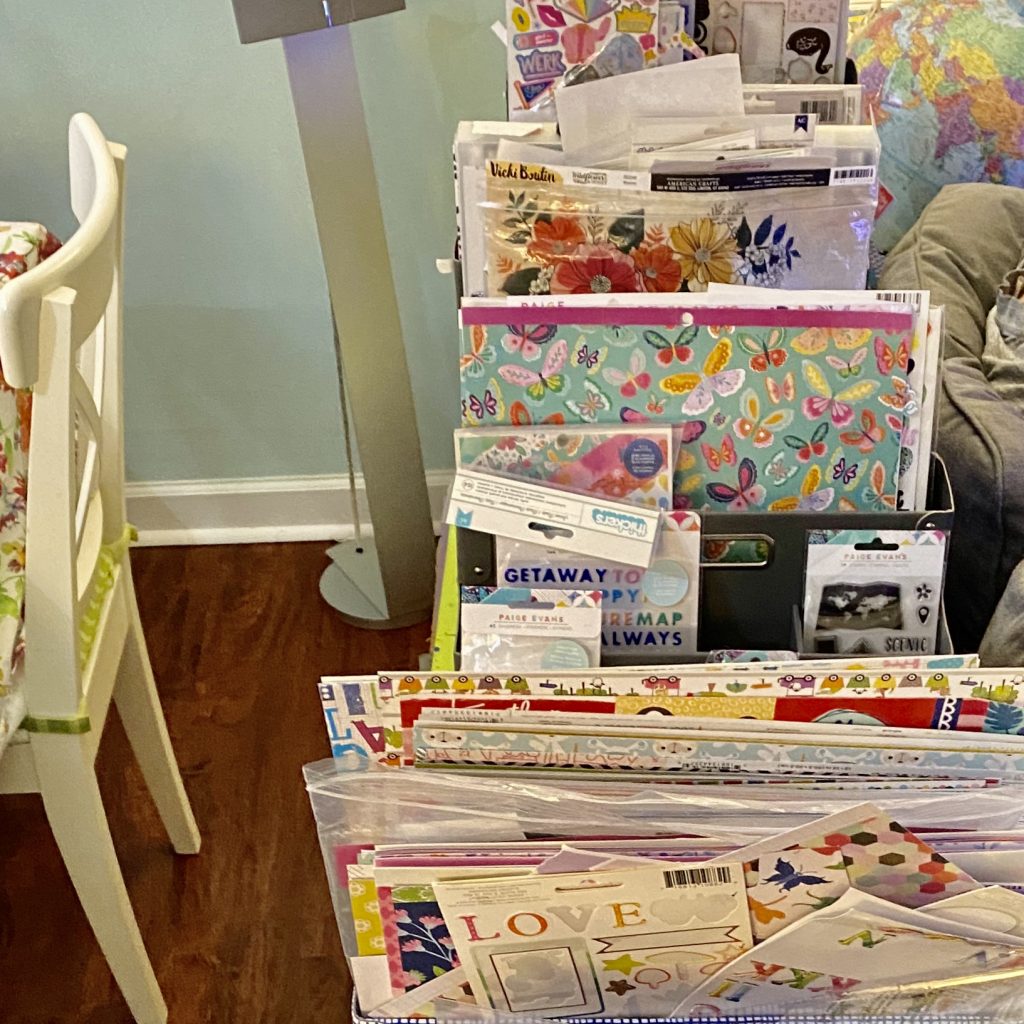
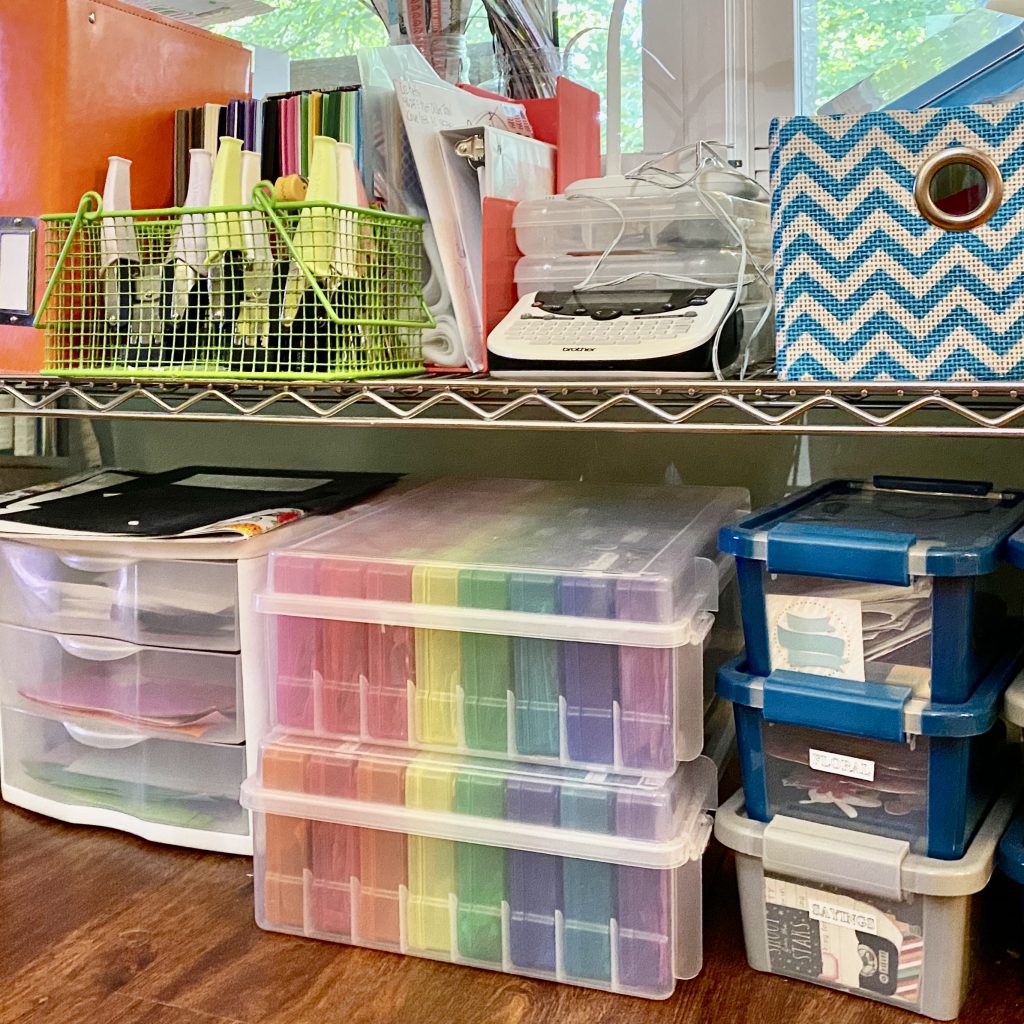
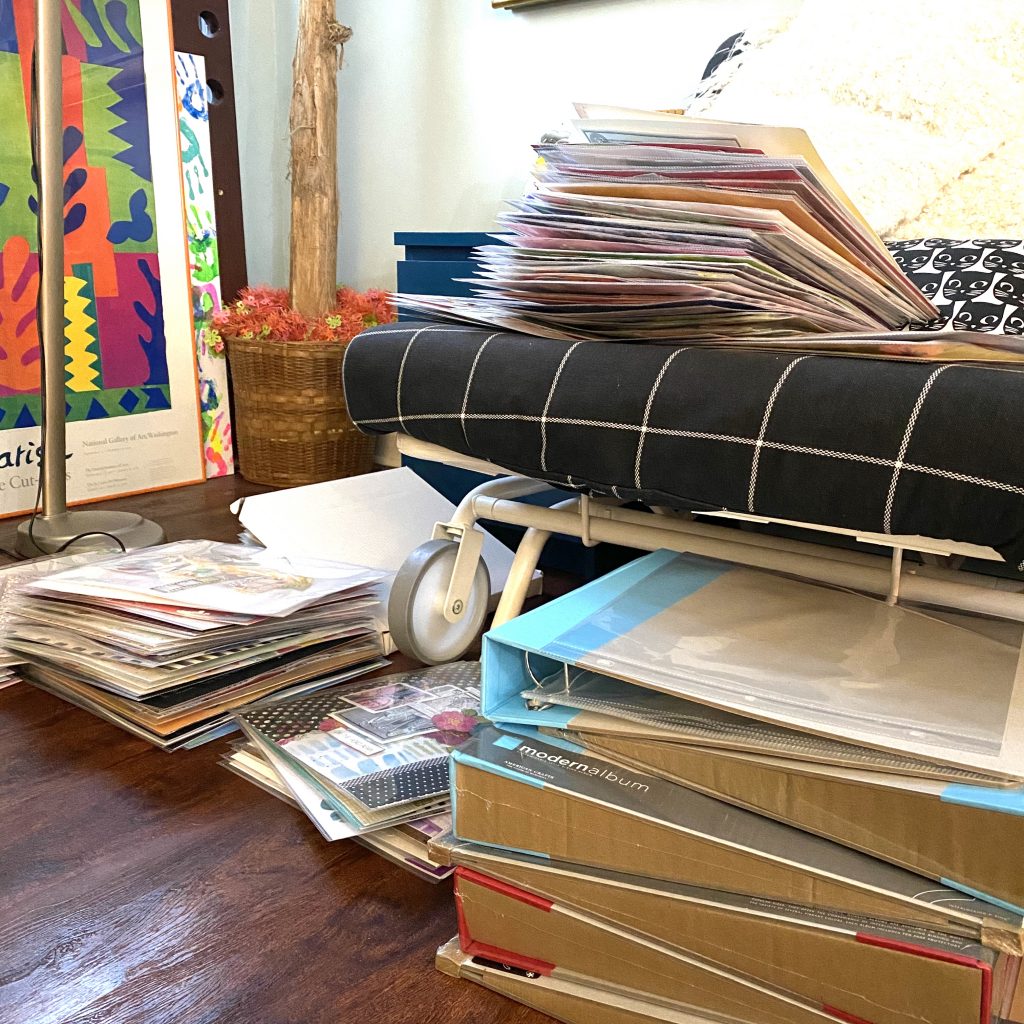
My world today: 1) I have a nice hanger for smaller stencils but recently-used ones are stuffed in a drawer and 12×12 ones are in a holder with old gel press prints! 2) This basket was meant to hold 6X12 sticker sheets with titles but has a mess of recently-used alphas that I didn’t return to my pegboard. 3) Hidden under a sofa console this cloth holder contains 12×12 chip and sticker sheets (mostly older), a few miscellaneous paper pads I never use because they’re hidden, all underneath the latest thing I decided to dump there. 4) Atop the console table are IKEA desk organizers containing kits or collections. They’re organized perfectly but shouldn’t be a main feature of our dining/living room decor! 5) On the floor underneath the (future) cutting station are colorful 4×6 holders and larger tool bins with embellishments sorted by category. Good idea that needs to be expanded and cleaned up a bit. 6) Area 3: ALBUMS. No place to sit and possible slip-and-fall hazard here!
I promised “warts and all” when I decided to film my first “before” video, but I didn’t realize quite how messy things had gotten. Chaos to you but it makes my heart sing to anticipate getting it into shape! I can’t wait to finish the cutting station and use it! Then I look forward to tackling all that mess pictured above!
Follow my progress on YouTube!
I’ll be posting “before” videos on Tuesdays and “after” videos on Saturday until I’m (reasonably) happy with the state of things, and THEN I’ll do a complete Craft Room Tour, the request for which is one of the reasons I felt I needed to do these organization projects. Here’s my YouTube channel link and I look forward to your comments and questions in this area. It’s my passion and my current obsession. And it makes me so happy to touch and rearrange and set up my craft supplies for more fun playing!