
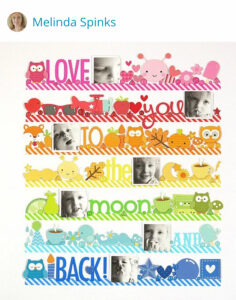
I interpreted “on the shelf” design as having a main horizontal baseline on which photos and embellishments are placed and highlighted, just like on a real life shelf. The baseline shelf could be something horizontal, including a drawn line, a piece of Washi tape or a cut strip of paper, to name a few obvious ones. While doing research for June’s theme, I found one layout via Pinterest that caught my eye. The layout, by Melinda Spinks and posted on Scrapbook.com was intended to promote the Doodlebug enamel dots. This example has not one shelf, but seven, representing colors of the rainbow.
Why a Rainbow Layout?
It really stood out to me as something that I wanted to scrap lift this month, not only because the rainbow color sequence is so visually appealing, but especially because June is Pride Month. Our son is a passionate member and ally of equity, diversity and inclusion. It is the perfect time to create a layout in support of his distinctive identity and fervent personality.
Selecting Six Washi in Six Different Colors
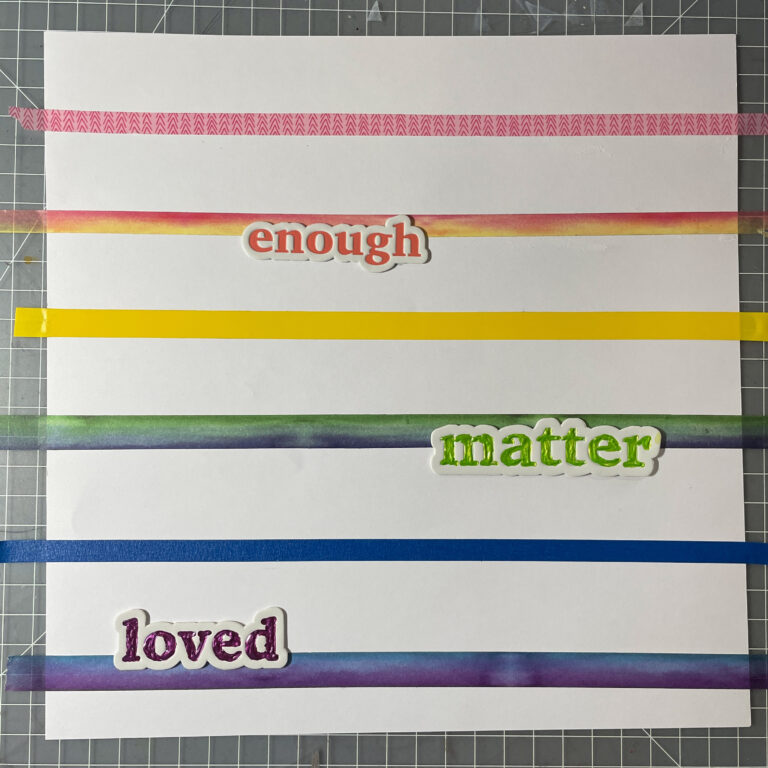
First, I searched through my small Washi tape collection to find one for each of the six colors that I chose: red, orange, yellow, green, blue and purple. These are different than the above example. (Tip: when I didn’t find a perfectly orange Washi (that wasn’t Halloween themed), I used an orange colored pencil on a red/yellow Washi tape to boost the orange tone.) To let go of perfectionism, I put the strips down on the white 12×12” paper, just using my eyes to guess distance apart and not worrying it they were perfectly straight.
Collecting, Editing, Resizing, and Printing Six Photos
Then, I did need to pull out a ruler to check the distance between the Washi strips. I wanted to know exactly what size to print the square photos. I determined that 1.25” was perfect. In the Photos app, I searched for photos from the past year and saved them into a new album. Right in the app, I also converted my favorite six into black and white to stand out from all the color on the page. For some of them, I had to increase exposure or contrast. As I have mentioned in other posts, my go to app for photo resizing is “Print to Size”. I was able to fit and print all six small photos on one 4×6” sized photo paper.
Finding Embellishments in the Six Colors
Embellishments from all my collections were pulled out and reviewed in order to find fun ones for his personality in red, orange, yellow, green, blue and purple. I used Ali Edwards’ word strips from the “You” story kit, die cuts from the American Crafts Dreamer Ephemera pack, Echo Park’s Teen Spirit sticker sheet, BoBunny enamel dots, and stickers from The Happy Planner Squad Goals, Watercolor Goals and Stronger Together sheets. Then, I also pulled out various hearts, stars and musical notes wherever I could find them in my stash.
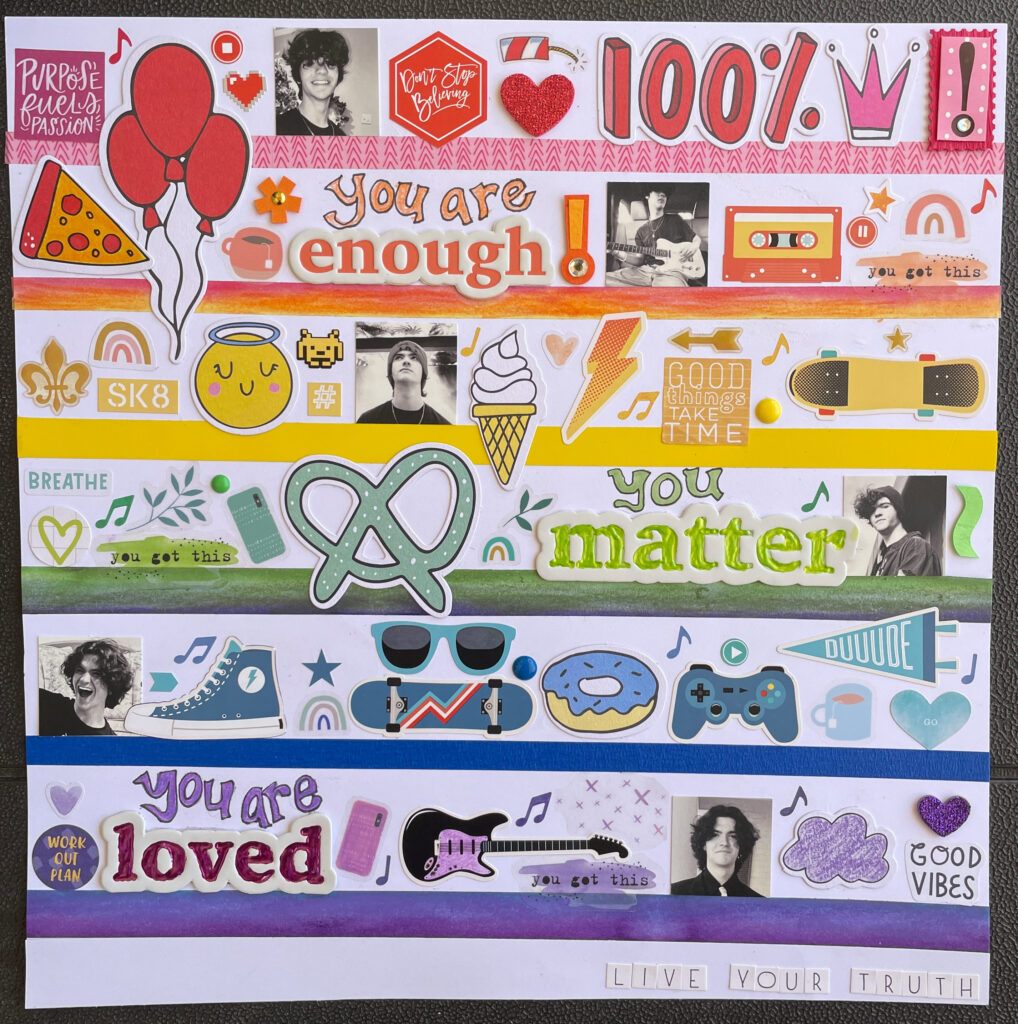
Adding More Color Where Needed
I tried my best not to get caught up in taking a long time to “plan” the page or second guess myself. I just placed the elements on the page and filled up each shelf with its color. As with the Washi tape, when I couldn’t find many purple elements, I chose to color some in with a purple colored pencil (i.e. the cloud, the guitar and the cell phone). Also, the Ali Edwards’ “matter” and “loved” foam word strips needed bolder colors. Since colored pencil would not work boldly on the foam, I painted them in with Ranger Liquid Pearls in Key Lime and Hydrangea. As you can see, the lines are not perfect and I’m okay with that.
Side Notes
ScrapHappy Members have access to rainbow inspiration from LOAD mini 720. Letting go of perfectionism is part of the focus of my OLW of 2023: release. I’m thrilled with how this colorful Pride Month “shelf” page turned out and very excited to continue using up (releasing!) more stash.
Check back each week during the month of June for more unique “on the shelf” designs from the rest of the ScrapHappy Creative Team!