
Have you ever added hidden elements tucked beneath layers of your scrapbook pages? It is something I rarely take the time to do. I admit, it is usually a prompt during LOAD that inspires me to make the extra effort to plan a layout with hidden content beneath the outer layer. Journaling details, photos, surprises, anecdotes, or embellishments are a list of some items that could be tucked under layers on a page. This month, our ScrapHappy Team will bring you creative ideas on this topic.
Remembering a favorite layout from the Friends’ LOAD222
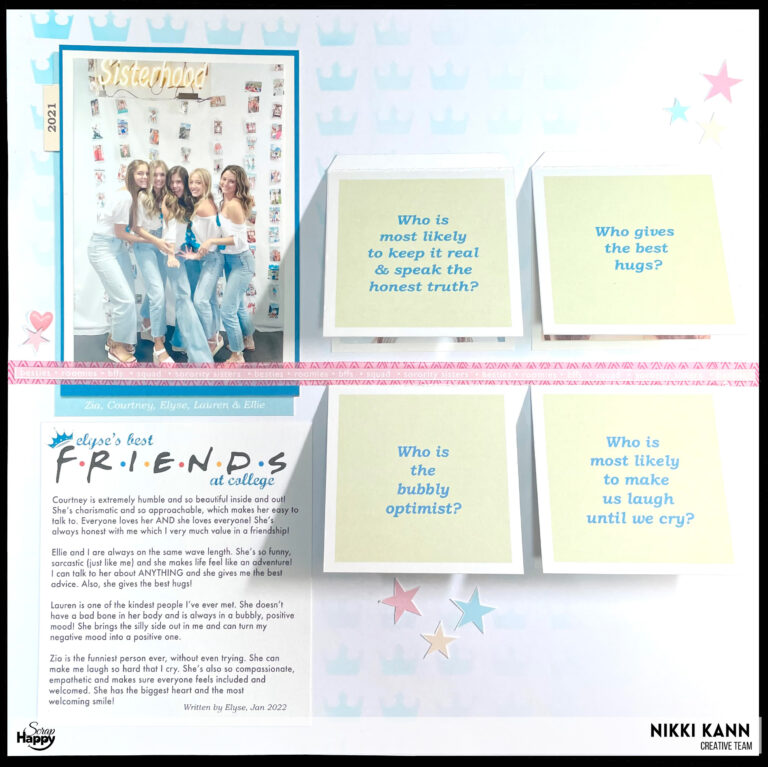
One of my own favorite layouts using hidden elements was created during LOAD 222: I’ll Be There for You. The theme of Day 26 was “The Best Friend Trivia Game”. Although, I did love using the story prompt to document my daughter’s college besties (Scrap something special about your friend), it was the technique prompt (You could use flaps to hide some surprises, like the game show board, or create your journaling with a game show board effect) that is especially worth discussing here.
Flaps reveal answers to quiz questions
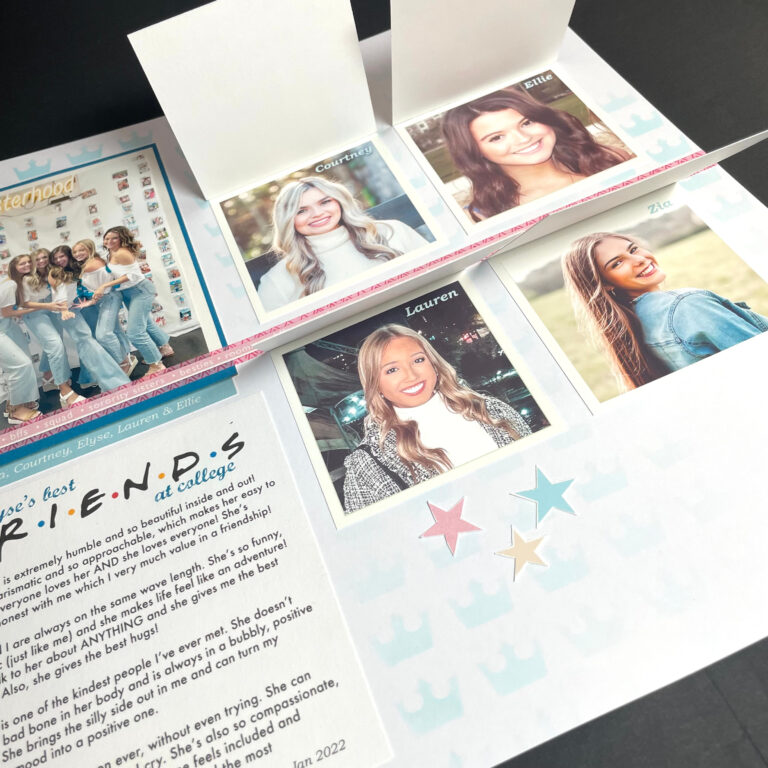
To incorporate the technique prompt, I simply adhered four square paper flaps (previously printed with relevant questions). In many examples of hidden elements that I’ve seen, the journaling is tucked under the flap and the photo is on top. Here, I switched it up by printing the four relevant quiz questions on the outside top of the flap and placing the photos with names underneath for the revealing answer to each question.
Going back to miniLOAD 723 for a creative jump start
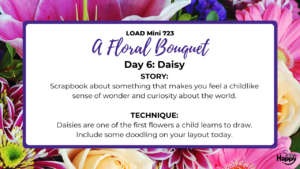
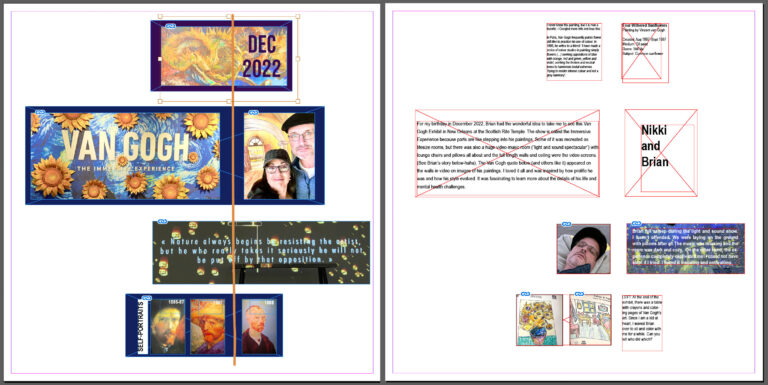
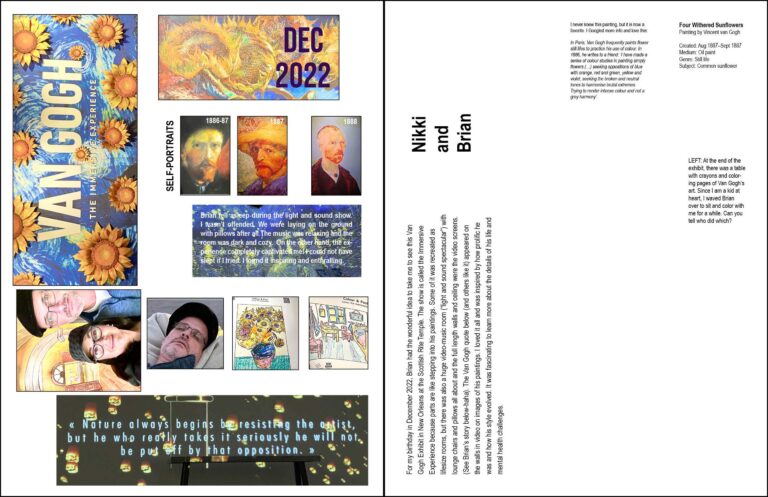
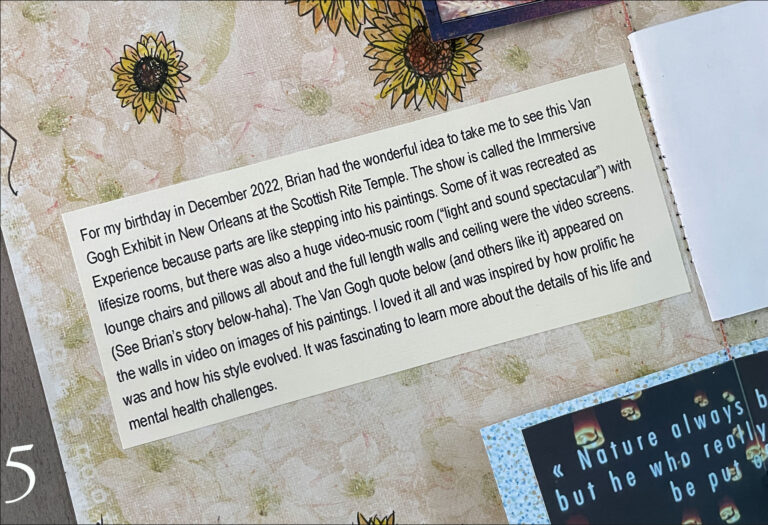
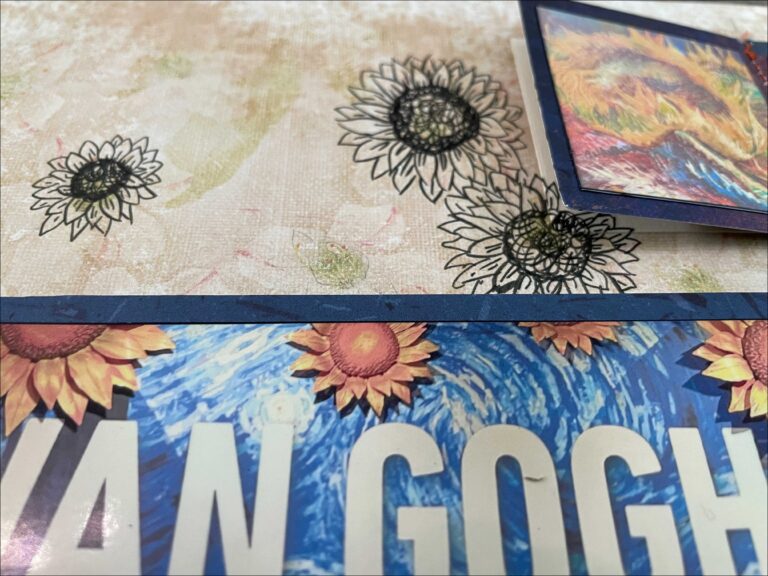
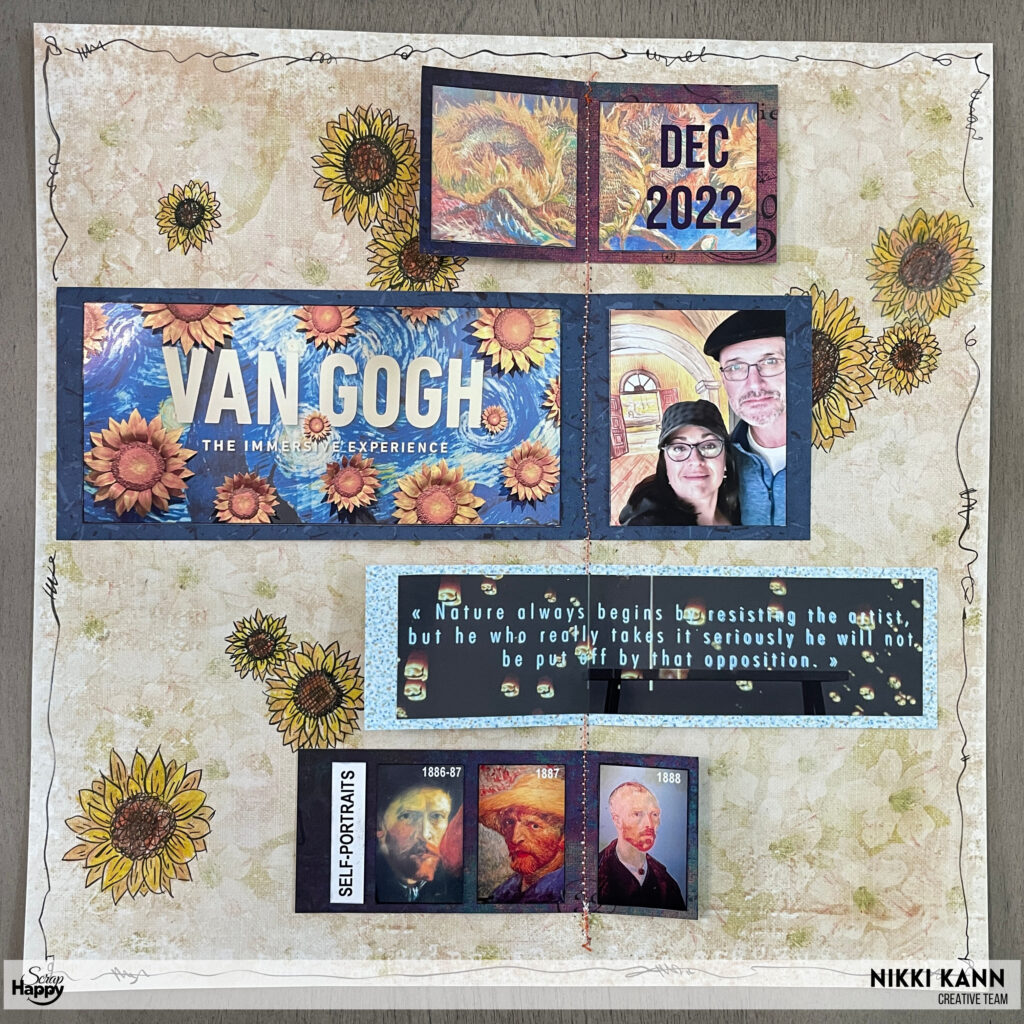
The memory of that page reminded me that I couldn’t participate in LOADmini 723 in real time, so I decided to use day six as a direction for this months blog post. If you were to ask me what gives me that sense of curiosity and childlike wonder, it would definitely be art. Our visit to the Van Gogh Experience in New Orleans was the perfect story to tell for this and I decided to draw sunflowers on the page for the doodle technique prompt.
Drawing a sketch and sewing a stitch
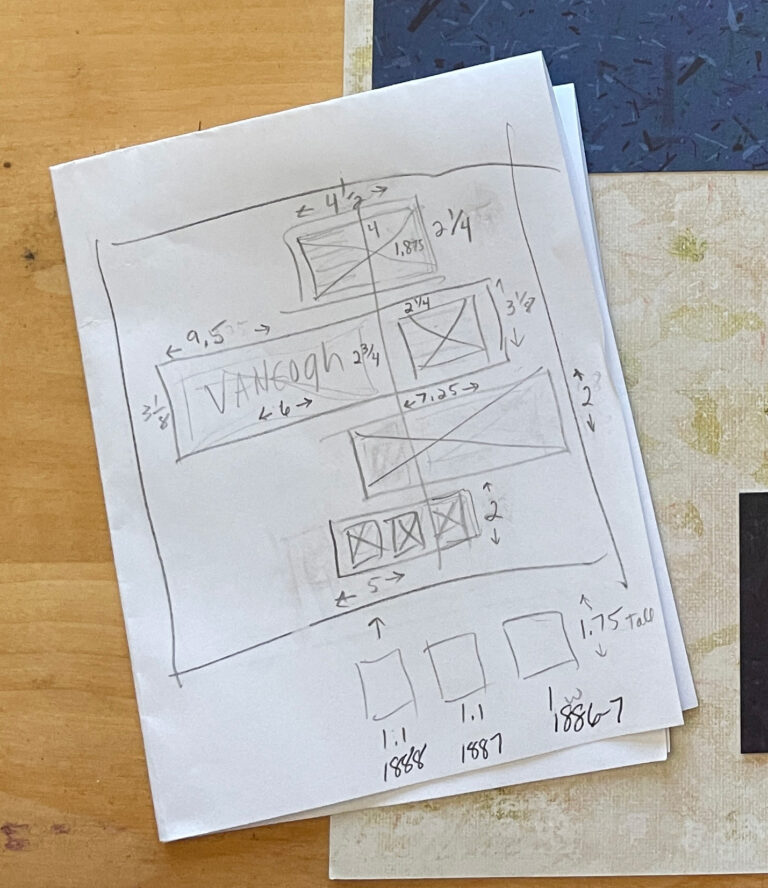
The idea to use my sewing machine to create flaps for the hidden elements, sounded fun since I haven’t sewn on a page in a long time. So, then this concept of sewing one long vertical stitch down the page, which connected 4 strips of paper formed in my mind. I drew out a sketch at first, varying the lengths of the papers and staggering them side to side.
Planning the layout digitally
My brain feels more organized by planning the page out digitally, even if my final layout is built with real paper, adhesive and layers. So, I built a template in Adobe InDesign based on my sketch. I planned out what I wanted to appear on the top layer and also what stories and photos to use underneath. This way, I knew exactly what size I needed to cut down my vertical strips. It was also helpful for knowing what size to cut the photos and within what dimensions to keep my journaling.
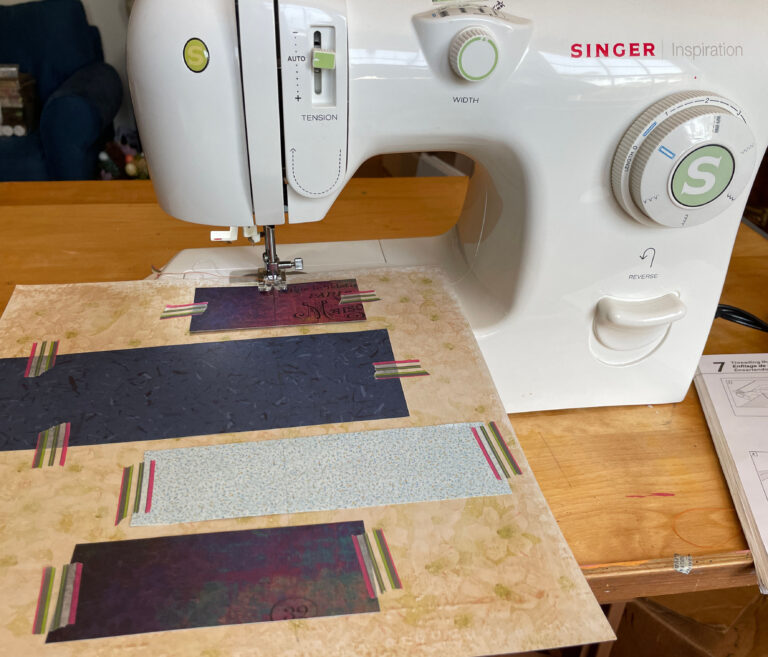
Washi tape is helpful to hold papers for sewing
After handwriting all the measurements from the digital layout directly onto my hand drawn sketch, the Tim Hiltz Ideaology papers and other blue patterned papers were cut to size. Then I taped them down with washi tape so they wouldn’t move during the stitching. With pencil and ruler, I placed marks where I wanted the stitch to start (at the top) and stop (at the bottom). I added orange thread to my sewing machine as the top main stitching. Since the machine already had white loaded on the bobbin, I was lazy and just used that. Once the sewing was complete, I removed the washi.
Going hybrid is the best of both worlds
This hybrid layout has multiple steps, going back and forth from digital file to the physical paper layout. Once the paper strips were sewn in place, I went back into InDesign and copied all the sized to fit photos into a new 8.5×11” document so that I could print them all out from my personal printer on one sheet of 8.5×11” glossy photo paper, then cut them out individually. I also copied all the journaling boxes into another 8.5×11” document to print on ivory paper so that it more closely matched the ivory floral background I selected. All of my personal journaling on this layout ended up being hidden.
The hidden stories:
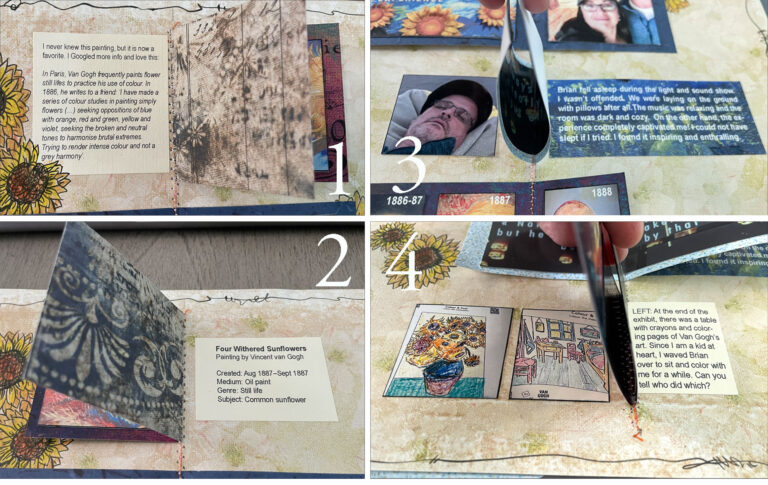
- Cool quote by Van Gogh about his Four Withered Sunflowers painting
- Details about the Van Gogh painting, Four Withered Sunflowers
- The amusing anecdote of Brian falling asleep while I was captivated. This probably would not have made it on a regular scrapbook page.
- Our silly and fun coloring book pages. Another cute anecdote that may not have gotten recorded.
- Personal journaling about the overall event
Drawing and coloring sunflowers
Part of my continued commitment to my One Little Word of RELEASE for 2023, is releasing perfectionism in my art. So, I grabbed a pencil and quickly drew circles where I wanted to add sunflower drawings (trying very hard not to obsess if the placements looked off and not to criticize my choices). You may notice that I did stick with clusters of 3; some design habits die hard. Then I picked up a black pen and casually drew nine sunflowers directly on the scrapbook paper, without drawing them first. I colored in the drawings with colored pencils and lastly, added a spontaneous doodle frame in black pen on the outer edge to bring it all together.
Final thoughts
I was really pleased with how this hybrid, hidden element layout turned out. From the LOADmini 723 story inspiration, to sewing the stitch for the flaps, to pre-planning the hidden layers digitally, to the final step of drawing directly on the layout, this month’s theme kept me engaged and challenged each step of the way. Hope there is something here that jump starts your creativity in a new way.
Come back to the blog each week this month to find fresh inspiration for hidden layers from our wonderful Scrap Happy Creative Team.