
Can ordinary packages from the grocery store inspire scrapbook layouts? You bet! That is our topic for the month of April here on the ScrapHappy blog! If you missed Nikki’s use of a cereal box to guide her creativity, go check that out. Then come on back to see how I used pasta!
The Inspiration
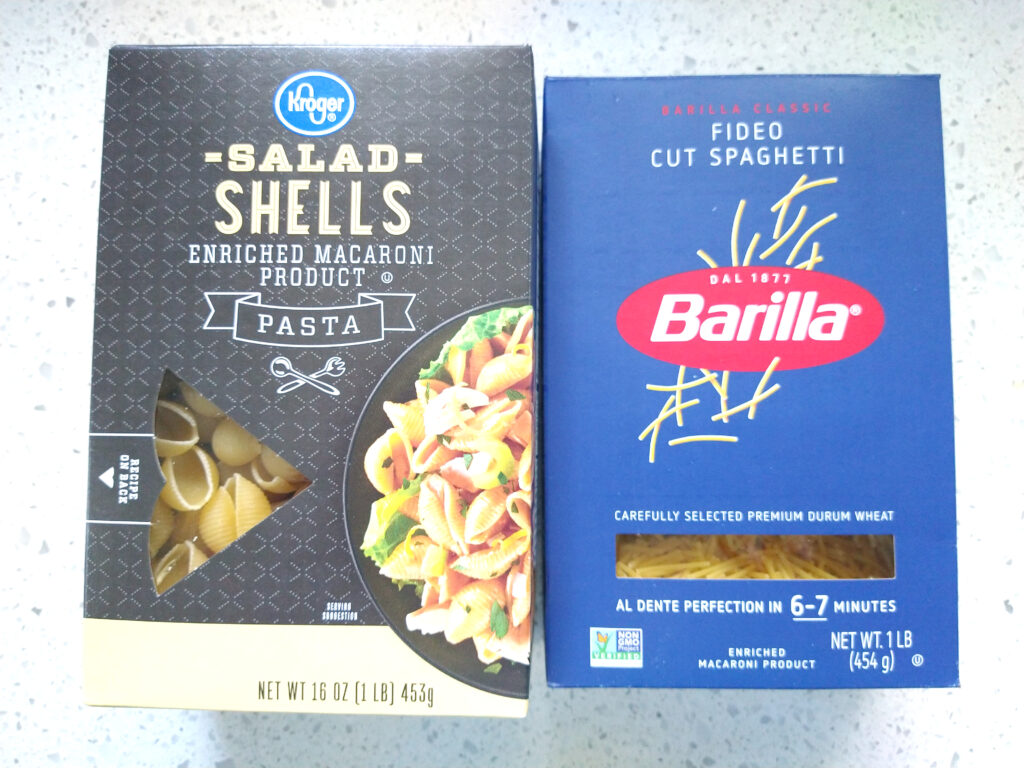
I simply opened up cupboards in my kitchen and began shopping for ideas. When I landed on the boxes of pasta, I was hooked. I just loved how the pasta peeked through the windows. Plus picking up the box and shaking it satisfies my inner child. I knew I wanted to create a shaker card, um, layout.
Let’s Get Shaking
As I worked on this project I started thinking about all things shaker. I knew I was going to use a non-stander “shaker” technique. That lead me to thinking about my sticking points when I first started making shakers. I just want to share them in case you have some of the same hurdles.
- Shakers are just for cards.
- Shakers are round
- Shakers can only be filled with sequins.
- Shakers have to shake.
I admit that last point is very counterintuitive since shake is literally right in the word! Let me explain.
When I first heard the idea of putting shakers on a layout, I was not convinced. It was very awkward to actually shake a layout. Shaking the entire album was ridiculous. Trying to jiggle just the layout’s page protector was ineffective. Taking the layout out of the page in order to shake it was cumbersome.
What is a crafter to do? I saw three choices.
A) Avoid it.
B) Roll—or rather, shake—with it.
C) Find another way.
I decided to find another way!

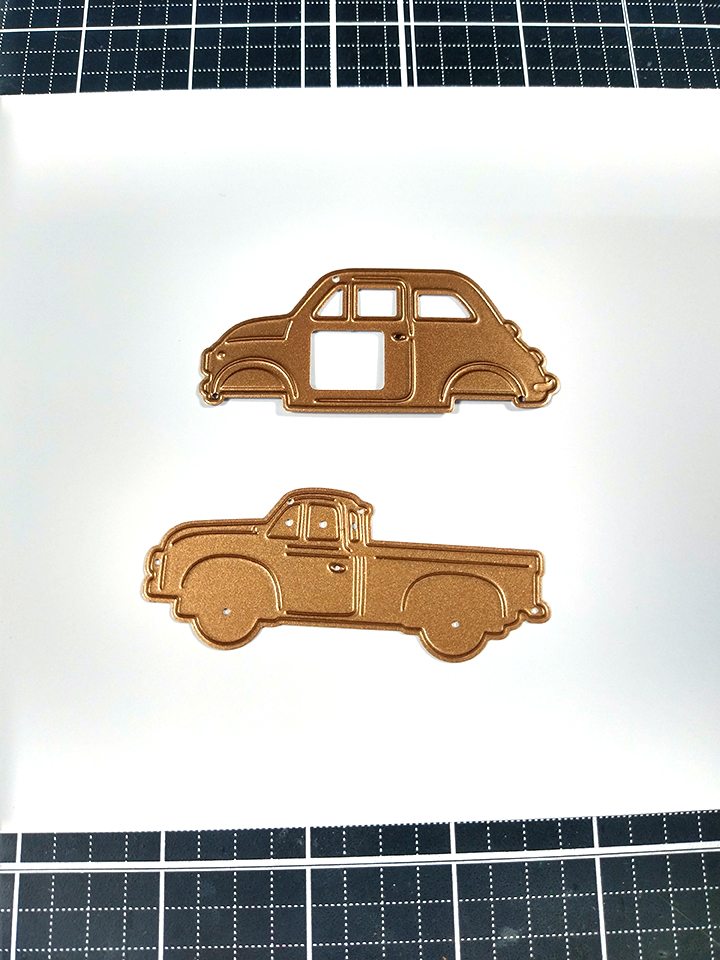
That led me to the technique of making shaker-like elements instead of actual shakers. I cut out my shapes using my die cut machine. I had to make sure my sheet of paper would fit in my machine! Typical die cutters only accept six inches wide. I had to design my shaker elements around this sizing restriction. Once cut, this became a layering element for my page.
Next, notice the shape of die I used for my openings? This leads to my misconception that shakers have to be round. In the early days of shakers cards, they were mostly round. I don’t know about you, but I never thought to make them another shape until someone shared their example of a non-round shaker.
Why did I never think of that?? Sometimes our brains just click into a path and we need a nudge to get it out of that groove. That is part of what this inspiration series is about here on the ScrapHappy blog!
These days I make shakers in any shape I can cut out of paper. For this layout I used two car-shaped dies from Spellbinders to accomplish my goal.
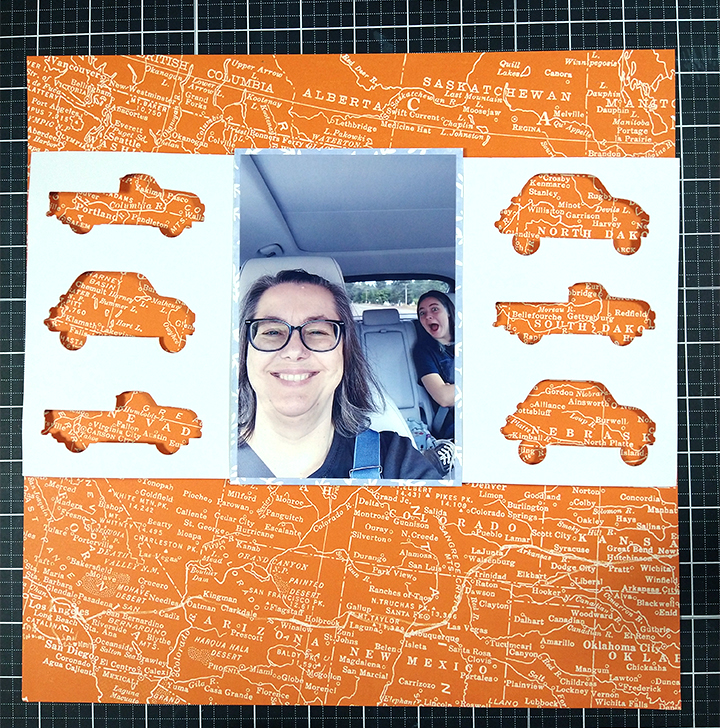
I cut multiple shapes out of a single sheet of white cardstock. I popped up that paper on my page using foam tape. This gives the depth and dimension of a shaker, but with fewer steps. By deciding to do a shaker-like style, I eliminated the need to be super precise with my foam tape and eliminated the need for the acetate window. Those two steps are only required in order to contain the sequins to allow them to shake without spilling.
Instead, I will contain my sequins with glue. I will get to that in a moment. First, I decided I wanted to tone down the orange cardstock that was showing through my shaker windows. I added a layer of thin vellum to quiet down the orange color just a bit.

I was then ready to get to the sequins—and other bits. This lead me to the next misconception I had about shakers. You don’t have to be locked into sequins. Shakers can be filled with anything that fits! If you want it to actually shake, then you have to be careful of the size of your bits. Other than that, experiment with filler materials.
I picked up a package of little curled ribbon snippets (third photo, top) from a local craft store. I had no idea what I would do with them, but they were so different and interesting I had to have them. They are just perfect for shakers!
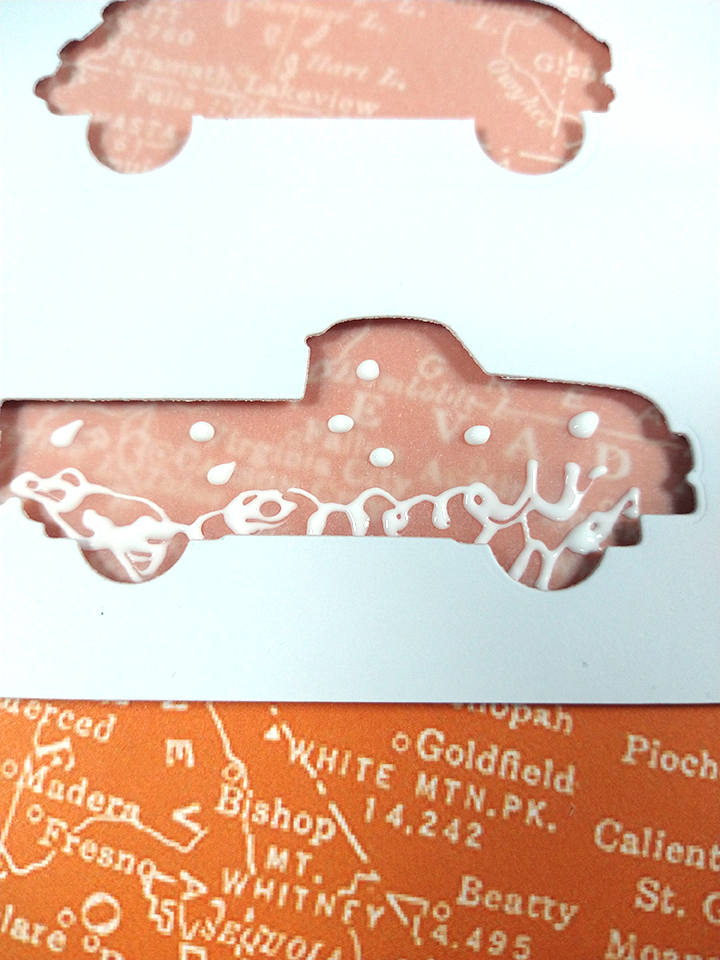
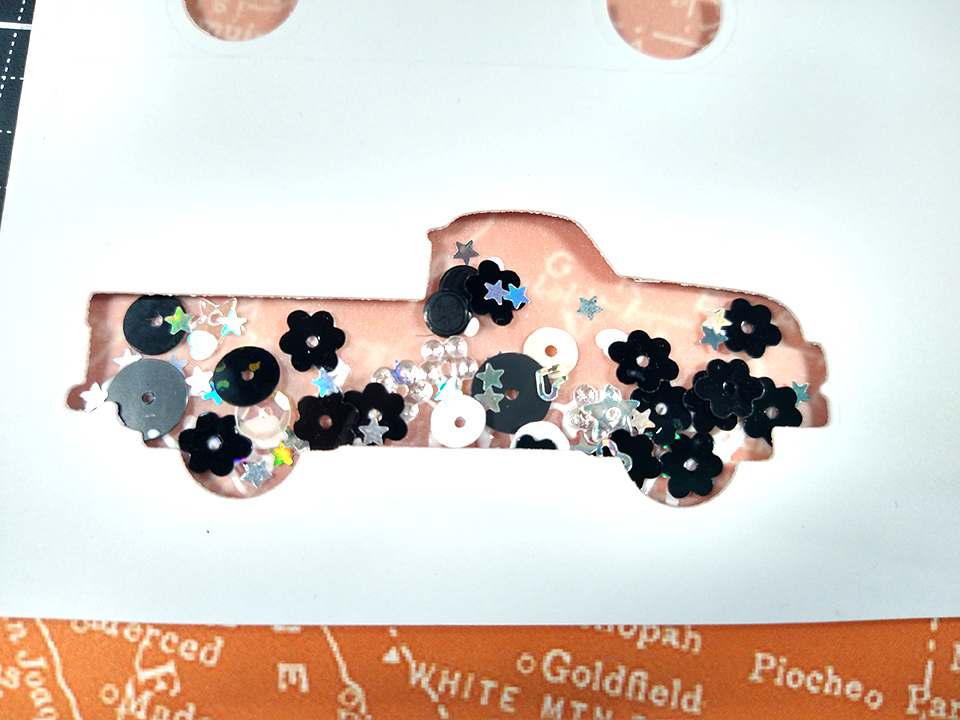
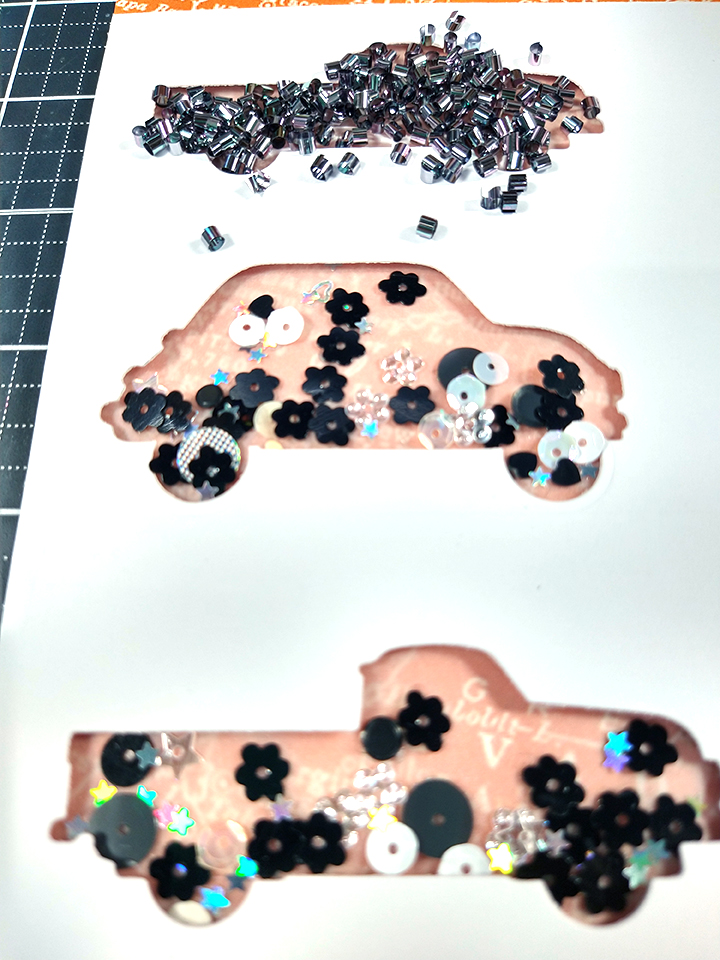
I simply squiggled some glue through the shaker opening and then sprinkled on my goodies. I did attempt to create a flow from top to bottom as if the pieces were falling. That gives the illusion of a shaker. After the glue thoroughly dried I tapped off any excess, purposefully glued on specific bits if needed, and then called it good.
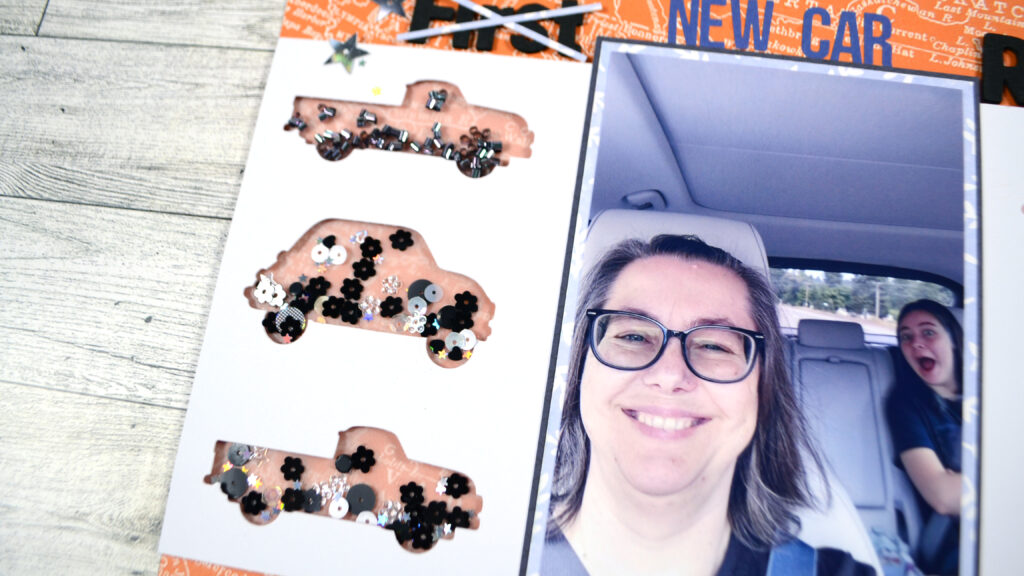
Since the shaker elements were the star of the embellishment show, I finished off my layout with just a few extra bits. I added my title and journaling and that finalized it. Except… You may have noticed my odd title. That leads to a complete aside from the main point of this layout!
I made a mistake when I was sorting my photos and thought these photos went with another story. As I was working on the layout something kept nagging me that didn’t feel right. When I investigated, sure enough I had mixed up my photos! Ah well. I changed up my title, changed up my journaling and just worked with it.

Anyway, that wraps up my project. I went from two boxes of pasta to a layout that captures a moment in my life. That is what this year long project of Unexpected Inspiration is all about.
Don’t forget that this inspiration project is a collaboration with Sara Scraps. While she shares this project with her membership group, you can check out her regular YouTube channel to see what she has to offer.
Hope to see you next month for more unexpectedness!