
Have you ever started stamping on a layout only to have the stamp slip? Or perhaps you got the stamp in place and lifted it up only to reveal a partial image? Did you feel like your project was ruined? Did you give up on stamping on layouts? I’m here with a product spotlight that can bring stamping back to your projects!
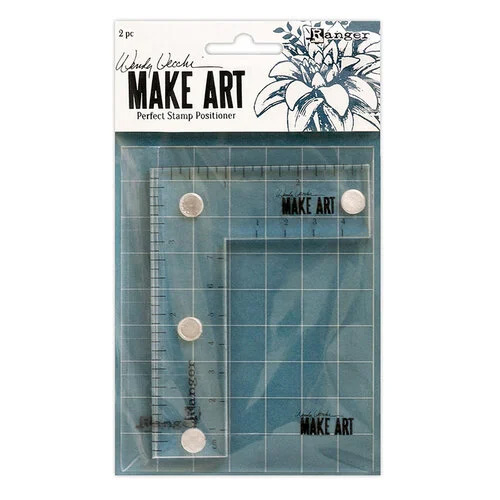
My current go-to tool for stamping on layouts is the Sizzix Stencil and Stamp tool. The tool alone is good for layouts. The add-on Stamp and Spin accessory takes this tool to the next level! I will dive into some of the things I love about this tool in a minute. First I want to talk about the history of stamp tools and other options out there.
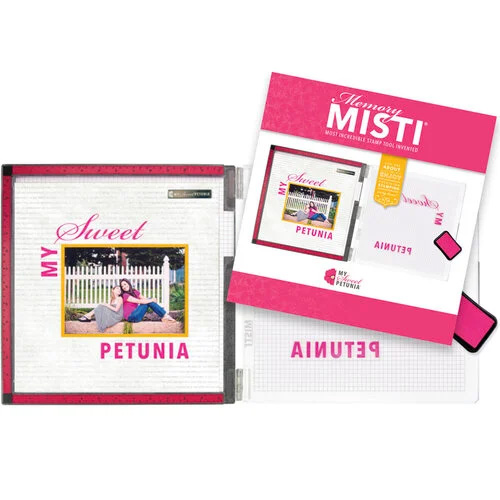
Stamping platforms have been big in the card making industry since the release of the Misti stamping platform. It was not the first ever stamping tool. However it’s features and usability changed the card making industry. There are now many, many options out there… for card makers. Where are the stamping tools for scrapbookers?
Misti does offer a 12×12 format stamping platform for scrapbookers. Don’t get me wrong, it is a good tool. However it has some limitations that made me shy away from buying it. Our own ScrapHappy teacher, Sara Scraps, uses all things Misti in her work. She even uses— and loves—the 12×12 Misti (here is one example and another).
So this post is just my opinion. Check out Sara’s use of the Misti for another crafter’s take on stamping on layouts.
Now let’s get to the heart of what I want to share today. I bought the Sizzix tool in the fall (2024) and I am loving it. Is it perfect? No. Does it offer a lot of fun options? Heck yes! Let’s start with just the basics.
Feature: Size
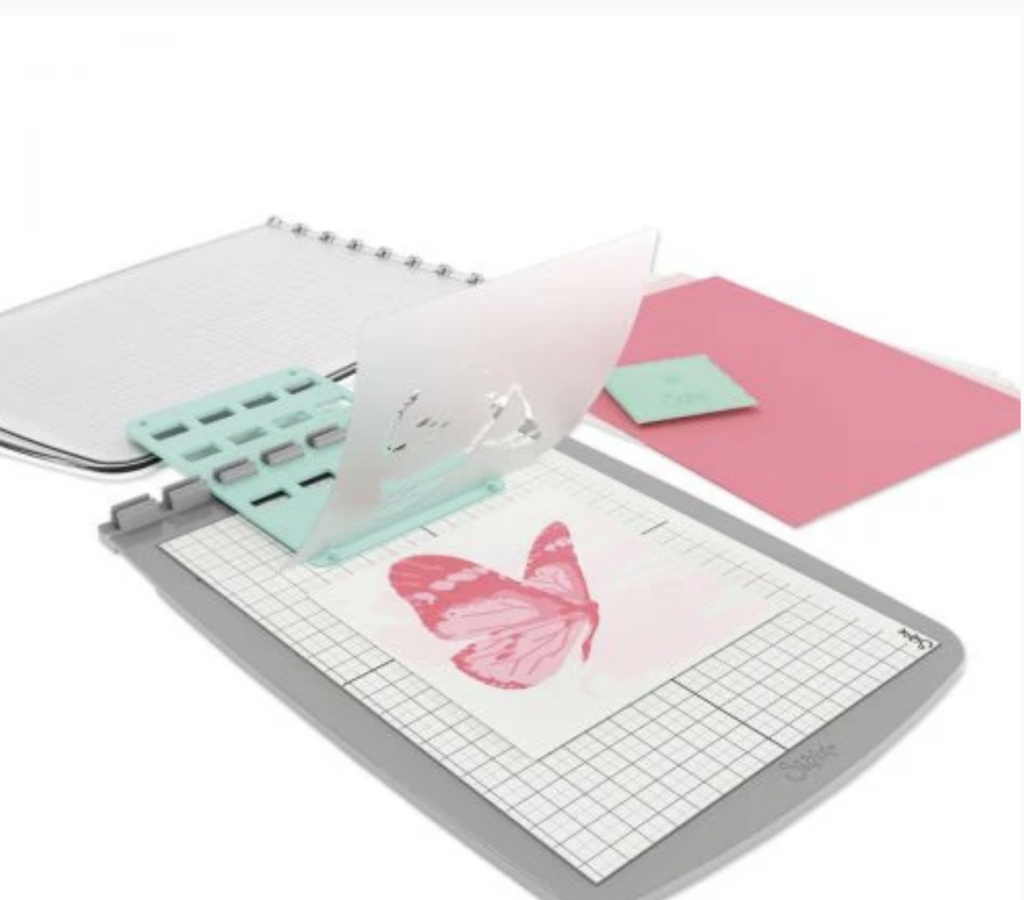
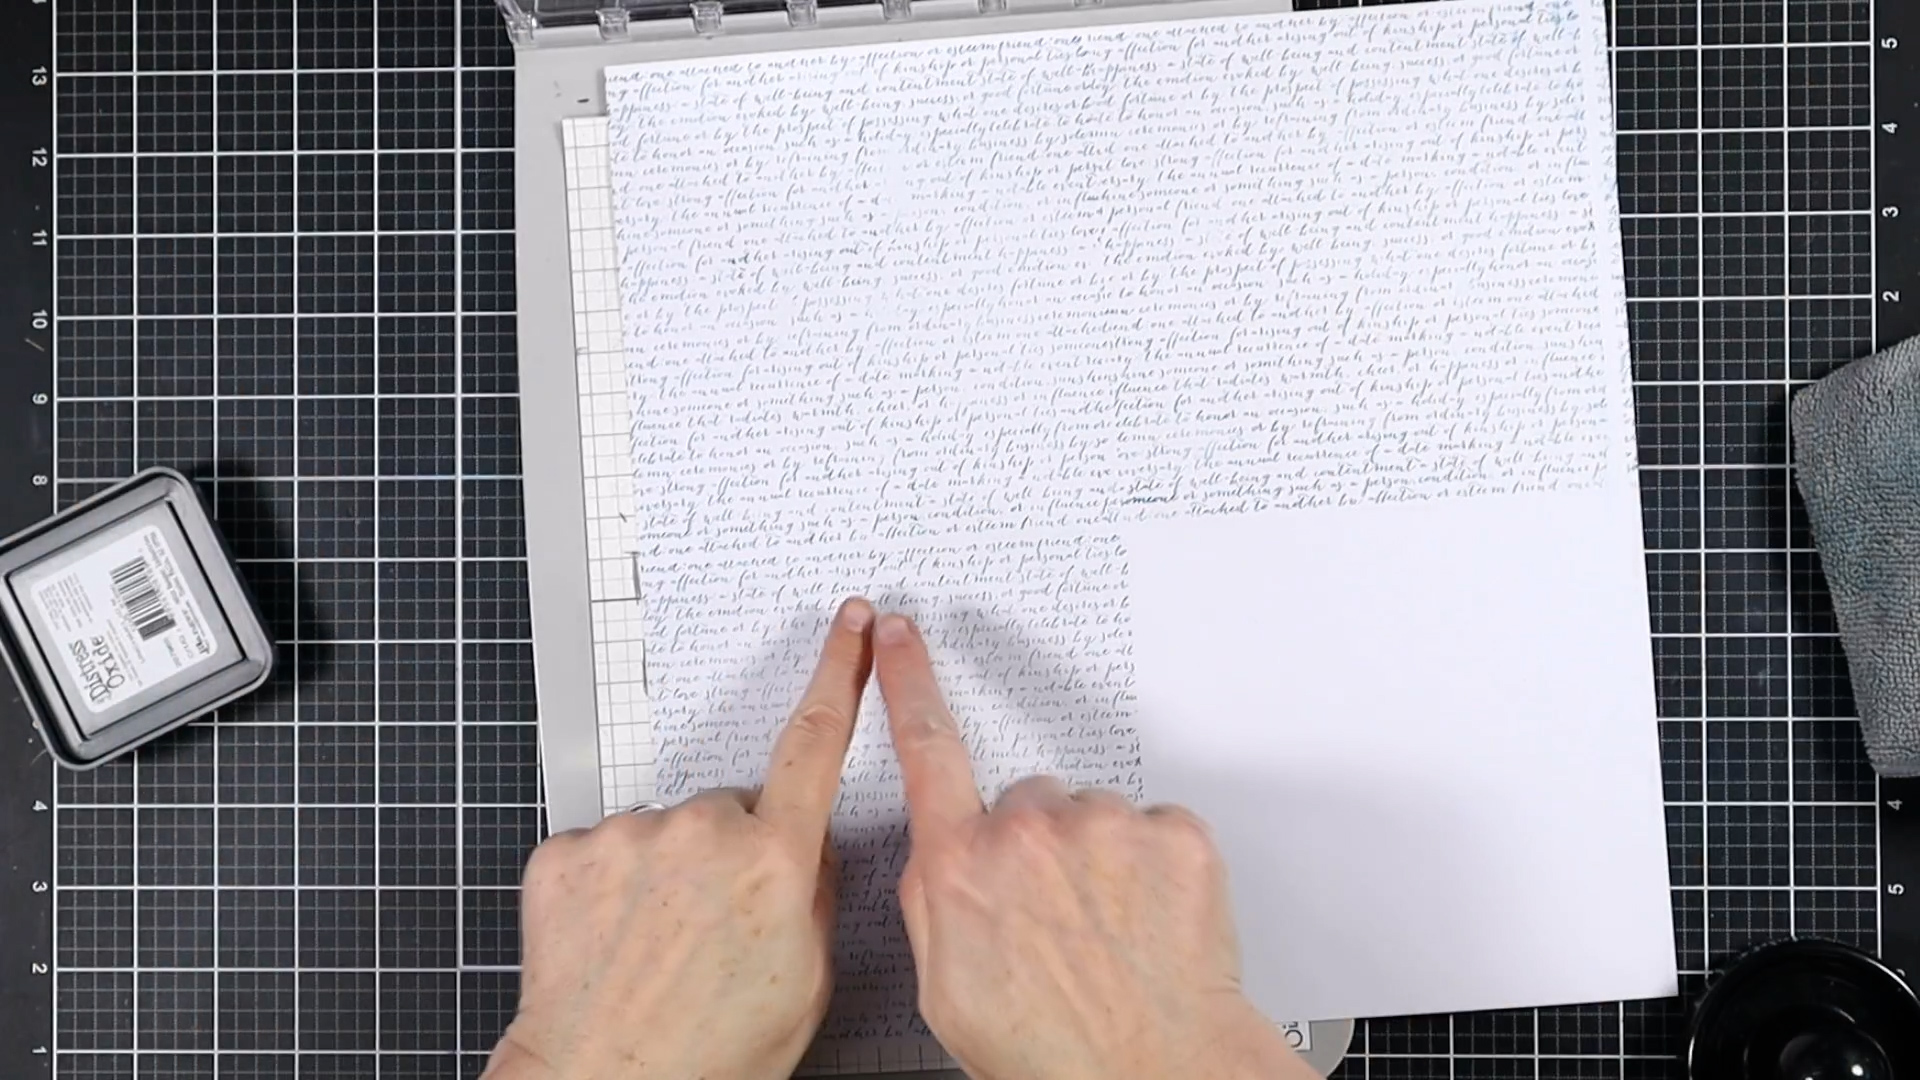
The first thing I love about this tool is it’s size and open sides. The platform stamping area measures 8.25 x 11.62 inches. Yes that is smaller than 12×12. However, three sides are completely open so a layout can easily be positioned for stamping anywhere on the page! The tool’s sticky grid base holds the paper in place. Your page won’t move as you work. This allows you to stamp an image in the exact same spot until you are satisfied with the results. No more “oops” stamping.
Feature: Removable Lid
I appreciate that the lid is removable. That means I can bring the lid to me in order to ink up stamps. This makes it much more comfortable to use.
Feature: Grids
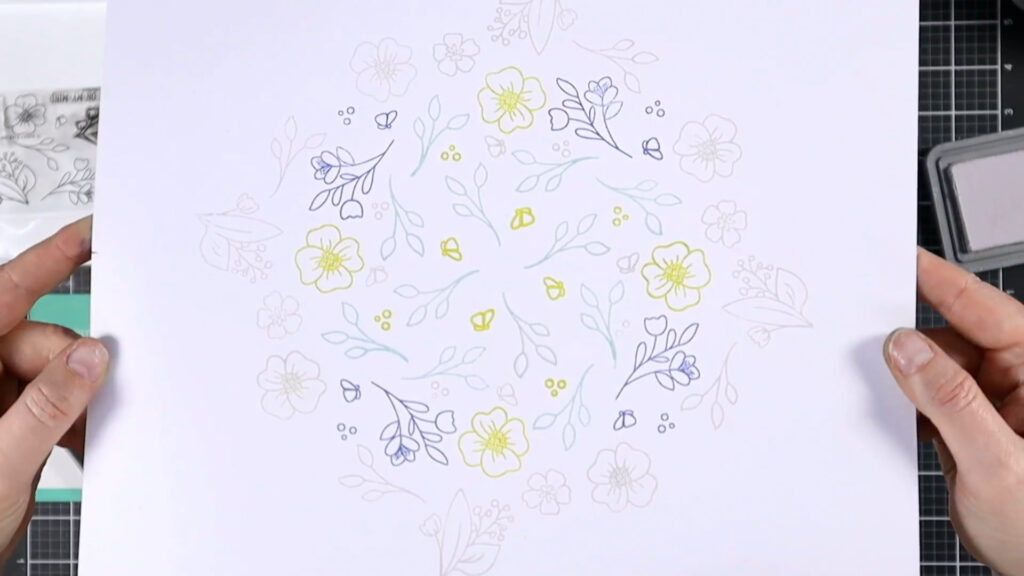
The sticky base of the tool is marked with 1/4 inch grid lines. The lid of the tool is etched with 1/4 inch grid lines. This makes it easier to align stamps on the lid to get them positioned where you want them. I find this the most useful for centered stamping.
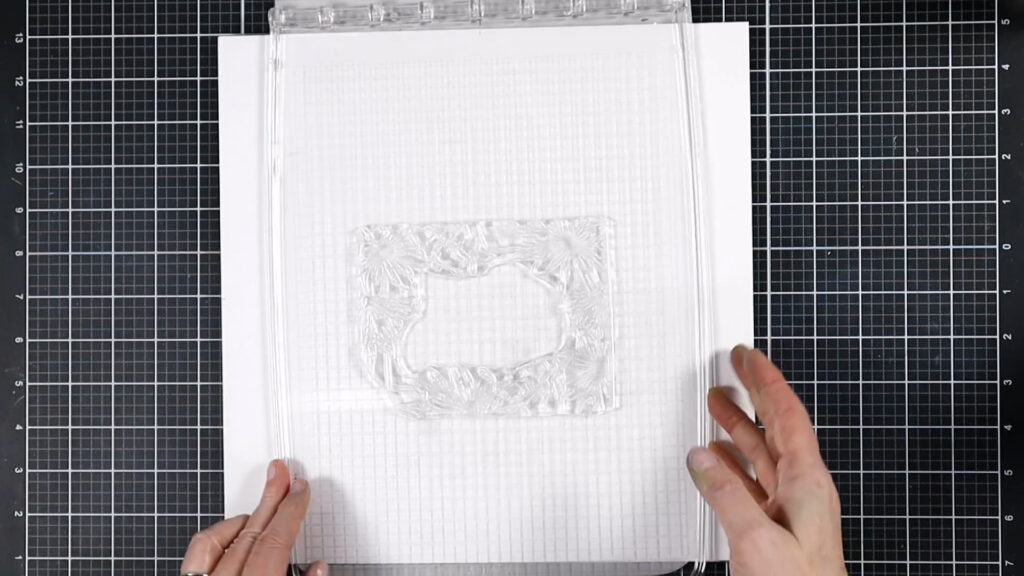
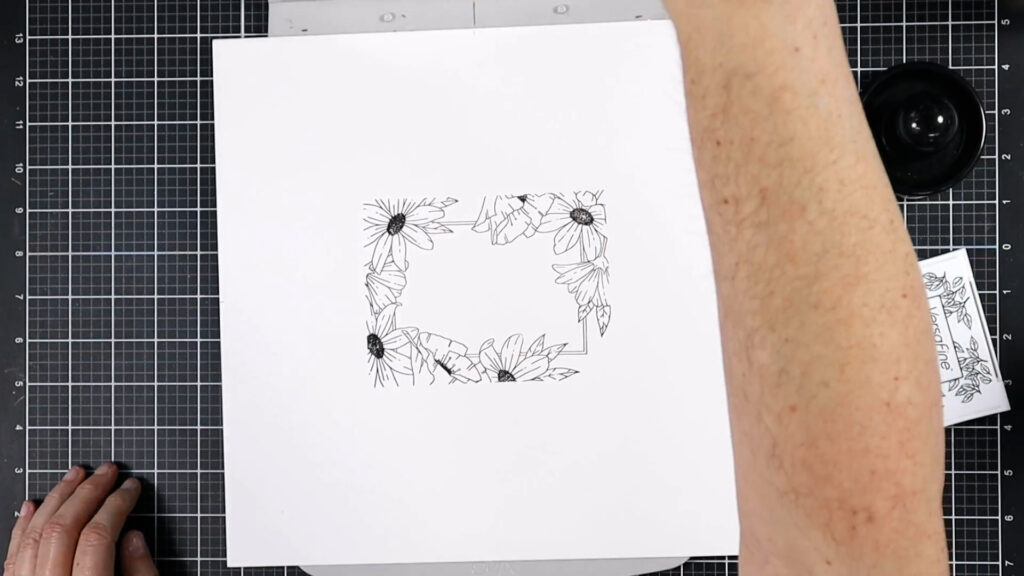
In the image above, I have a large floral border stamp centered on my lid. I position my paper in the center of the platform as well. This allows me to stamp the image right in the middle of my layout. With this image stamped, I have the start to a clean and simple layout design. Come back next month to see how I transform this paper into a full layout adding even more mixed media goodness!
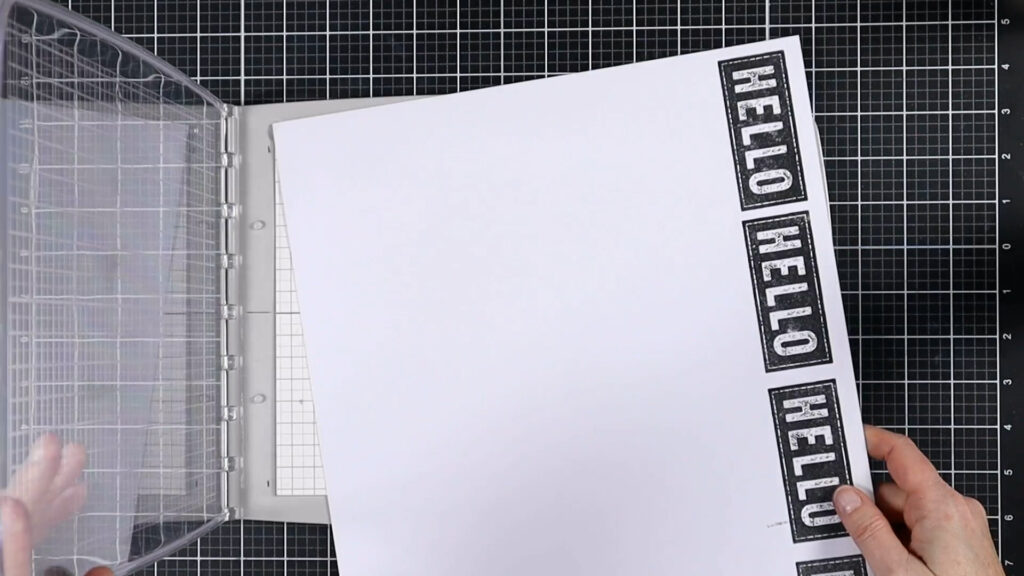
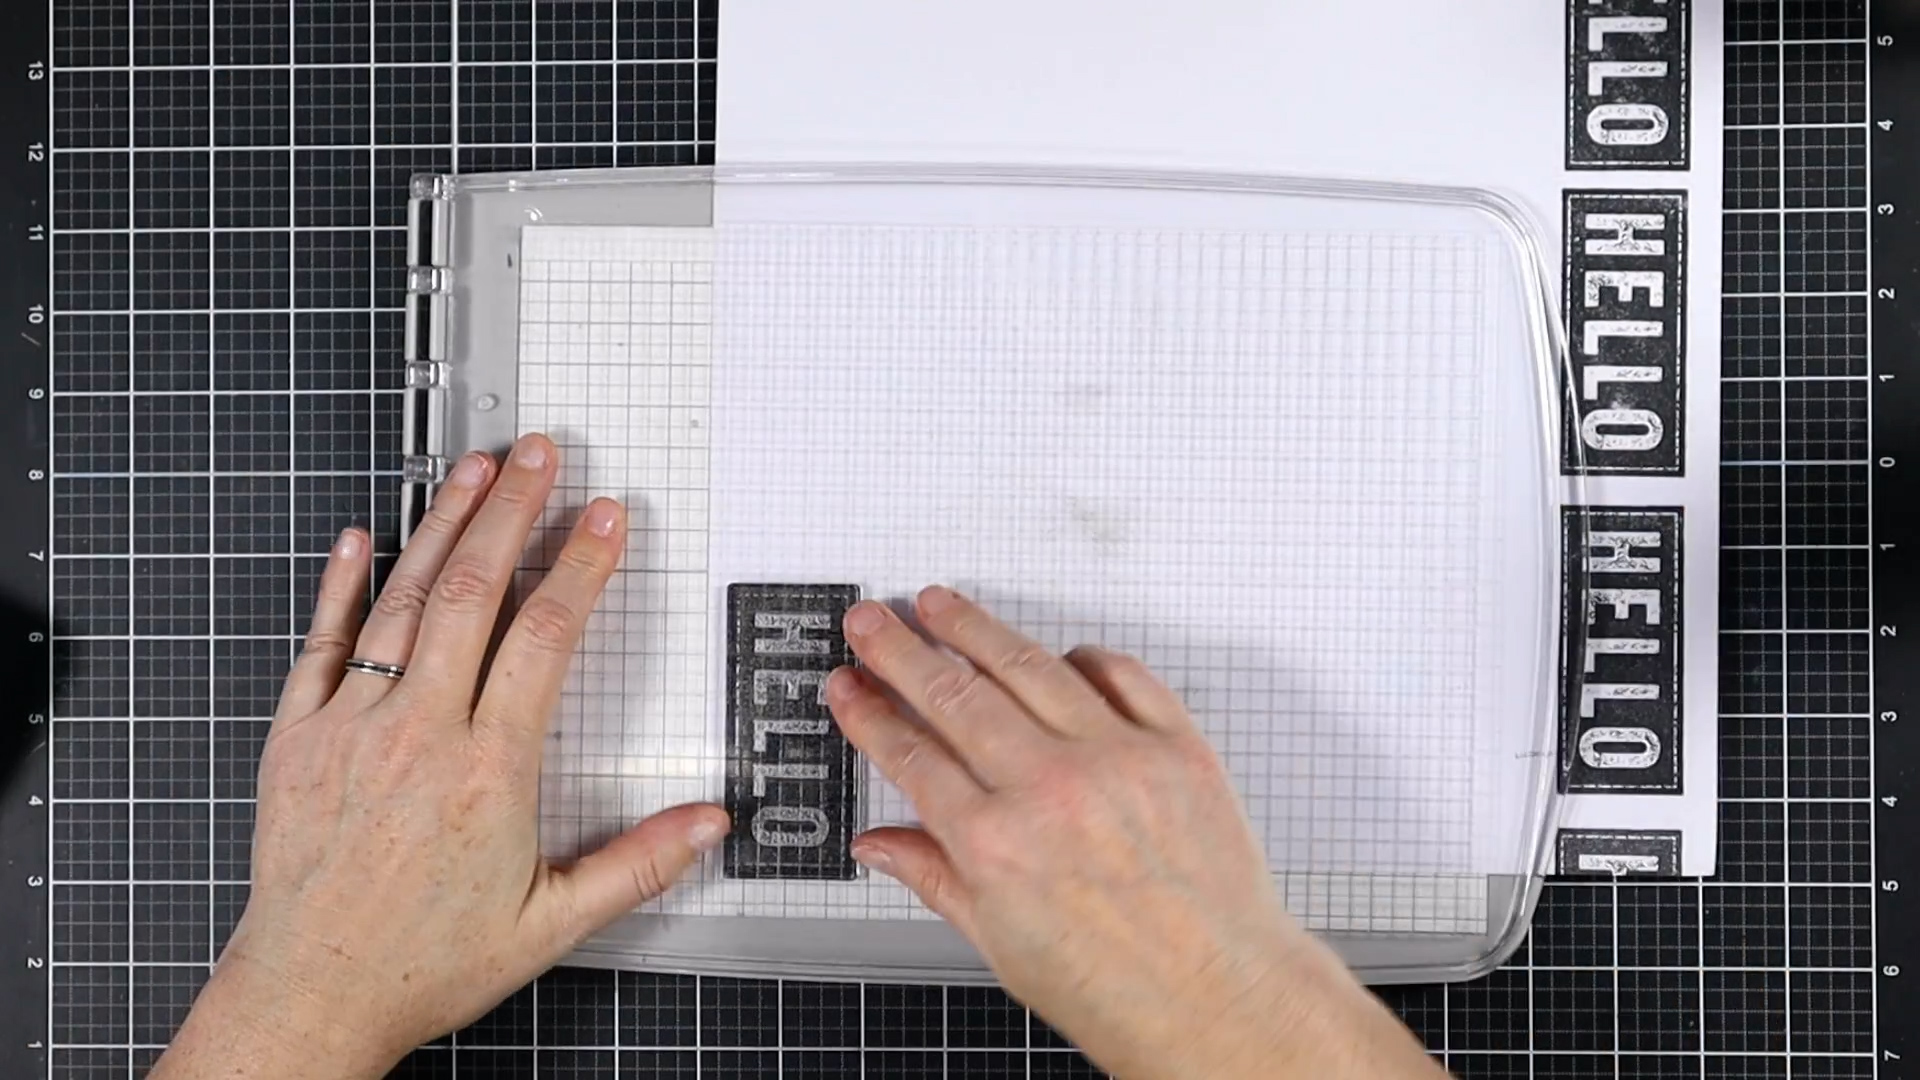
Feature: Repeat Stamping
If you set up a stamp image on your lid you can create repeated stamped images. To do this you leave your stamp in place and move your paper. The grid lines help position the paper. If you shift your paper sideways, you can create borders (left pic). If you shift your paper sideways and up & down you can create grids of images (center pic). You can keep going with ideas until you have created an entire 12×12 background (right pic).
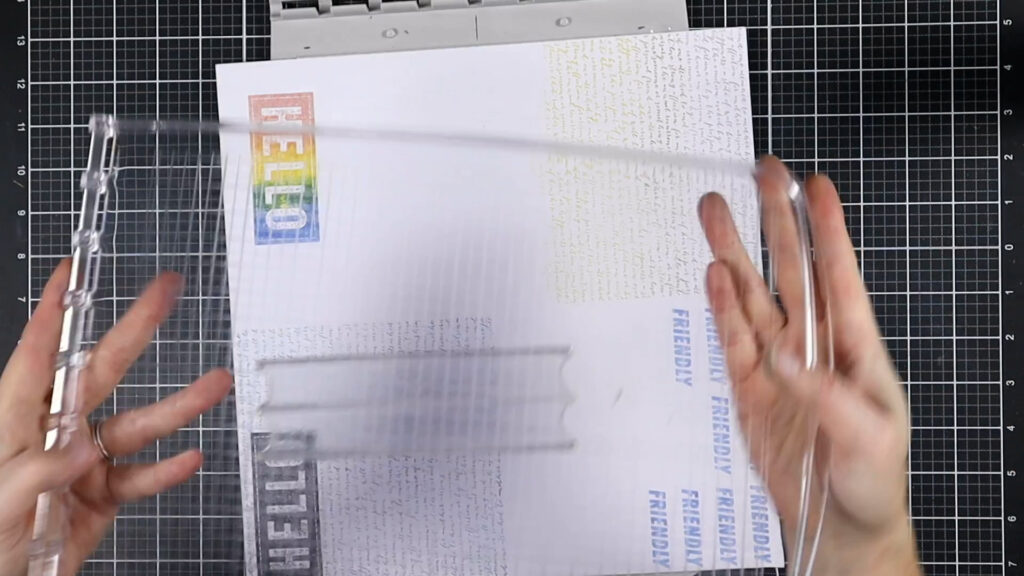
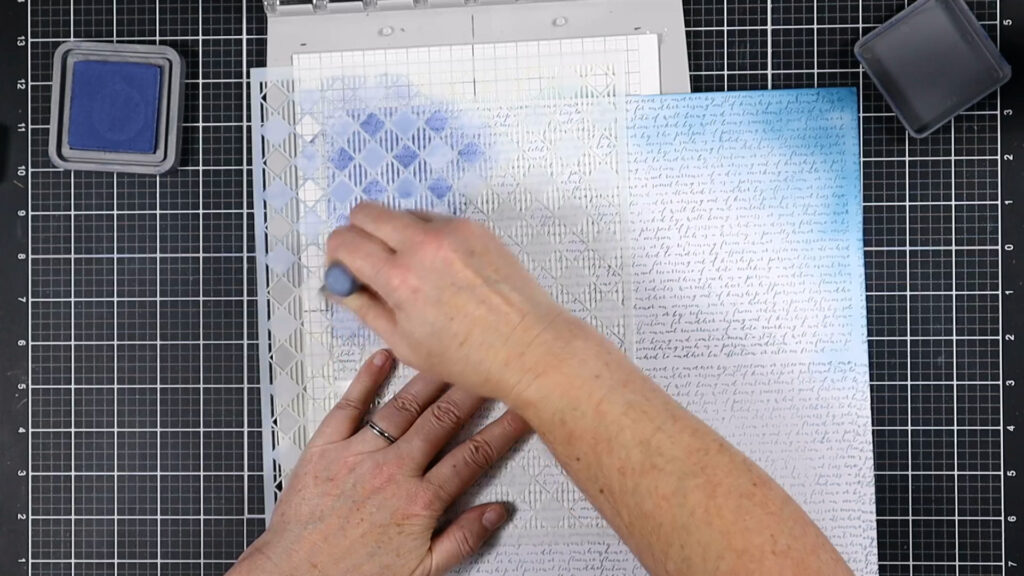
Feature: Stenciling & Blending
Did you realize that you can also use this tool for stenciling and ink blending on layouts? The sticky platform can hold your project in place while you create. Take a look.
What else can it do?
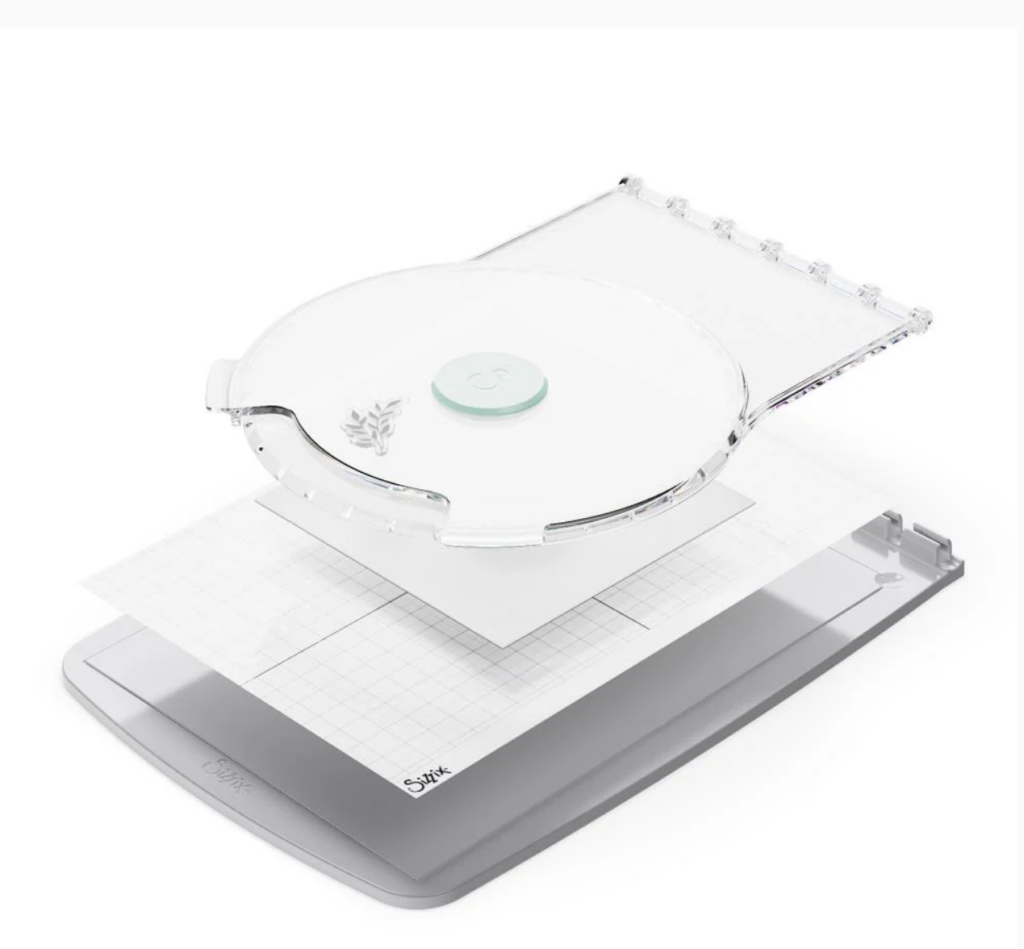
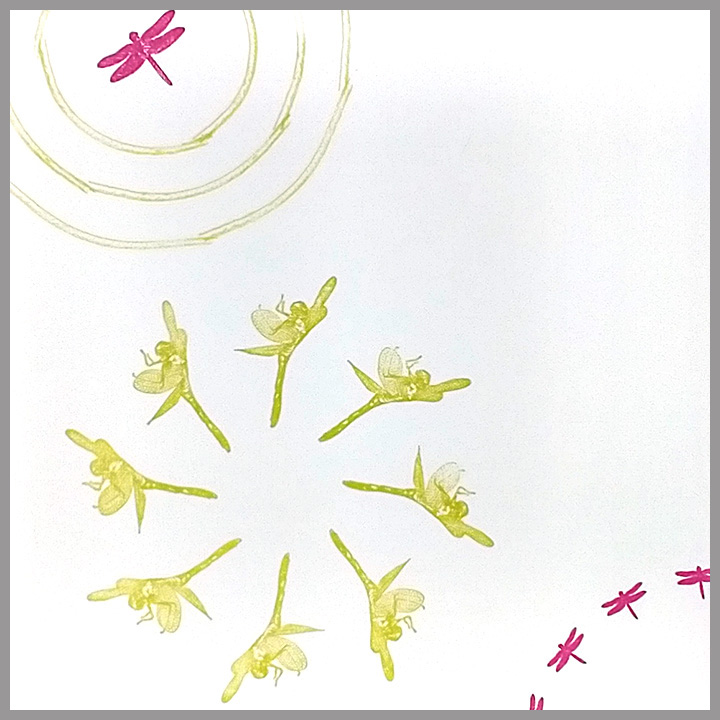
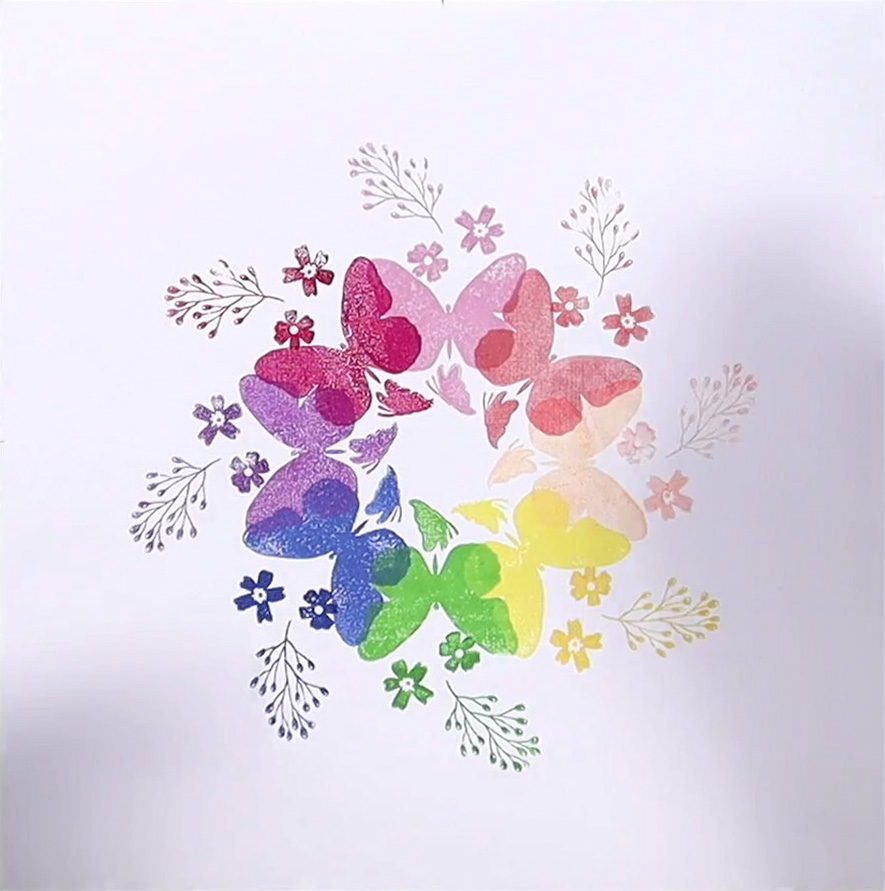
It is now time to talk about that spin tool accessory. This item replaces the main lid of the tool. The lid features a wheel that you can rotate. The wheel is marked with various circular grids so that you can align stamps to create other backgrounds. You can use this wheel for a different version of repeat stamping (left pic), or have fun creating various wreaths (right pic).
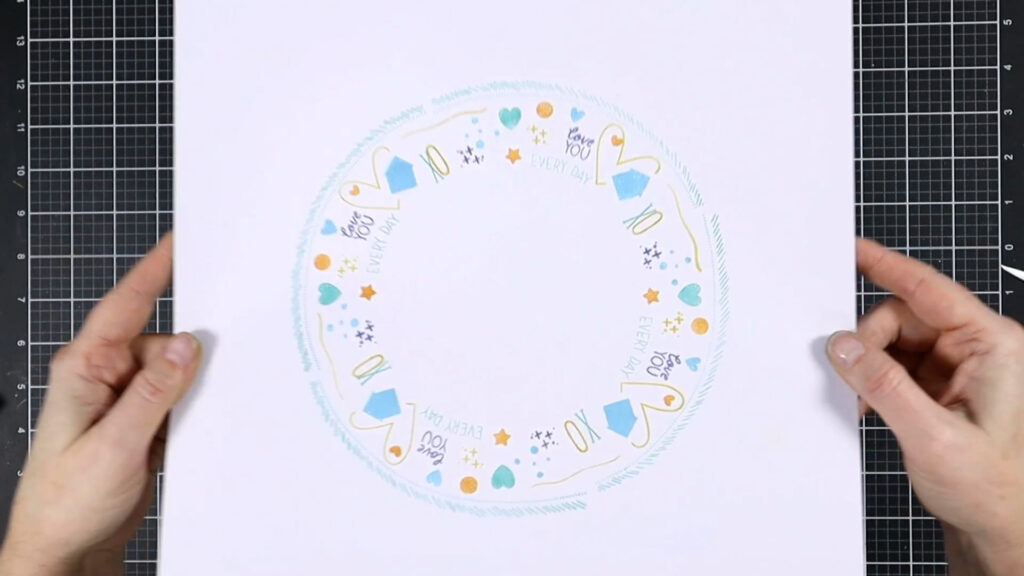
I want to focus a bit longer on the wreath idea. In other crafty sessions, I have created various wreaths. They can contain any images, from dragon flies to flowers. Wreaths don’t have to be just foliage! They also do not have to be just in the center of a layout. On the right I have a centered, yet multicolored arrangement. On the left my images are stamped in circular patterns without being actual wreaths. They are also offset on various portions of the page; none are centered!
Bonus wheel idea!
Since I am also a card maker I own many, many (too many?) stamps. One of the stamp products that I love for my cards are the Concord and 9th Turnabout stamps. These designs are created with collaged images on a single stamp. The stamp can be rotated 90o and then stamped again, up to four total rotations. The images nestle between each other to create a full pattern of prettiness. Since most of the stamps are about 6×6 inches they are well sized for scrapbooking. Here is a graphic from the Concord and 9th product page itself.
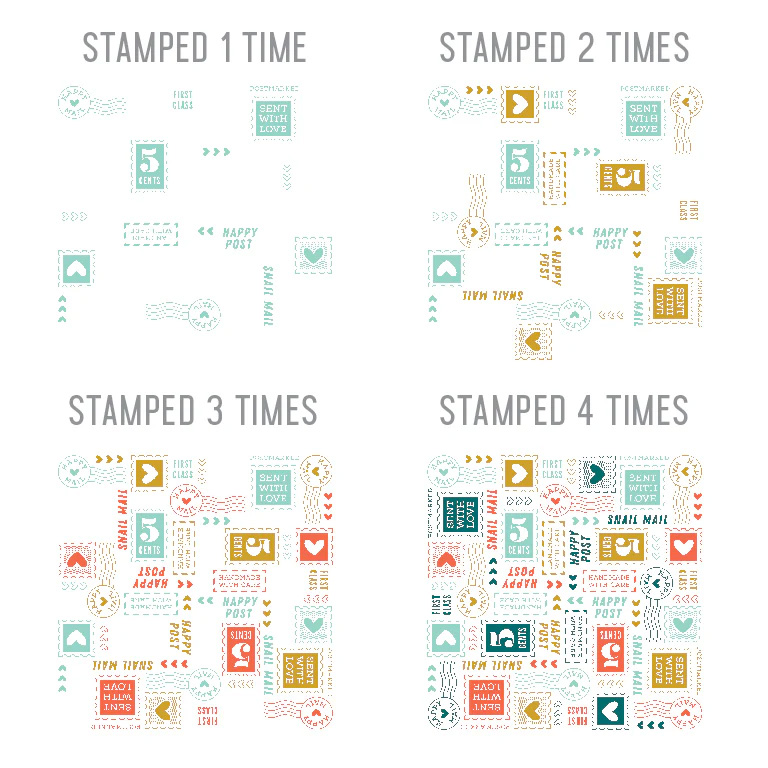
Using this Sizzix tool, these specialty stamps can be put to use on scrapbook layouts to create full 12×12 backgrounds. It takes a little getting used to, but if you enjoy stamping and/or choosing your own colors for layouts, this could be a bonus idea for this tool.

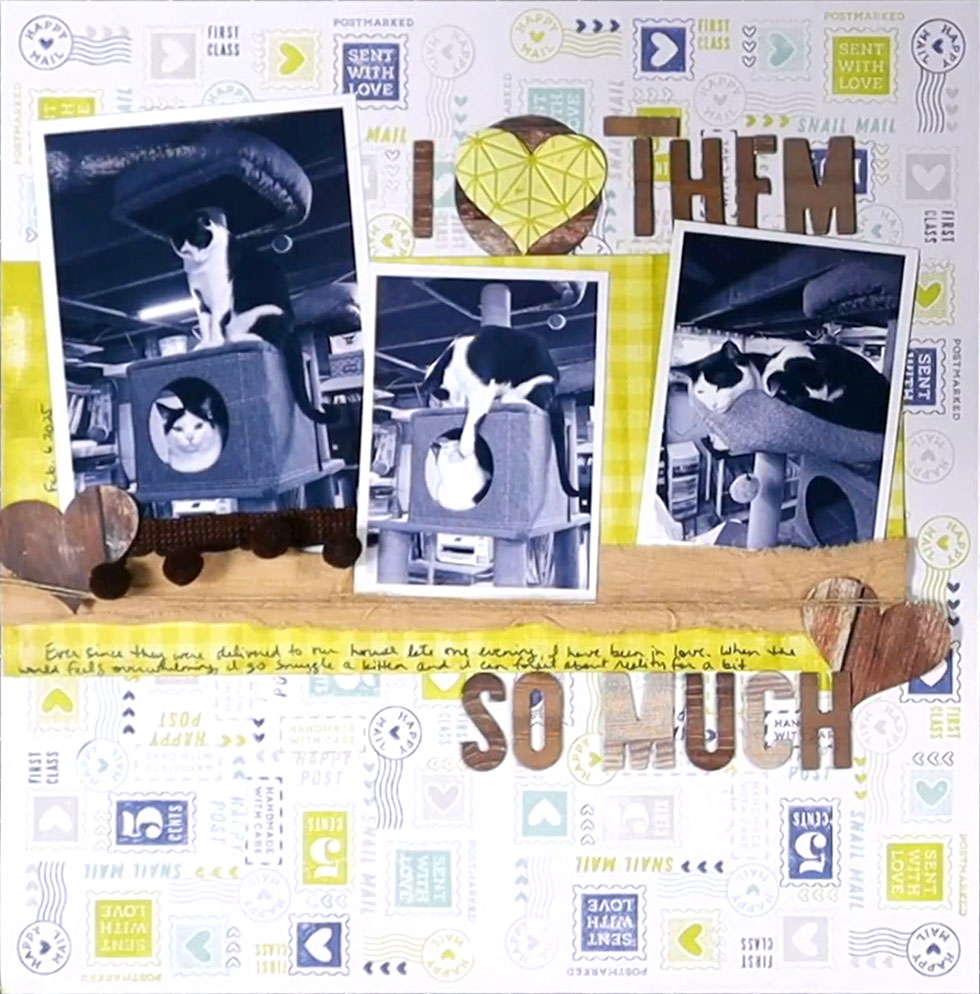
Just take a look at the photo below. I used that same image from above, to create an entire 12×12 background. I proceeded to create a layout using that paper. Creating with my own chosen color palette was fantastic. I absolutely love the background and the finished layout.
More Info
I hope you can see how easy and beautiful stamping can be on layouts — if you have the right tool! I’ll leave you with a look at a layout I made using one of those wreath backgrounds. It is a very clean and simple layout, yet has interesting details to allow the eye to wander.

Just a note: It is a little hard to tell from this photo, but I used a craft knife to cut along the circle of the wreath. That cut is just big enough to tuck in the corner of my photo. You can see where it “disappears” on the bottom right. It isn’t invisible, it is hidden under the wreath!
That is it for this time. What do you think? Do you stamp on layouts? Do you now want to try? Drop us a message as we love to hear from you! Don’t forget to join me in March as I create another layout with that floral border stamped image. Until then, happy scrappin’.