
We are basically three months into this year – how are you doing with your New Year’s Resolutions? Most people have given up long before now, and I’ll admit, my focus ebbs and flows a LOT! But I gave up on resolutions years ago in favour of intentions. And so far, those intentions are still holding strong.
I plan to talk about more of them throughout the year, but the one that I want to talk about today is my intention to sort, purge, and reorganize my craft supplies in a way that works for how I create, allows for easy use, and is one that I can maintain regularly.
As a refresher you can read my first post on this topic here. I talk about things that are currently working like my ink storage/display, my open paper rack, and my clear bin storage for other supplies. There is also a lot in that post about things that need tweaking, like my paper storage (ironic!), my over abundance of stash, and the shelving unit that houses all that stash.
I went into great detail and filmed my process for reorganizing my paper rack, but before we delve into that, let’s take a look at some of the other areas I’ve tackled and talk about what changes I’ve made and why.
On My Desk

Here is my desk as it was up until this journey into my Clutterbug type. The desk I’m using was originally one of the two service desks from my store. The top is made out of individual 2×4’s that we sanded and stained so there are cracks and it’s not nice and flat. Not ideal for working directly onto so I have a piece of maple plywood sitting on top. It’s a lovely deep desk though which means I have space for both the plywood at the front working area, and some display/storage at the back.
I found these stackable wire racks at Dollarama and love how much I can fit onto them. But because of the lip that the plywood has, it was hard to access the baskets on the bottom. The larger one on the right was full of ALL my ink blending tools – distress ink handles, Altenew blending brushes in various sizes, and Catherine Pooler handled blending brushes. None of which were getting used mostly because it was inconvenient to access.
Inconvenience is one of my biggest barriers to creativity!
So I looked for ways to change things …
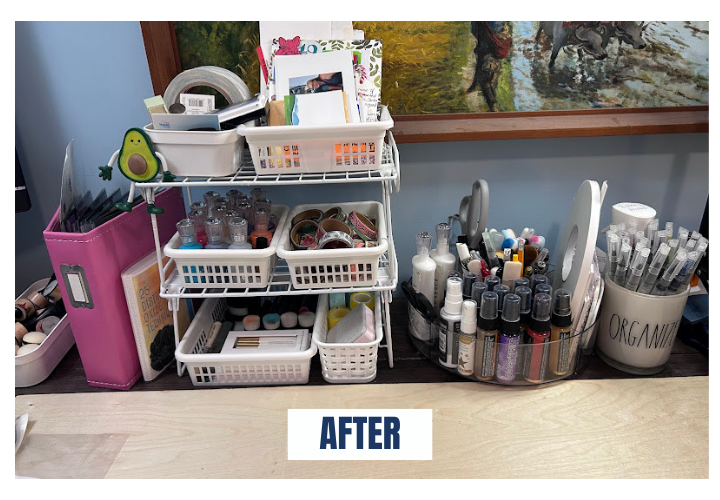
Here is my desk today. I found this clear Lazy Susan at Michael’s and it holds so much that I was able to replace an entire set of stacking wire shelves with it. It holds all my spray inks, stamping blocks, adhesives, pens, scissors and even the handled blending brushes. I love it!
Next to it you can see a jar full of Altenew watercolour brush pens that were in their packaging hidden on another part of my desk. I am learning that if I want to use something, it needs to be out of its packaging and visible!
That large basket that I couldn’t access got replaced by two smaller baskets. One is tucked on the bottom shelf and holds all the non-handled blending brushes I own. Visible, easily accessed, but neatly out of the way. My Distress blending handles and refills get used more often so they are now in their own basket to the left of my Distress Oxide colour binder.
I had opened up one of the drawers in my desk at one point in this reorganization process and discovered all my Nuvo Drops. I’d totally forgotten I owned them which means they weren’t getting used. I now have the space for them on my desk so hopefully I’ll remember to add them to my pages. (Has it happened yet? No, but at least they are staring me in the face every time I scrapbook now!)
Out of sight for a BEE, means out of mind!
On My Shelves
To the right of my desk as I work is a shelving unit that holds … well, everything! It was over loaded, jumbled and hard to access, partly because of a small step stool that I had in front of it on the floor. Not only did that step stool bar access to my bottom shelf, it also tended to be loaded with ‘piles’. As a BEE, if I don’t know exactly where something goes, or I’m in the middle of a project but also need to move to another project, I will pile the things I’ve been using ‘until I can deal with them’. Do I have piles that date back years, even decades? Probably. What of it?!
In the video that is linked below, I walk you through what changes I made to these shelves, but here is a quick visual and run through.
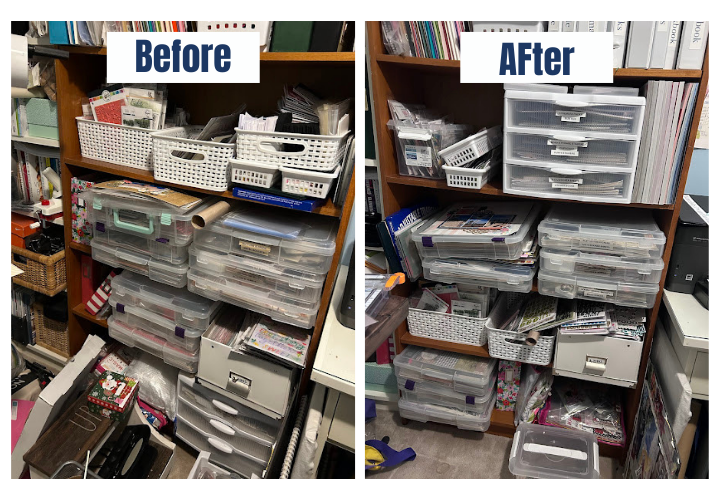
I am slowly learning that I need to put things that I want to use, or already use all the time, in easy to access spots. So that 3-drawer unit that used to sit on my bottom shelf had to get moved. The iris bins full of Christmas stash that I rarely use, they could move to the bottom shelf along with bags full of memorabilia from old trips and other half finished projects.
Let’s take a quick look at each shelf as it is now:
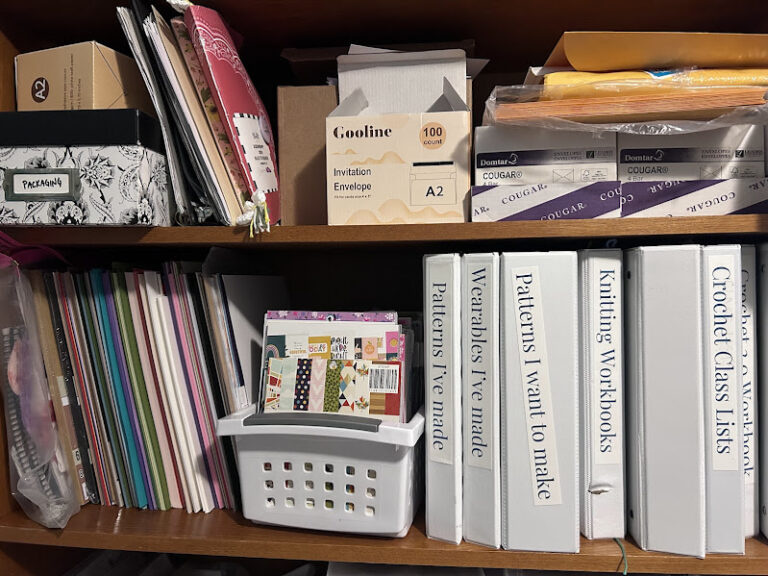
Starting at the top – there isn’t another good place in my house to store all the envelopes etc, so they live in my office/scrap room. Then I have all the binders I use for my Crochet and Knitting classes, along with the few 6×6″ and 6×8″ paper pads that survived my cull, and my remaining stash of 8.5×11″ card stock.
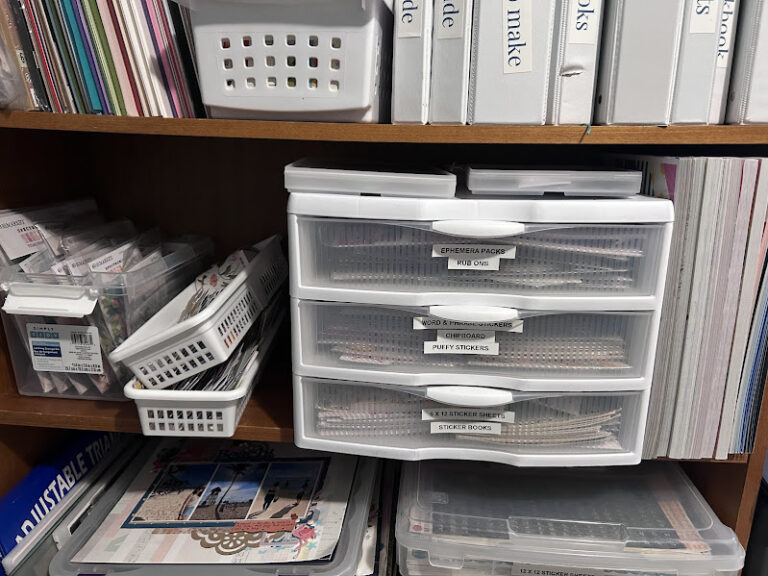
Next shelf down is where I moved that 3-drawer unit to. I also took the time to completely reorganize it and (be still my beating BEE heart) label it! To the right are all my 12×12″ paper pads that used to sit on my paper rack but were always hard to pull out so hardly got used. To the left are a couple of small baskets that hold loose die cuts. One has all the shaped die cuts like florals, and images, words, and other icons. The other basket holds all tag and journaling card die cuts and similarly shaped pieces. I can easily take these to my desk when I’m working, rifle through them to search for what I need, and then put them away quickly.
That bin on the far left is FULL of 49 & Market embellishment packs like frames, labels and florals. I found them in a bag on my shelf when I was cleaning and let me tell you, I had 1000% forgotten all about them and now I’m not too sure what to do with them! They will sit in this bin until I can figure out how I really feel about them.
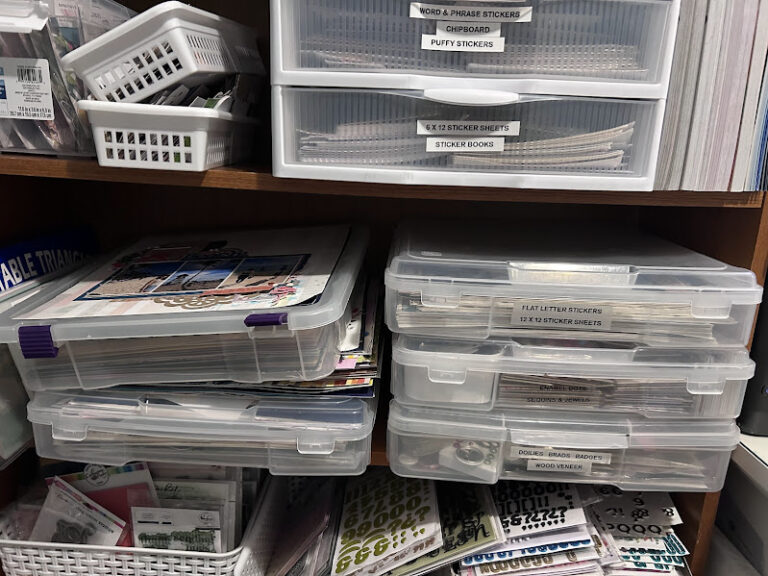
Next we have a shelf of iris containers. The ones on the right are labeled and hold things like my beloved enamel dots, 12×12″ sticker sheets, wood veneer, and other embellishments. The ones on the left currently hold layouts waiting to be put into albums (Ha!) and the bottom one has all my older ScrapRoom kits in it. When we are filming Scrapbook Live, if I need to add something not found in the kit I’m currently working with, I like to reach for older kits first and then go into my stash.

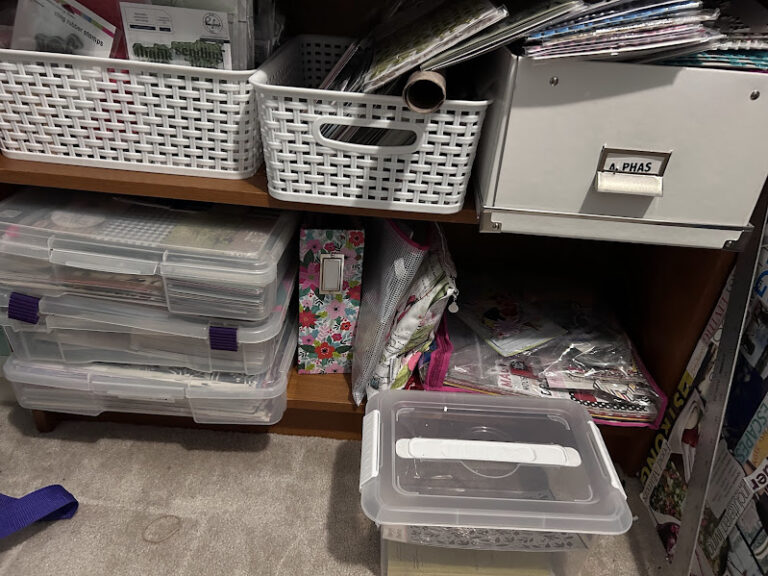
This next shelf is half organized, half complete chaos. The two baskets hold all my stamps, dies, stencils and embossing folders that I have kept from my massive purge in January. If you are curious about that process, here is the link to a quick video I filmed.
The box that says ‘alphas’ was organized until I found a stack of Thickers in a different box (one that housed items I was using while making my 2017 UK holiday albums). So that is a future sorting/purging/organizing project.
Last but not least is the bottom shelf and a very important bin to tell you about.
First the shelf: in the iris containers on the left are my Christmas papers and embellishments, as well as one that holds papers, embellishments and some memorabilia from that 2017 trip I mentioned above. I haven’t decided yet if I’m going to go through it and put everything back into my regular stash, or if I’m going to keep it to use whenever I resurrect that particular project. Next to them are my 2023 December Album (mostly finished but not quite), some bags full of all sorts of other storage bags (yes, I love a good bag), and yet another bag full of Disney themed products plus some memorabilia from our various Disney trips over the years. Why am I keeping all that? Well … those trips haven’t been fully scrapbooked either so ….
It’s like there’s a theme to my life, right?
Before we get bogged down in analyzing that, let’s talk about that clear container on the floor. My personal 2025 mandate for all my stamps, dies, stencils etc, is that whatever I don’t use this year is being donated. So this container is where all the one that DO get used go. If I use it even once, it goes in here and is safe from the ultimate cull at the end of the year. Will I need a bigger container by then? Maybe, but we can cross that bridge when we get to it.
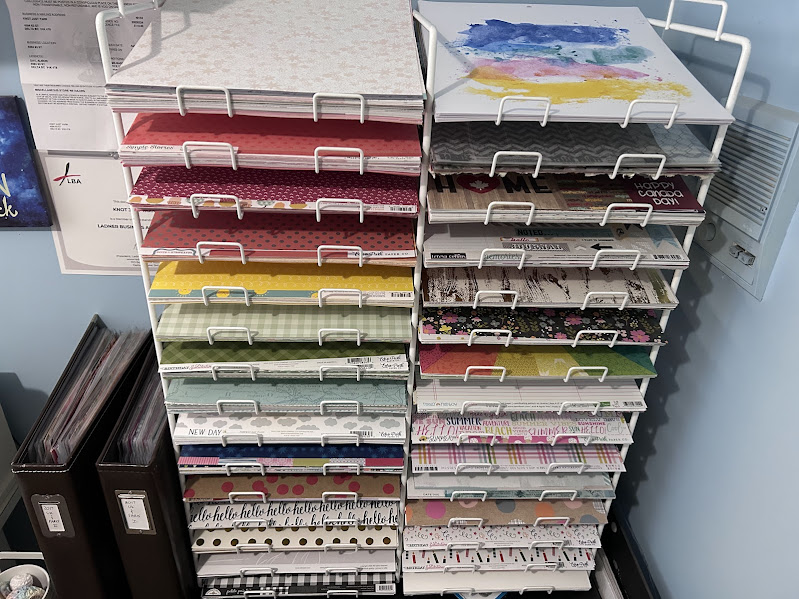
All that’s left now is to talk about my 12×12″ papers and my paper rack.
On My Paper Rack
As a scrapbooker, and primarily a 12×12″ scrapbooker, paper is where it’s at. Buying it. Owning it. Using it. Storing it. Rifling through it. Looking at it.
You get the point. I love pretty paper!
But one of fastest ways to become the slowest scrapbooker on the planet is to spend 3 hours looking for the perfect piece of patterned paper for the layout you are working on. Finding a way to sort and store your papers so you can quickly and easily find something that will work is crucial. And it’s personal to each scrapbooker!
Before I owned a craft store and had to display my scrapbooking papers by collection and designer, I stored everything in rainbow order. That’s how my brain worked. After I opened the store, I rearranged my home space to store everything by manufacturer and/or designer. But I wasn’t doing a ton of scrapbooking during those years, so I didn’t notice the flaws in my system.
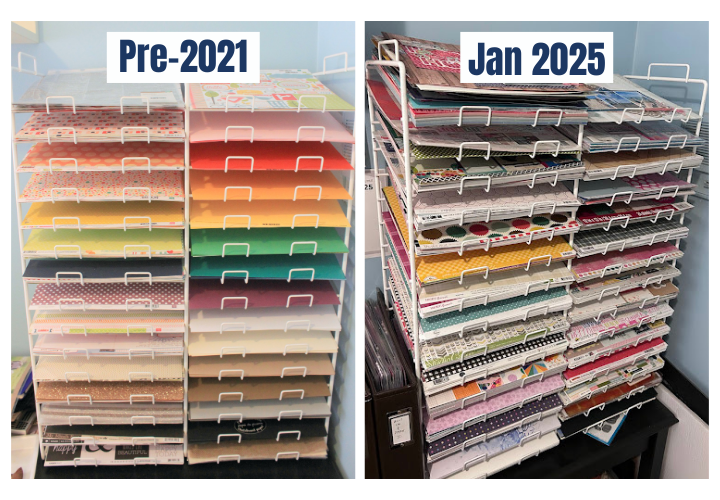
This is a look at how my racks looked before I opened my store, and after the store closed. (And yes, can we take a moment to comment on how much stash I accumulated over those 3 years please? Yikes!)
Since I tend to think “I need a blue paper here” rather than ” I need that tiny blue floral print from Pink Fresh”, I needed to embark on the massive chore of re-rainbow ordering my papers. Here’s a look at the process.
https://youtu.be/pWBNJrHcXd0
If you want to do this yourself, here are my steps:
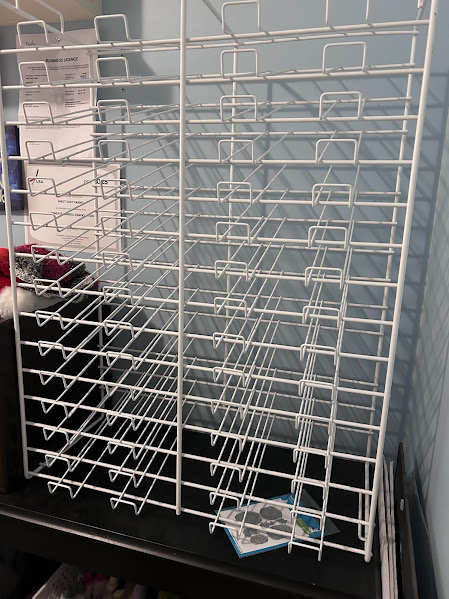
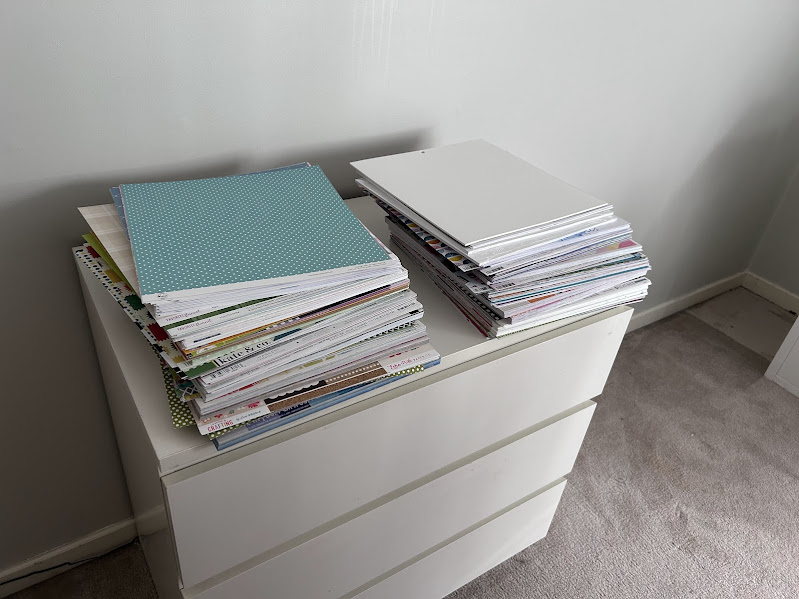
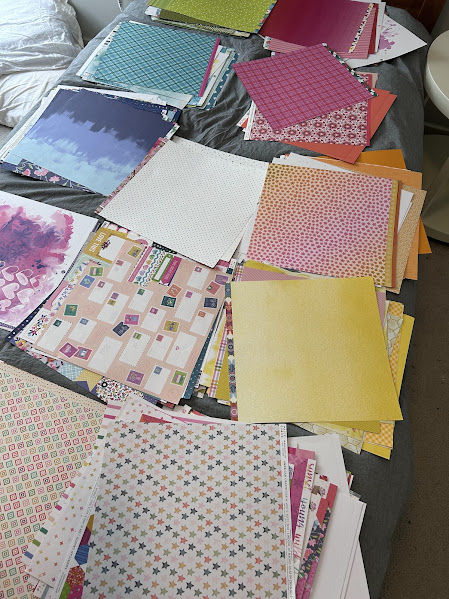
Step 1 – Remove all your papers to a space where you can spread them out. For me this was our spare bedroom (a.k.a the room my eldest daughter sleeps in when she’s home but since our house is no longer “home” but “her parents house” … sigh). I just started with giant piles and went from there.
Step 2 – However you intend to sort your papers, go through each paper one by one and put it into the category that makes most sense for you. I sorted by rainbow order with the following added categories: pinks, teals/turquoises, whites, blacks & greys, browns & creams, multicoloureds, and cut aparts. Do this step fairly quickly. Don’t over think things. I also placed each paper with the side I was most likely to use as the side I’d see on my rack. Double sided papers can bog us down, especially if both sides are gorgeous, but be honest with yourself and choose the side you think you are most likely to use and move on.
Step 3 – If you have piles that need further sorting, do that step now. My pink, green and blue piles were too thick to fit on my rack so I further sorted them into lights and darks. Then my multicoloured pile got further sorted into categories like florals, geometric shapes, stripes, rainbows, and polka dots. As a BEE I need lots of categories, you might not so do what feels right to you.
Step 4 – put everything back and admire your hard work!
I am so happy with how my craft room is shaping up. I also crochet in here and have a bit of yarn and some half finished projects stored here, so I’ve definitely got more work to do to get my space as beautiful and tidy as I’d like it. But that is another part of this process that I am being intentional about. I’m doing it in manageable chunks. As I have the time and energy I will tackle the next area until eventually I reach some sort of organizational Zen.
That’s a thing, right?
We will continue to bring you updates and posts from our Creative Team as we all use our Clutterbug Types to help us improve our creative spaces. If you take the quiz I’d love to hear which type you are and if you currently organize according to your type. Pop your comments below.
Until next time, Happy Scrapping!