
We are in the height of summer here in the northern hemisphere. My mind is full of sunshine, river days, and ice cream. How can we take the energy and images of our summer vibes and use them for any card all year long? For me, the secret is a good sentiment.
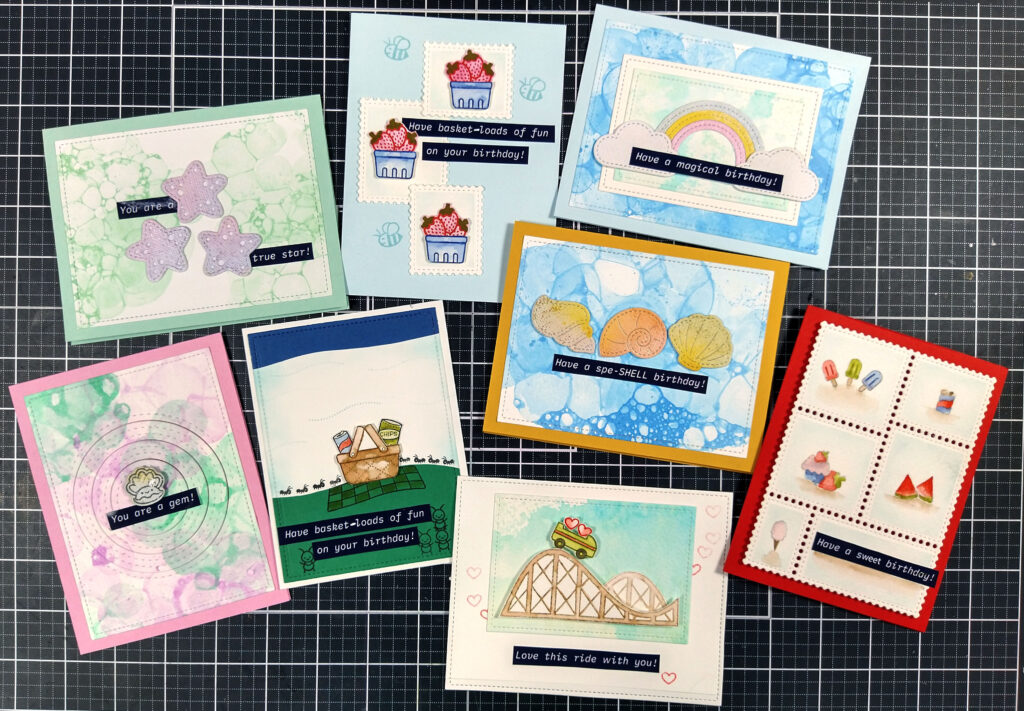
Today I’m sharing lots of cards featuring classic summer fun paired with a punny sentiment. These ideas can work all year long. I’ll be sharing how I created those sentiments. You can even download my versions. I’ve also got tips on featuring tiny images. Plus, I’m sharing some info on how many of my backgrounds were made. See the bubbly goodness on several of those cards? You can do that too! What’s more summery than playing with bubbles? Let’s dive in (pun totally intended!).
The Sentiments
For these cards I went straight to my Lawn Fawn stamp & die stash. Their sentiments are already great at capturing puns that work year-round. And yet, I was still piecing together words to come up with just the right phrase for my card ideas. I turned to a trick I’ve used before… make my own sentiments.
I typed up my sentiments and then drew rectangles to place behind my words. I changed the font color to white and set the rectangles to be black. Most word processing applications allow you to draw rectangles so you can do this yourself if you don’t like my phrases! (Full disclosure, the “spe-SHELL” pun comes straight out of one of the Lawn Fawn sets. However, I wanted just that word in a different phrase, so I made my own.)

You can see I’ve got these in different color ways. The big thing is, the solid color rectangle makes them much easier to trim out by hand. Of course you don’t have to have to use the rectangle; this is just personal preference. You can simply print out words and cut them into strips.
I print mine on 4×6 photo paper since I like the gloss that is added to the sentiment. Really, they can be printed on any paper. If you want to download these and give them a dry here are the quick links.
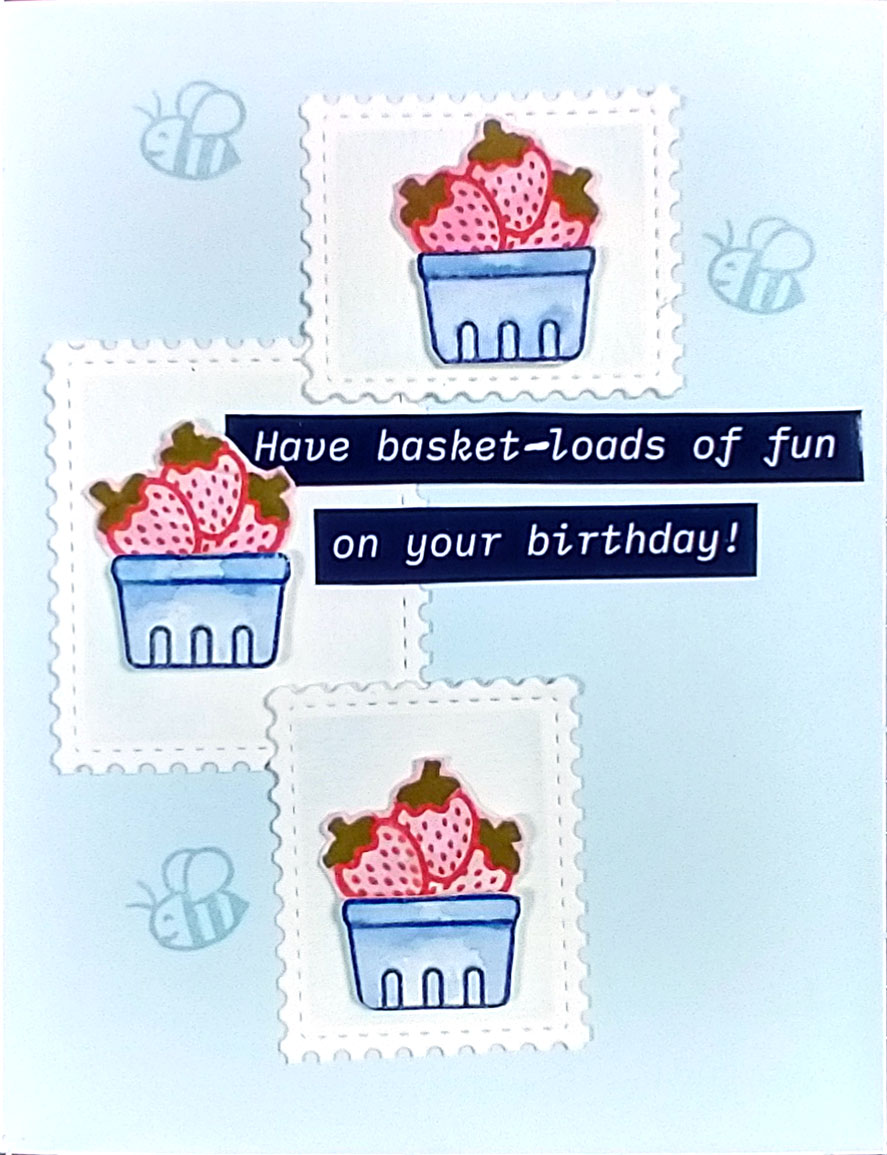
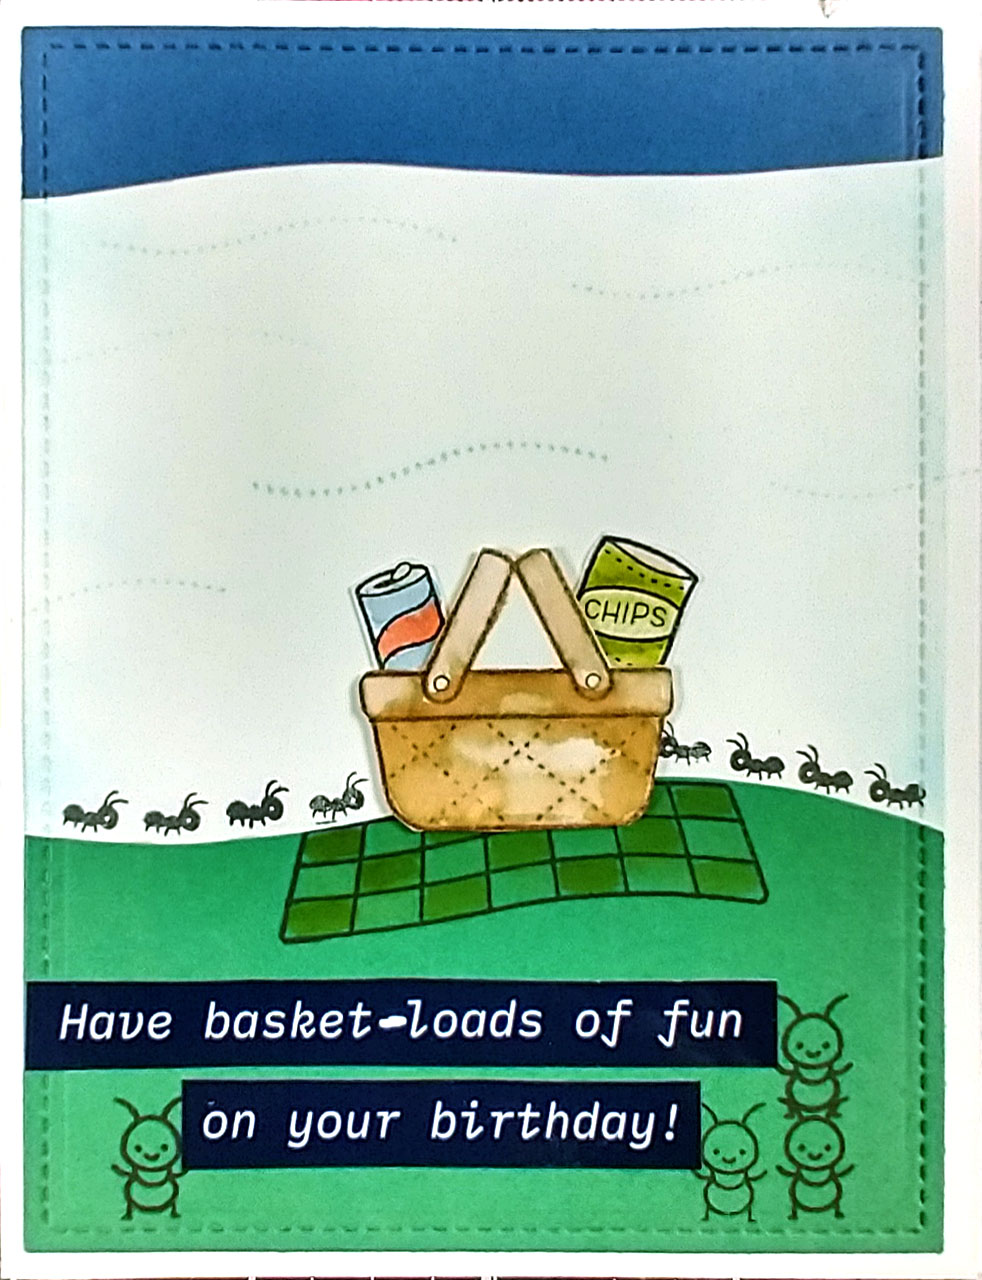
I love how the punny sentiments can work for the very cutesy ant card as well as the cottage-charm strawberry card. Now, I know some of my sentiments are very specific to my images. For example, the “basket-loads of fun” sentiment. While I have berry baskets and picnic baskets to pair with these words, you may not. Try an Easter basket instead! These cards aren’t just limited to summer icons.
(PS, the dash between “basket” and “loads” was added with a white gel pen. The download does not have the dash.)
The Backgrounds
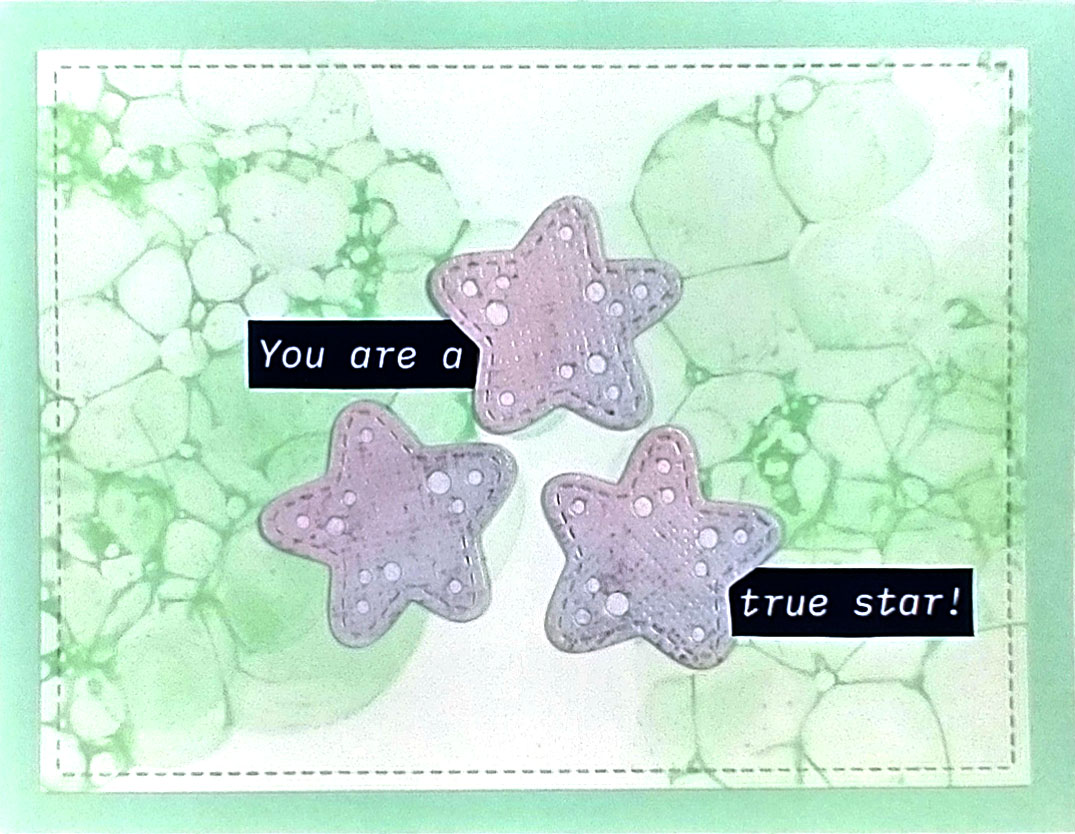
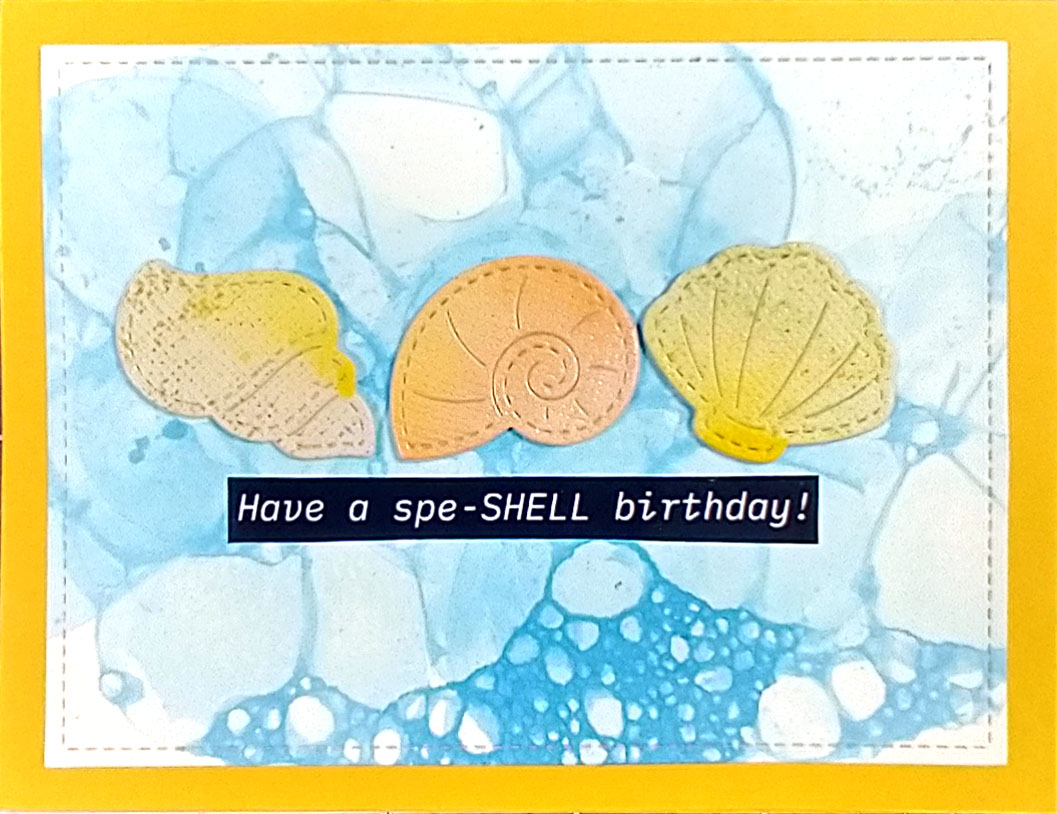
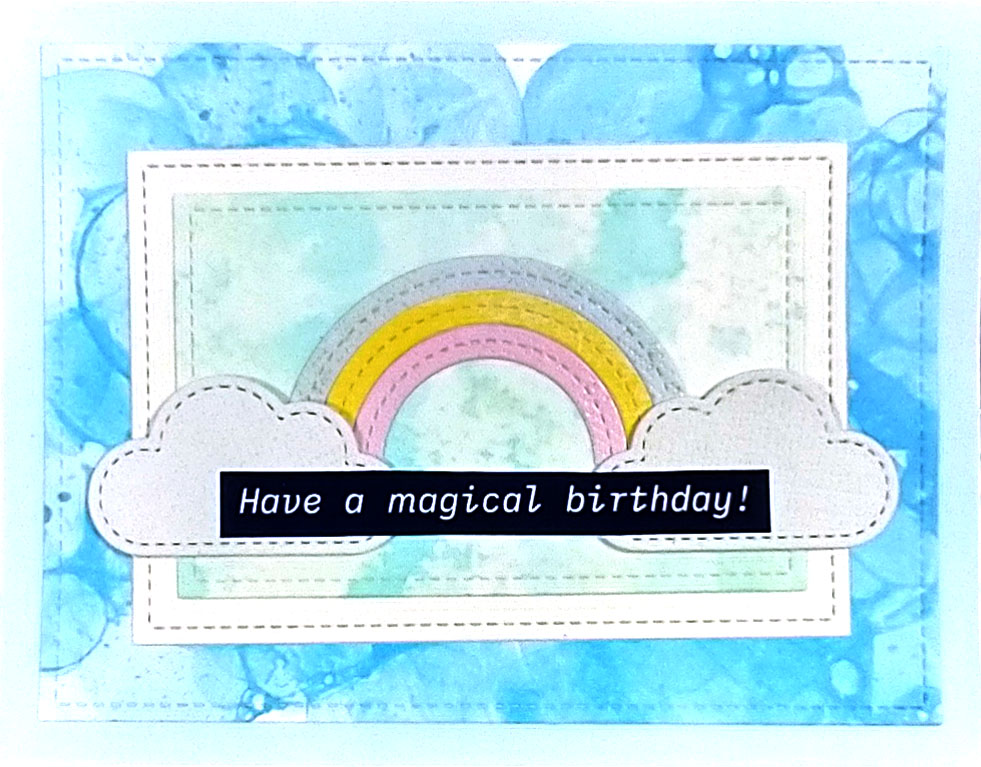
Next up, let’s talk bubbles! These backgrounds were made months ago. They have been saved in my stash of mixed media pieces for a good occasion. Bubbles pair fantastically with sea creature images. Now look at the bubbles acting as sky behind my rainbow. Lovely!
If you want to make your own bubbly background, our fearless leader Alice has you covered. Back in the early pandemic days Alice hosted a series of tutorials. These were great for crafting when we were all homebound. One tutorial was all about making bubble backgrounds. Alice does go trough some trial and error to get good results. If you want to jump to the success, try heading to the 23 minute mark.
These are the kinds of antics we get up to as part of the membership here at ScrapHappy. Alice does offer free events and free videos/crops to the wider community. However, if you want all the fun of ScrapHappy, you just may consider joining as a member.
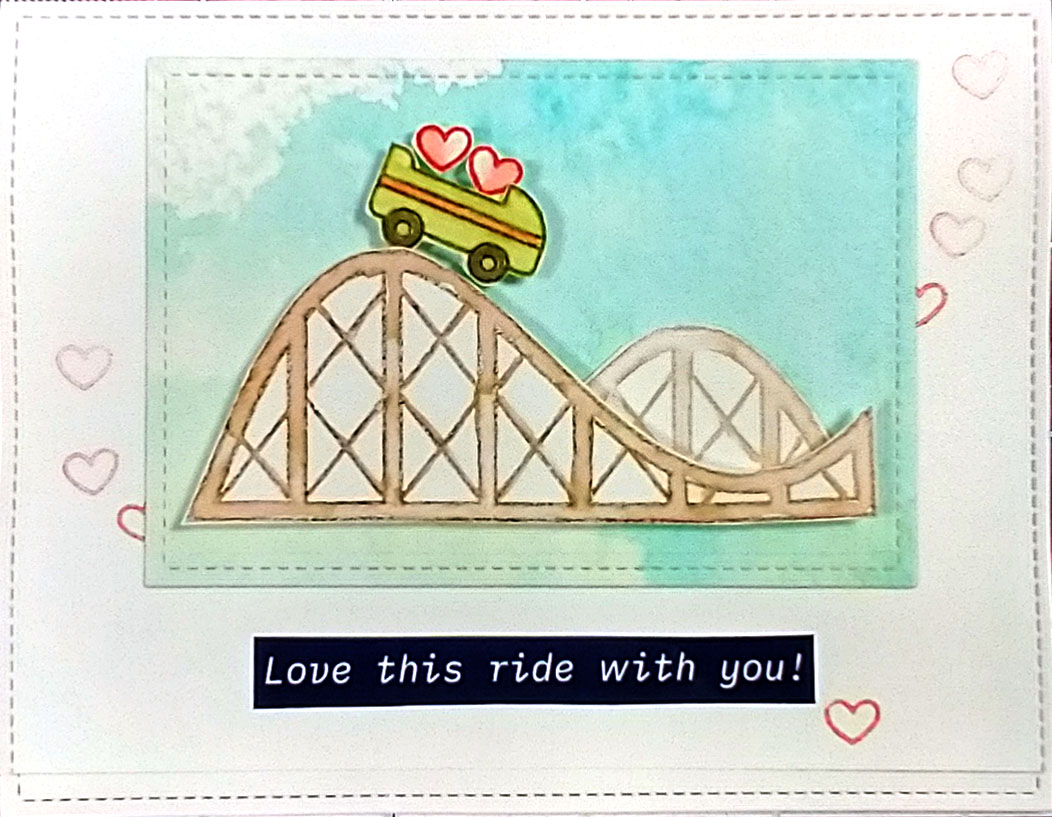
Let’s take a look at a couple more details. See the background behind the roller coaster? That was part of a watercolor “sop up.” What does that mean? When I have watercolor paint left on my surface, I’ll mist it with a bit more water and soak up all the color on a spare piece of paper. That paper goes into my bin to save for later. Those pieces come out at times like these when I need a quick yet interesting element for a project. Now take a look at those seashell die cuts. Those were cut from “sop-up” paper as well. I can align the die to the prettiest color zones of that paper and cut out the pieces I like.
The Images
Speaking of die cut images, let’s turn our attention to the sizing of images. Lawn Fawn is know for some of the smallest images on the market. I’ll be honest, sometimes I don’t even know how to begin using their stamps to create an entire card. I have learned a few tricks along the way.
Repetition and Grounding
When working with small images you need to provide a “nook” for the images. If you just slap them on the page they can feel disconnected and “floaty”. If you give them a place to land, they can feel solid and grounded to the design. The seashells on the left are sitting on the sentiment strip as grounding. There are also three of them for repetition. Not only does including more images help fill up the space, but the odd numbers are visually pleasing. Repetition does not have to mean exact duplicates.
Yet in the starfish there are exact copies. These are grounded by the two side of the bubble background. The third, upper star helps bridge the gap. Plus the sentiment split across the zones helps link everything together visually.
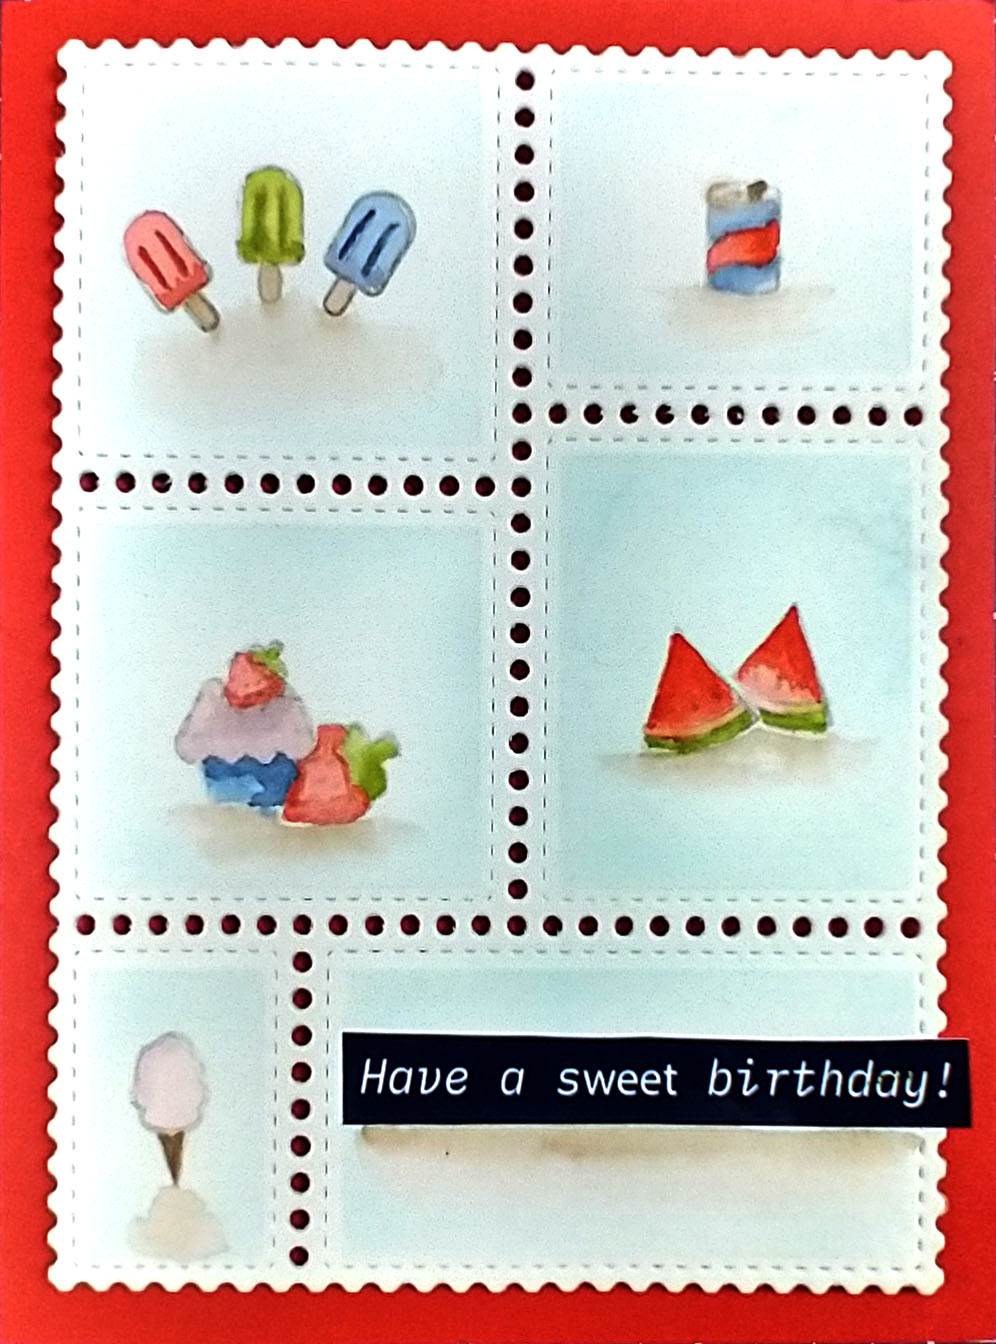
Smaller Canvas
A big trick is to make your working space smaller. I accomplish this by using rectangle layers to size things down until the images aren’t swimming in too much space.
A very hot take on the smaller canvas idea right now is postage stamps. Each little postage can contain a small image. Using repetition of the postage stamps allows each image to have it’s nook while providing cohesiveness across the entire card.
Spotlight
Repetition is my go-to way to bring interest to a card. However, some ideas just need that one “pop”. For this card I really wanted to highlight the idea of a pearl in an oyster. However, my image was really quite small. The solution? Lots of stepped up layers to create a bullseye on the image. The die cut circle layers are each popped up on thin foam tape. The first circle is on one layer of tape. The second circle is on two layers of foam, and so on. That brings us to the focus of the card. The concentric circle pattern creates both repetition and a smaller canvas at the same time. Plus that bold black sentiment is a magnet for the eye.
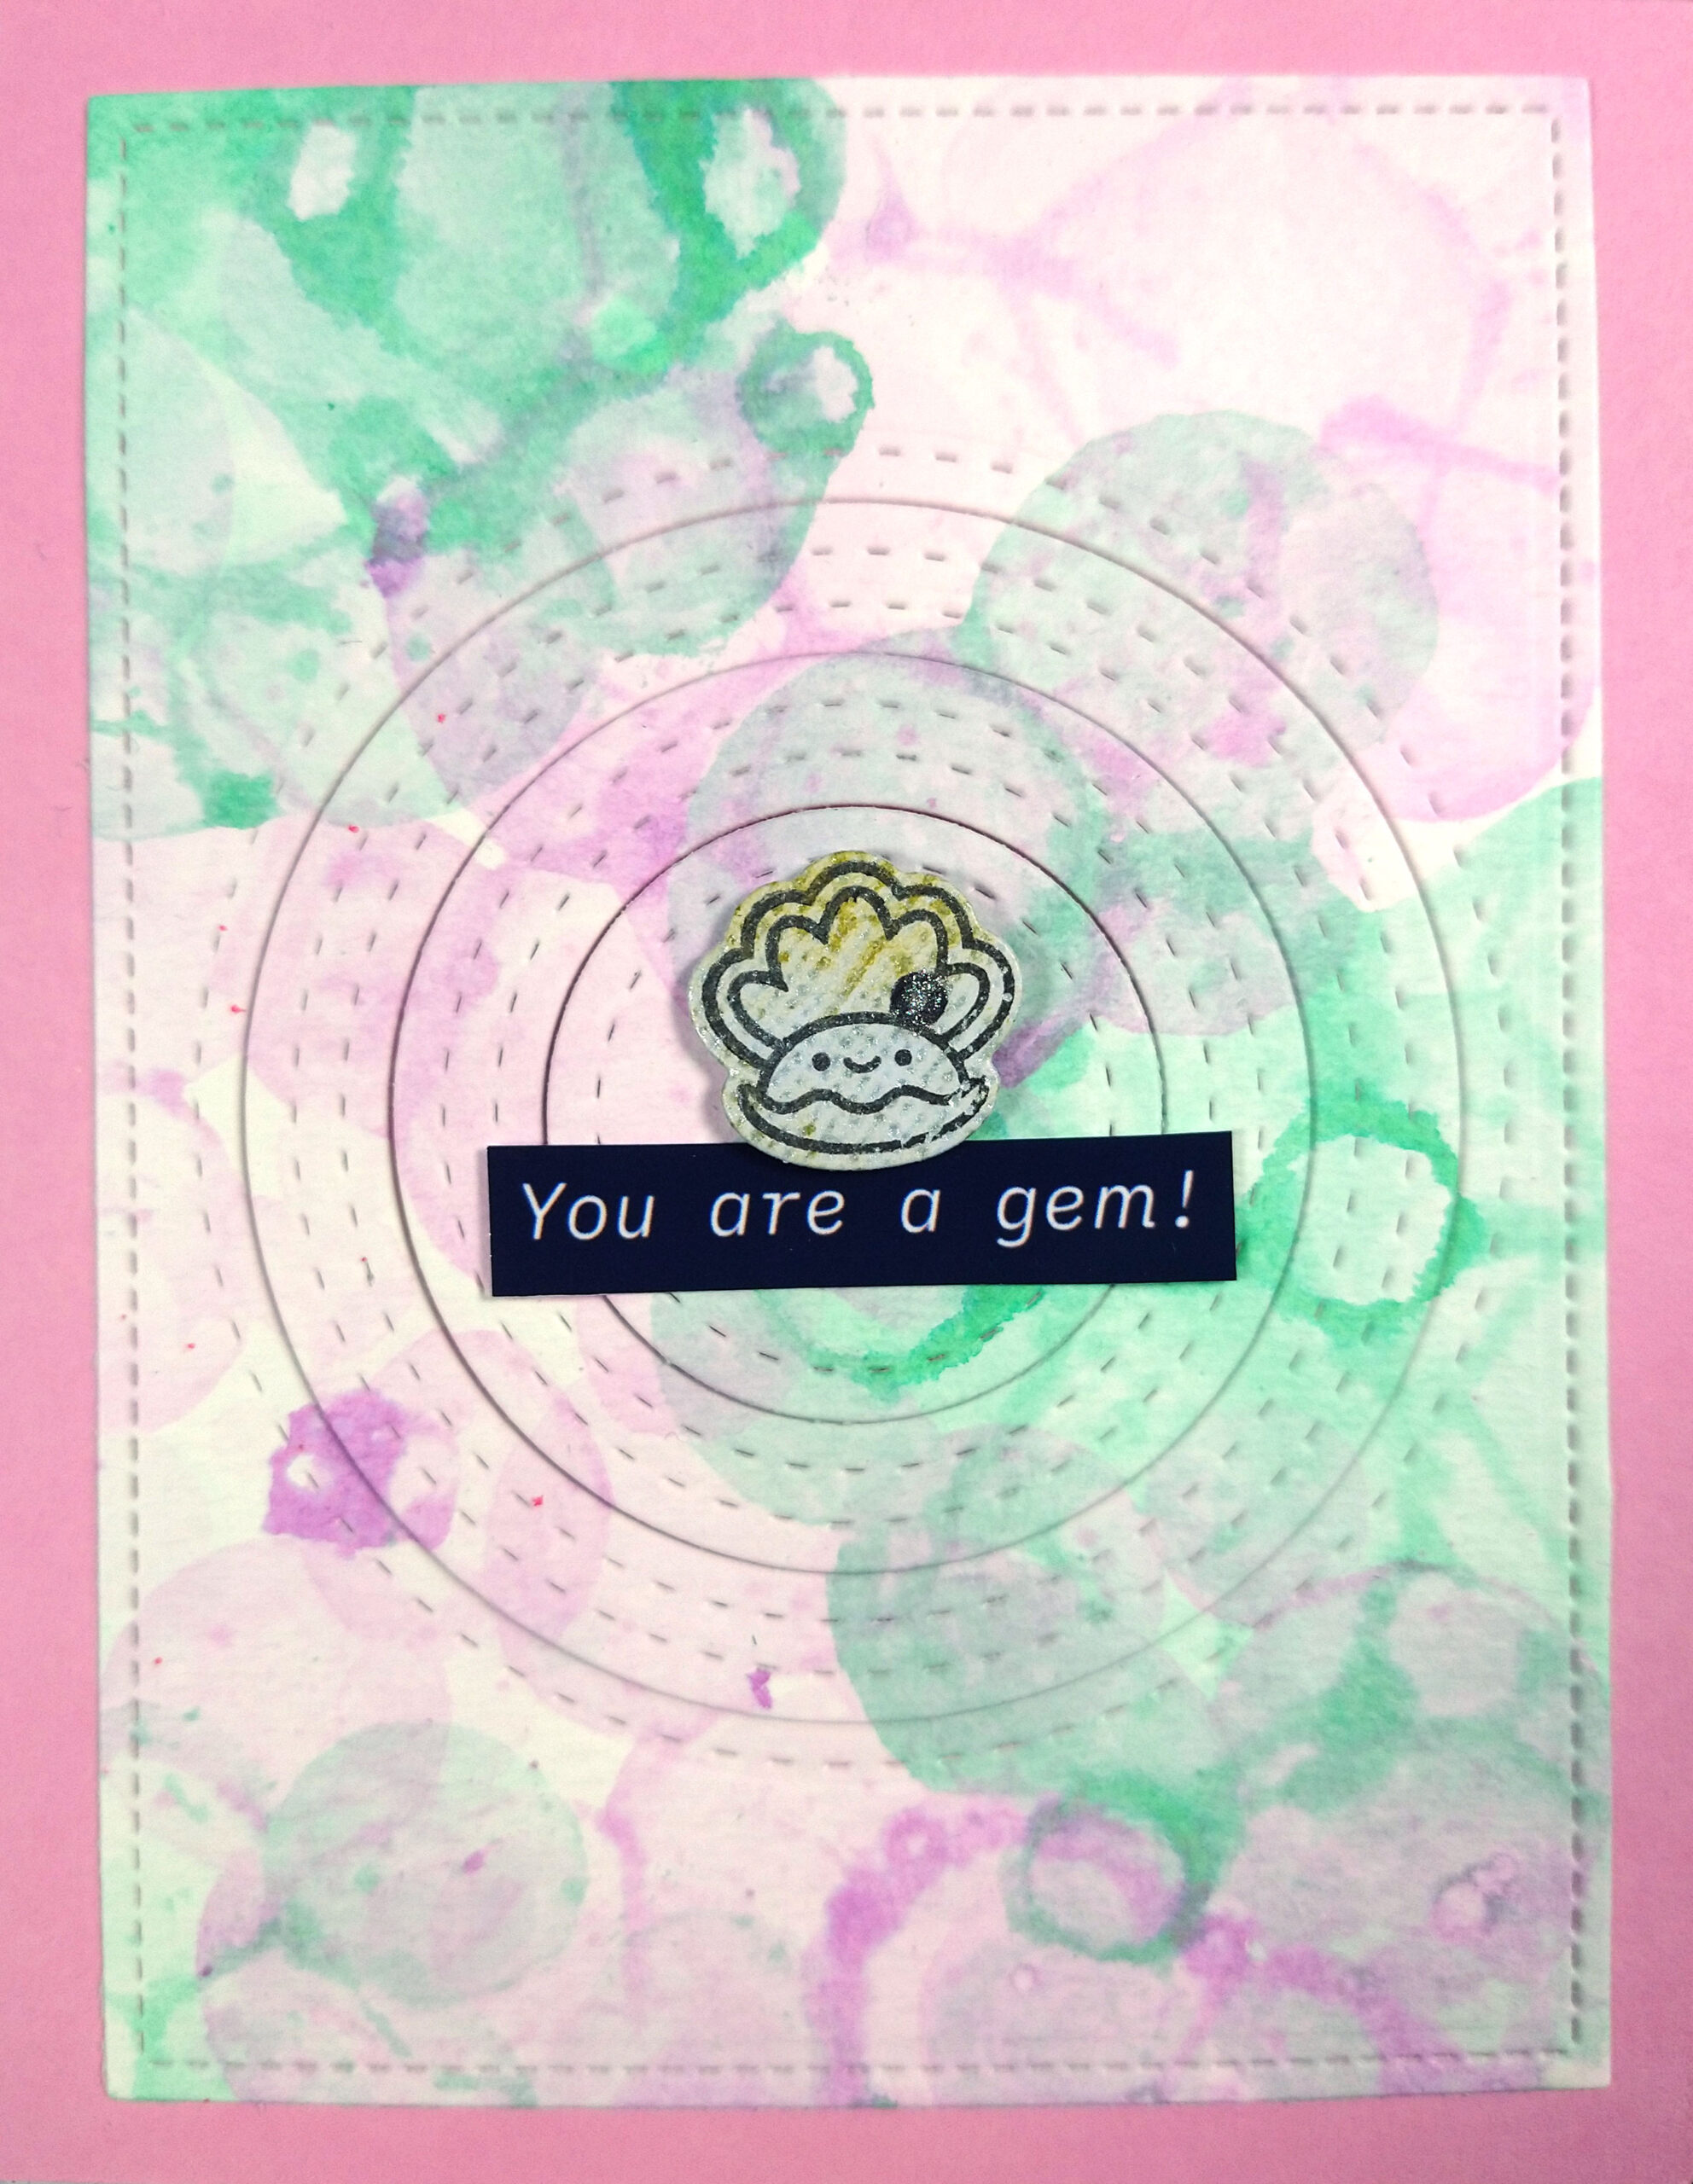
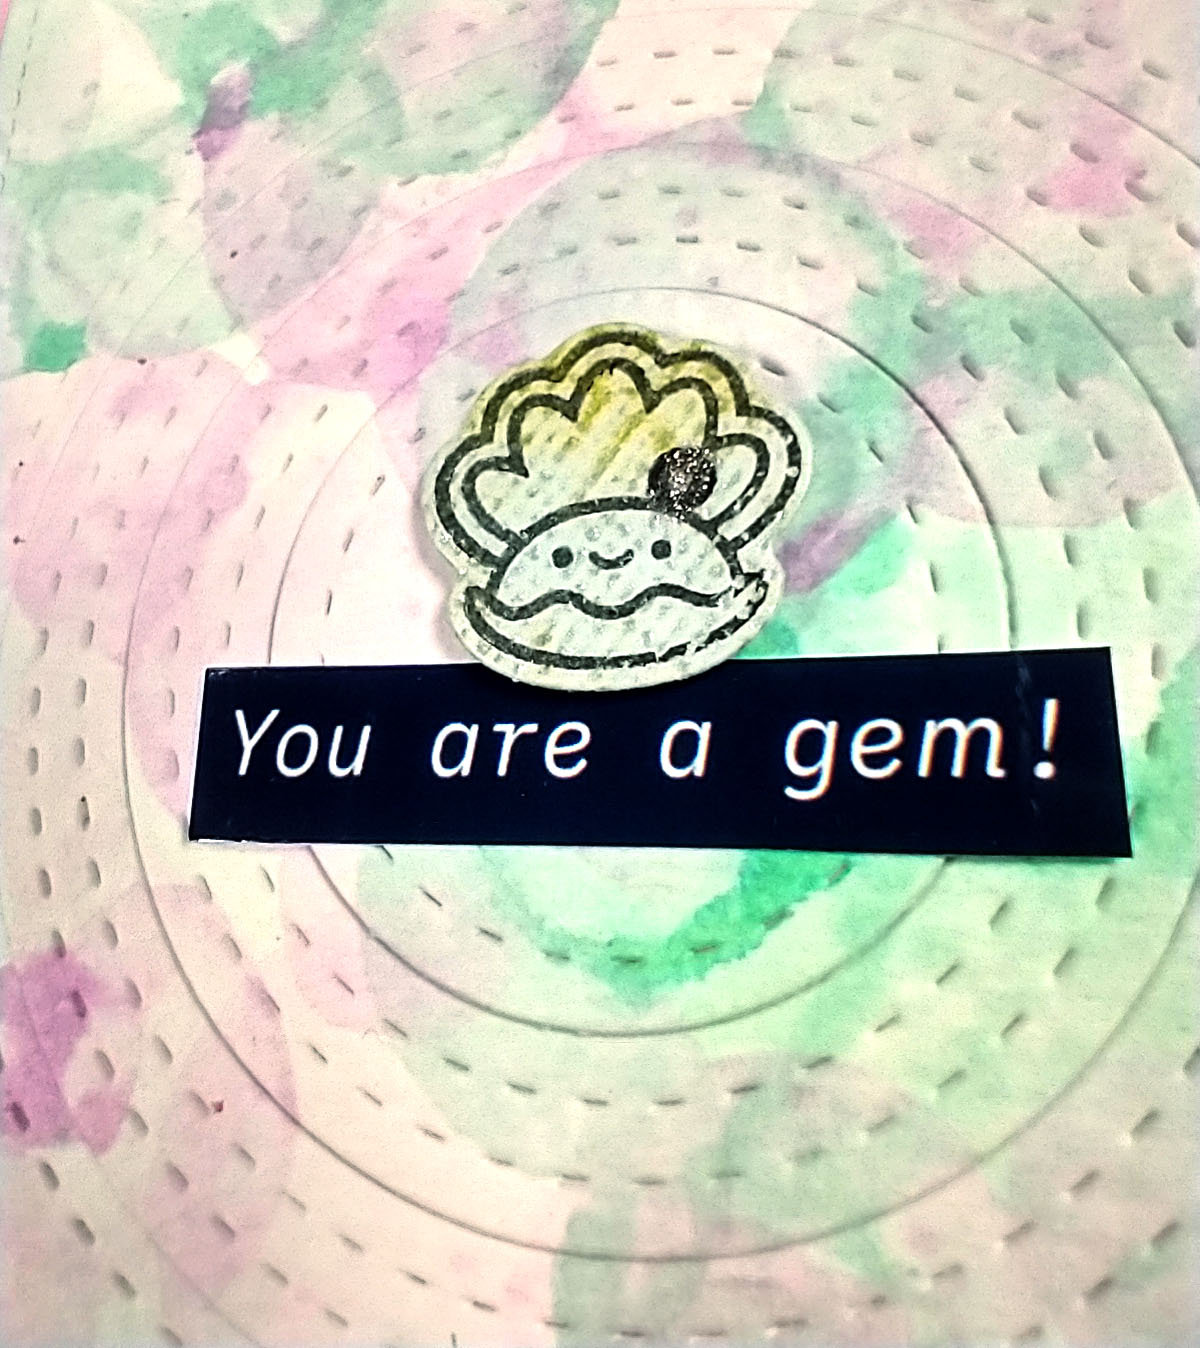
Yes, I know my shell is a scallop and not an oyster. I know my pearl is the wrong color. I know pearls are not gems as my sentiment suggest. But we all get the idea, right?? LOL.
I hope you enjoyed my summery take on card making. I had way too much fun just sitting and creating. Pulling together the vibes of the current season for things that can be used any time of year is totally my jam.
And yes, “Your’re my jam” needs to be the next punny greeting for more strawberry cards.
About the products
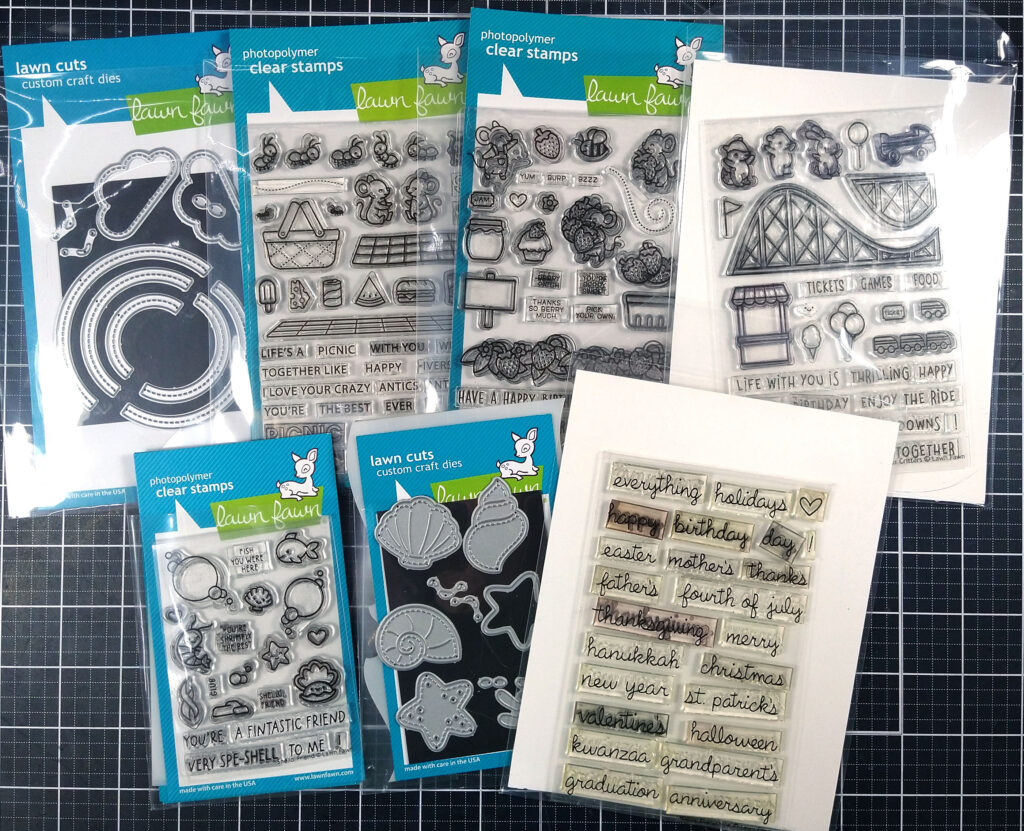
Sets used, from top left:
Small Stitched Rainbow die set
Crazy Antics stamp set
Berry Special stamp set
Coaster Critters stamp set
Shello Friends Stamp & Die set (NEW!)
Stitched Seashell die set (NEW!)
(Not used) Happy Everything sentiment set
(Not pictured) Large Stitched Rectangle and Small stitched rectangle sets
Other items used (not pictured):
Waffle Flower, Postage Collage Die
Waffle Flower, Postage Collage Coloring Stencil
Waffle Flower, Nesting Stitched Circles