
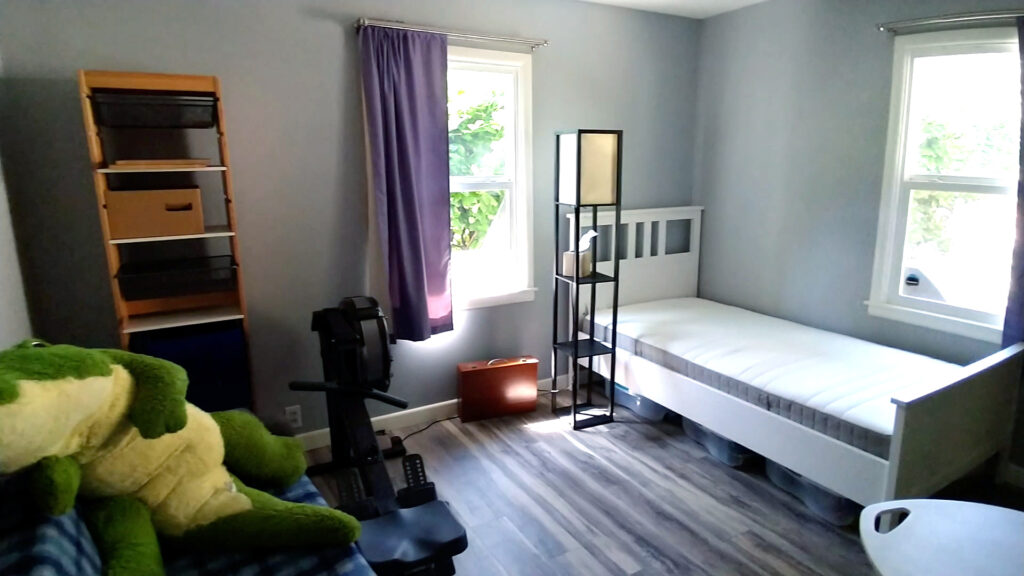
If you had a chance to design your craft room from scratch, what would you do? Well, I had a chance to do just that. Kinda. Sorta. Let me explain. For years my crafting happened in a dark corner of an unfinished basement. Once my middle kid moved off to college I started eyeing that bedroom as my future craft space. Then when my kid permanently moved out, I took the opportunity to move my crafting upstairs to that room with heat and windows!
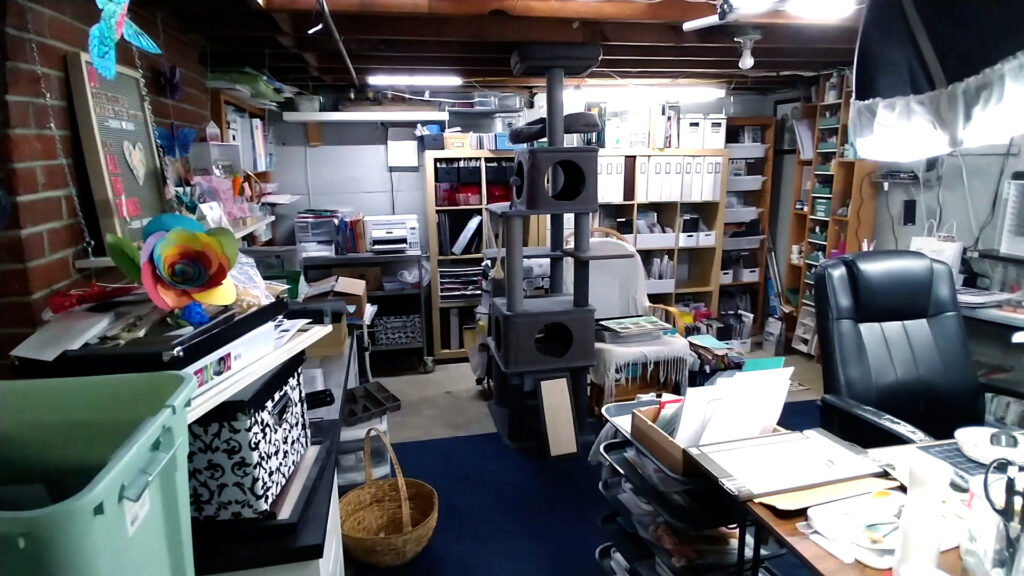
In all honesty, the basement wasn’t that bad. It had many things going for it. But, to keep the story short, this space was no longer working for two reasons.
- The noise from the furnace and my husband’s nearby-office conference calls were interfering with my YouTube plans.
- It just wasn’t lovely. Pipes, wires, cobwebs and ant dust all surrounded me. (Also a factor to my YouTube plans.)
The urge to overcome those two downsides hit me one day. I decided to stop thinking about moving and actually do it. The moving process took me a while but I got it done. I had a lot of organizational decisions to make along the way!
Since we share organizational information here on the blog, this makeover fit the bill. This involved a lot of parts and pieces of organizing. So let’s look at them one at a time. I’ll share my organization process, tips & tricks, and still be honest about what the challenges are. I hope you can find some ideas for sticking points in your own organizational journey.
Evaluate!
Often we will get annoyed with something that isn’t working without really thinking about why. Is that thing that is bothering us really about that thing? Or maybe the thing is in the wrong place? Or maybe it is too crowded by other things? Ask yourself “Why am I annoyed?” Make a physical list if need be.
Make sure you make note of what is working also. There are pros and cons to any organizational system. If you decide to make a change, will you be changing out one annoyance for another?
For example, by moving upstairs I will no longer be near the utility sink in the laundry room. This makes cleaning up my mixed media messes so easy. Will I miss this? You bet. Is it still worth making the move? Also yes. Will I need to come up with a new process for dealing with that mess? One more yes. So, even with exciting changes comes trade-offs!
Lesson: Don’t rush in. Take time to think about the problem.
Keep What's Working
Many years ago there existed filing cabinets that fit 12×12 papers. I have been in love with that idea ever since. My budget at the time did not allow for that kind of storage. Nowadays it doesn’t even exist. What’s a crafter to do? Hack it of course!
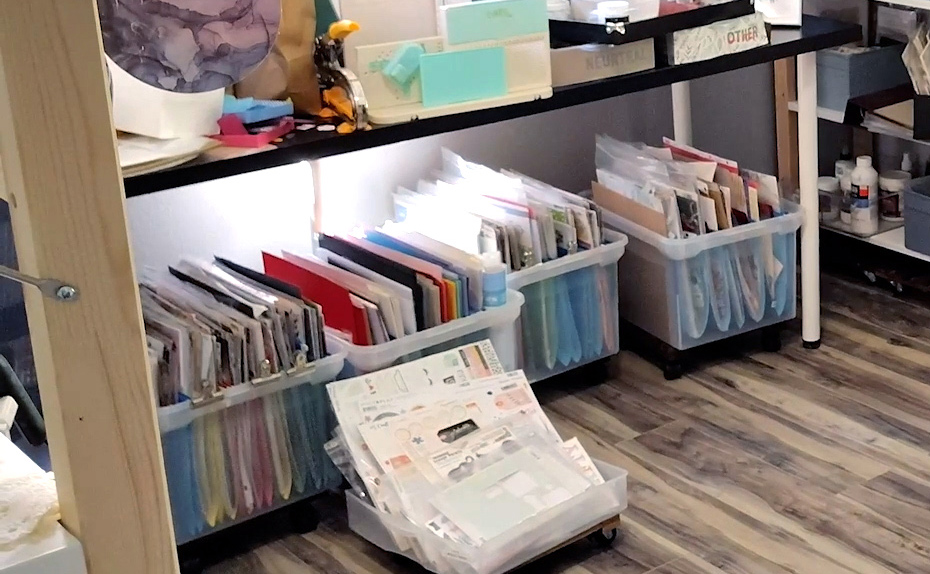
I created my own rolling files using office supply storage boxes and plant stands with wheels from Amazon. These have been super functional for me.
The pros: I can easily pull out a bin, flip through papers and push the bin back in place once I have what I need.
The cons: It does take up a lot of space. And all the space needs to be floor space. Floor space is always at a premium.
In my own evaluation I’ve decided that the pros of being able to easily flip through my papers far outweighs the floor space that this system uses up. I have learned about myself that I love flip-though organization. My stamps and dies are stored in a flip through manner. As are my stencils, embossing folders, embellishment bins, etc. I’ve learned this is what works for me over years of trial and error.
If you don’t want to take years to figure this out about yourself, there is help. In early 2025 we discussed the Clutterbug profile system. This quiz can help you figure out what types of storage are right for you by asking you some pointed questions.
Lesson: Make a list of what you like and what you don’t. Really think about the reason why you do or don’t like those things. Details will lead you to the better solutions!
Make a Plan (or 5 or 6)
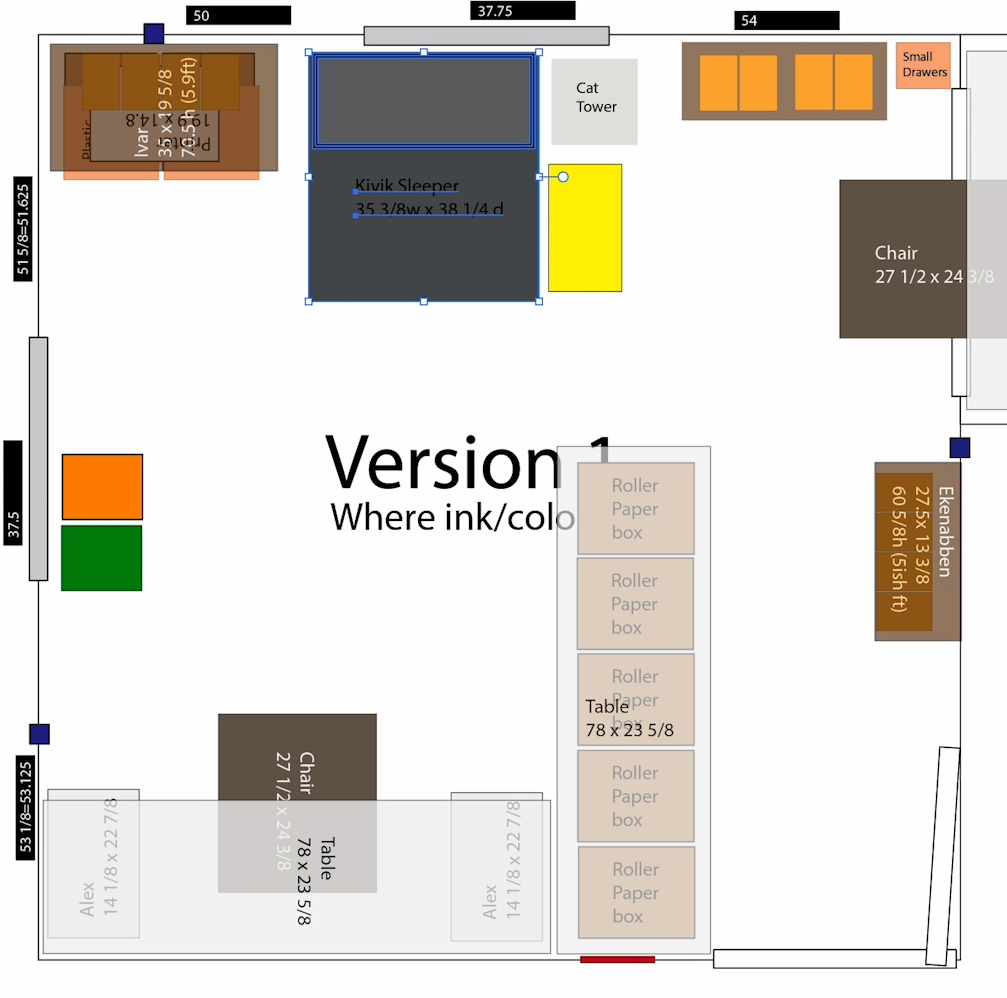
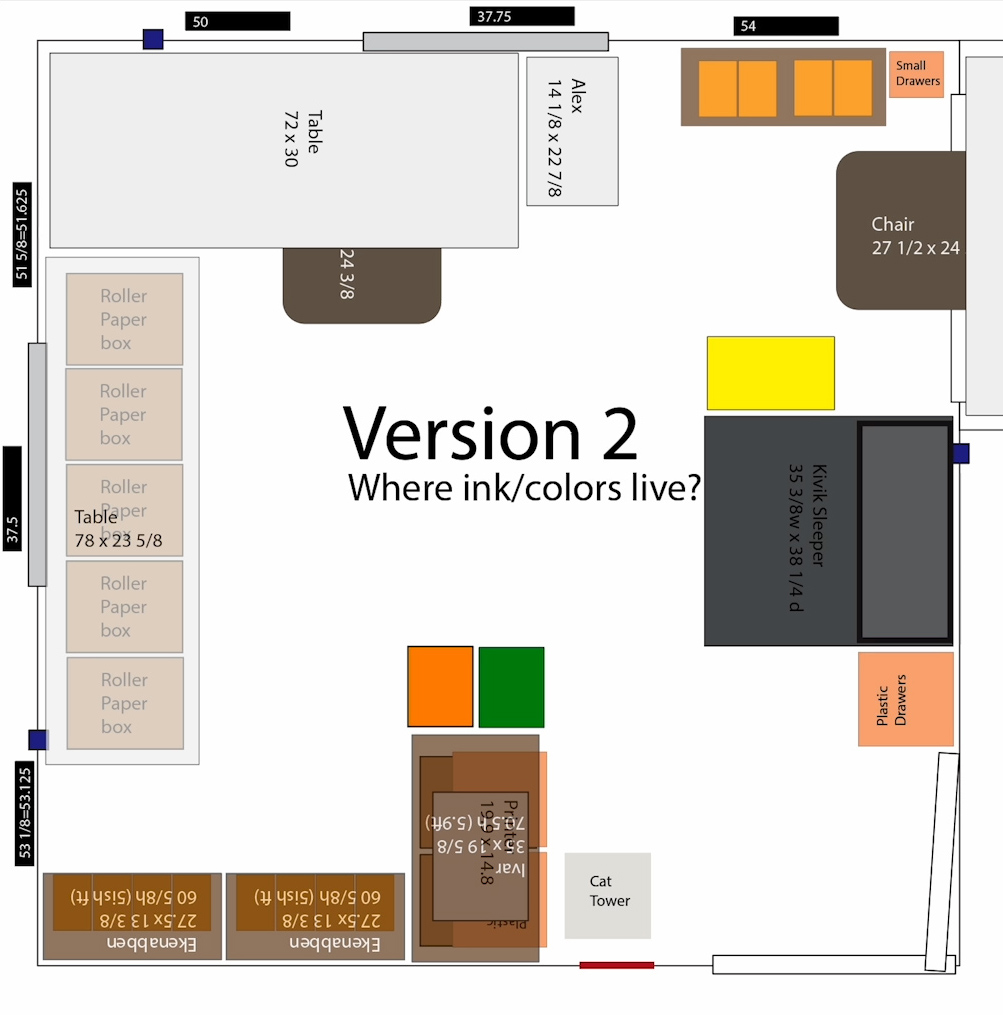
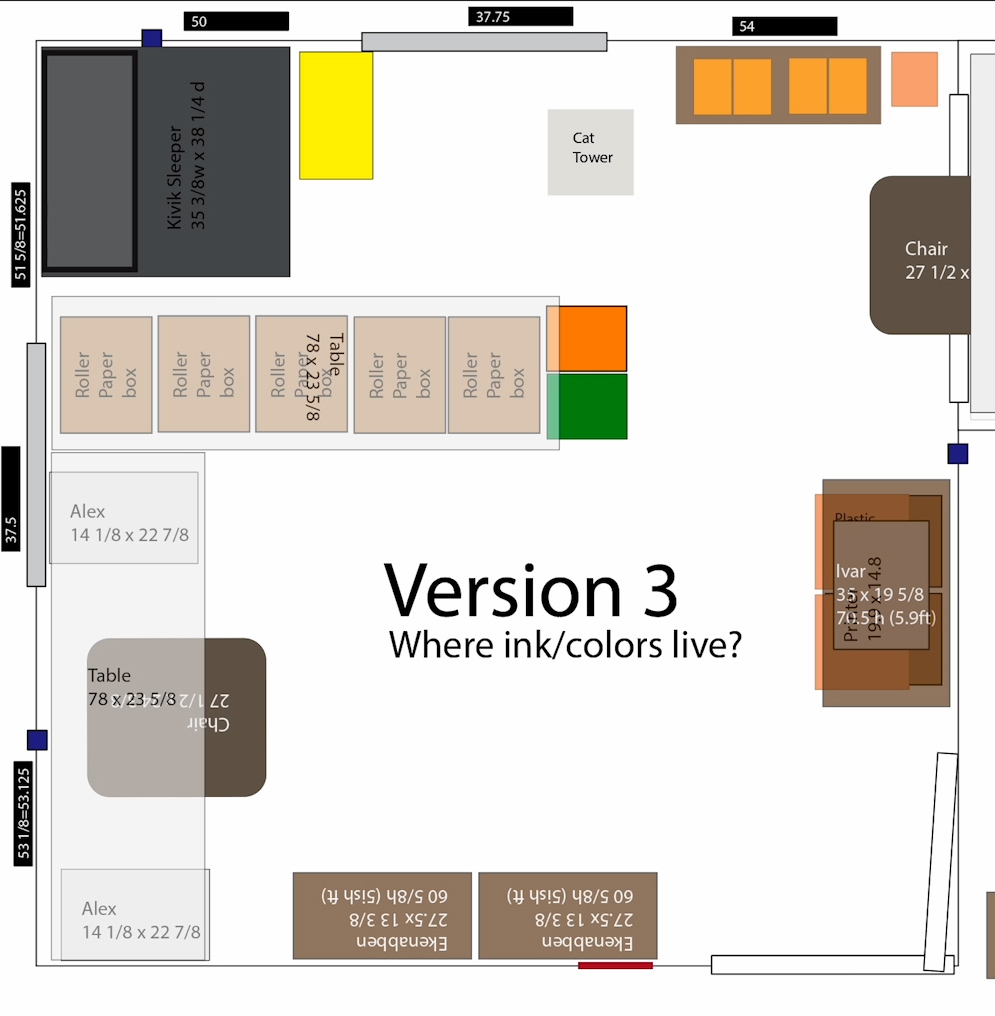
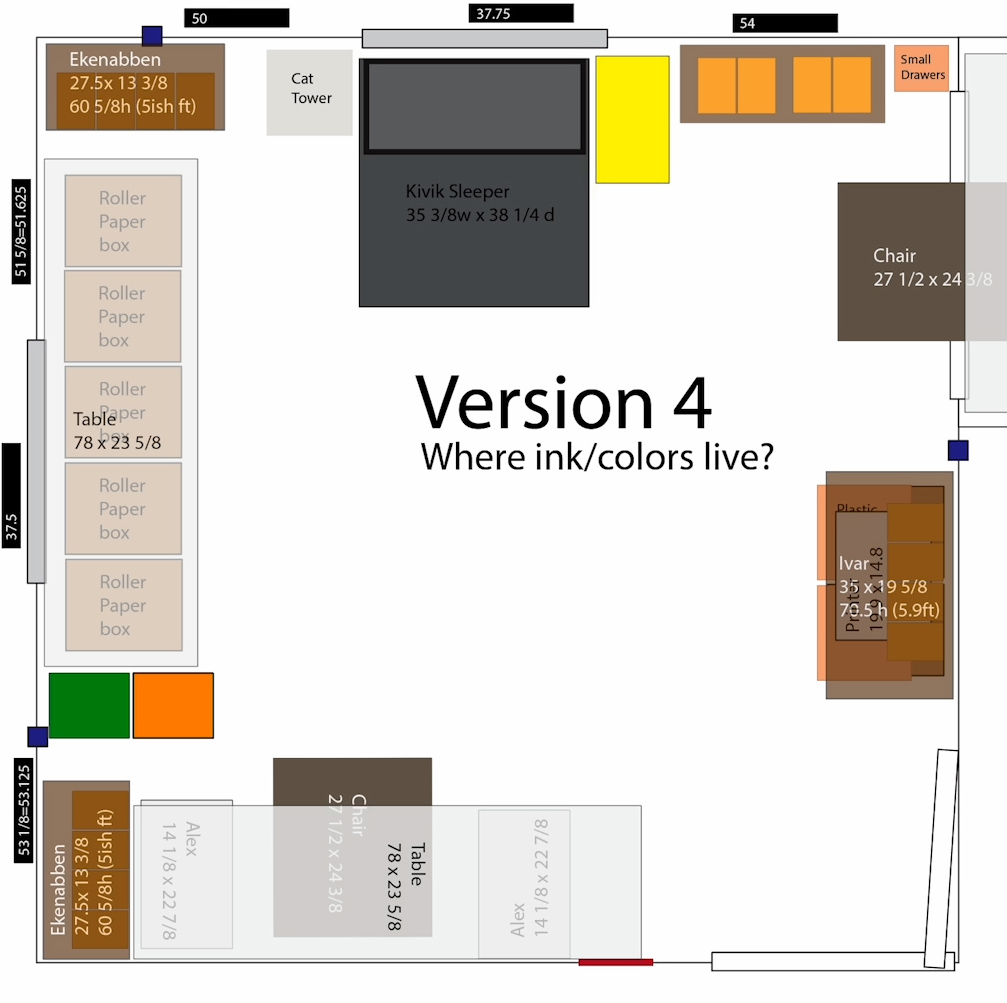
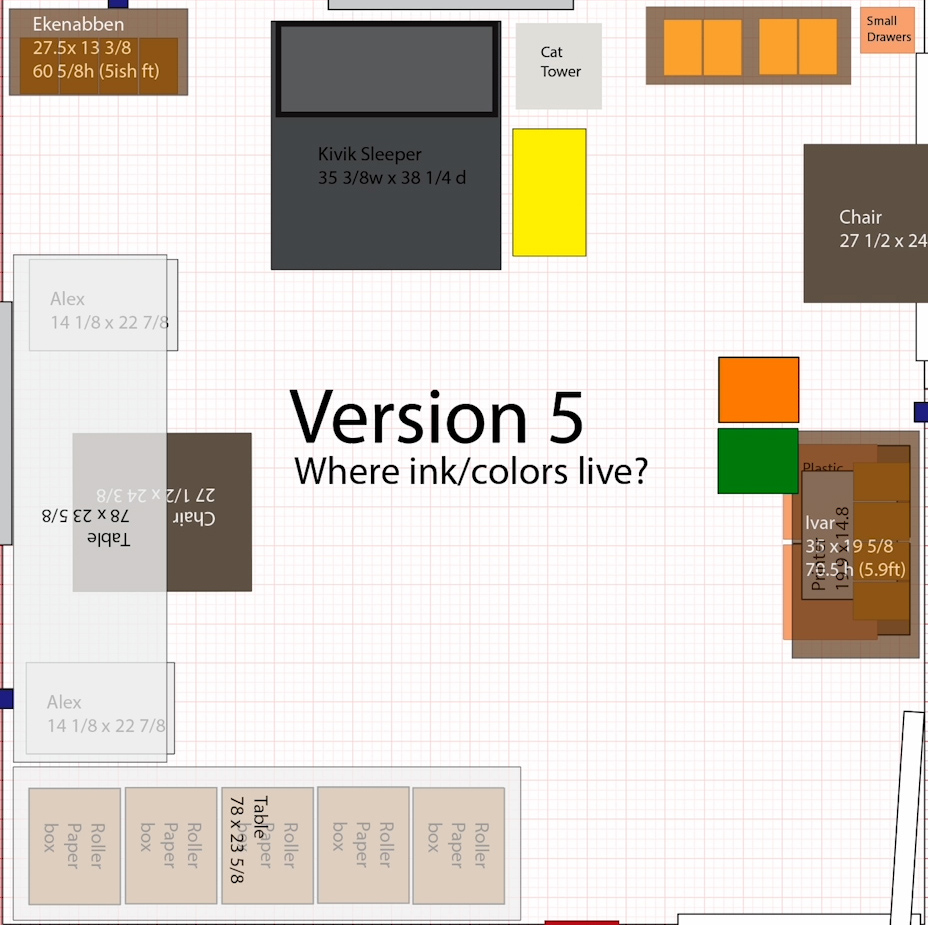
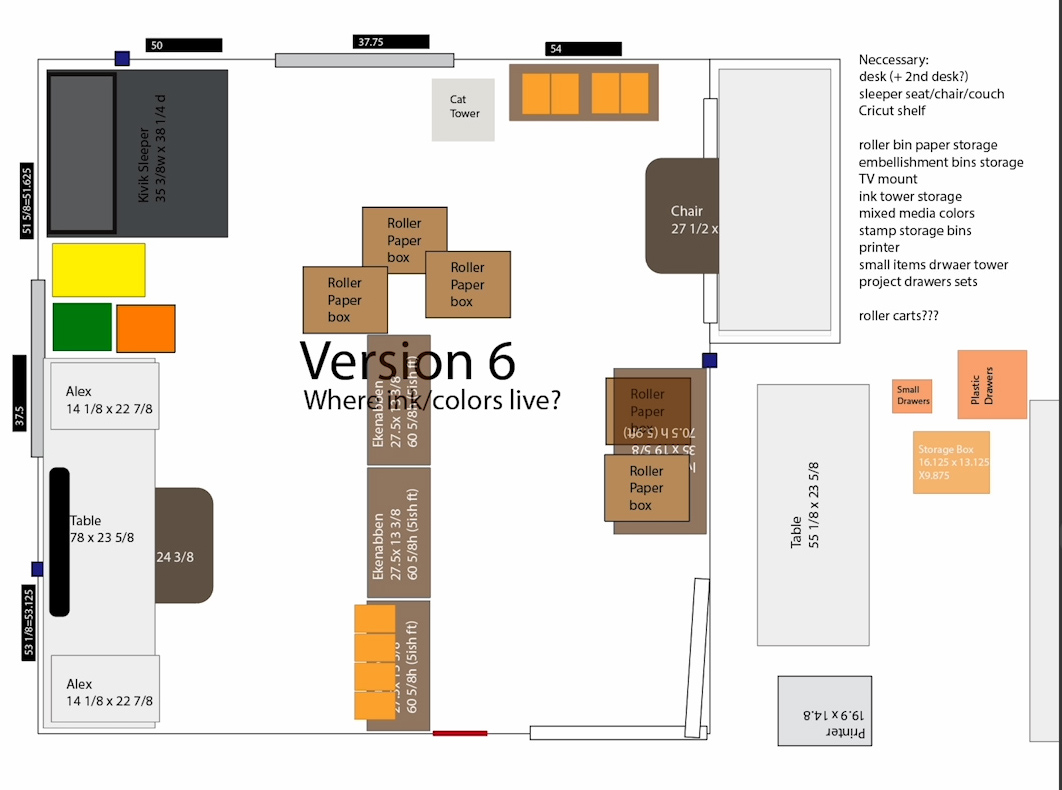
I was moving from a larger space to a smaller space so I really had to be sure things that were working would fit. Then I would know how much space I had left for buying new storage. All of this planning would also let me know how much stuff I needed to purge. Evil word, I know. But honestly a very important part of the organization process.
You may look at all those images and feel like I am a bit obsessive. And you’d be right. 😂 Importantly, through this process I learned that many of my ideas just wouldn’t fit! My imagination was not matching reality. This plan literally saved me a lot of pain as I approached this big job. My back would not have been happy moving furniture back and forth until everything fit!
You may not be entirely moving spaces, but you may be considering moving furniture, or adding some storage pieces. Whatever the case may be, having a floor plan will help.
Lesson: A to-scale floor plan is super helpful if you are doing a larger organization project. Grid paper or Canva can be helpful for this.
Oh, the pain of the purge
I mentioned purging. Now it is time to tackle it. I didn’t take pictures of the purge process; it was a very loooong process. I started even before the decision to move spaces happened. It really started from the pressure of my organization not working. Owning less stuff makes storing it easier!
If you have a hard time letting go of stuff, I get it. One psychology hack I’ve figured out is this: Use a very big box to purge. If you use a small box and it starts to overflow with stuff you’ll feel like you are getting rid of everything. However, if you use a big box and you don’t even fill it half way you feel like you did a good job without sacrificing too much.
Unfortunately purging doesn’t end with the initial organization. In my new craft room I have less space. I did build in a bit of room in each category for growth. Yet I know that indefinite growth just isn’t realistic. If I want to add things to my room then I will have to let other things go. This will build in an ongoing purge process. It’ll also make me think twice about buying new things. I have to want them enough to be willing to get rid of things I already own!
Lesson 1: Use psychology hacks to get yourself through sticking points.
Lesson 2: Make friends with purging. It’ll be with you for the life of crafting!
Form vs Function
I’ll admit I wanted some really cute storage in my new space. After so many years in a rather rough basement environment (cracked concrete and exposed nails!) I wanted to be surrounded by clean, pretty space. My first dreamy shelving got the boot right away since they were not functional enough. The shelves were not adjustable and thus a no-go for me (more on that later).
I had to remind myself that I needed functionality here! Sadly functional and affordable often comes at the expense of attractive. While my new shelving ended up being less pretty, that left me a bit of money to spend on bins in pretty colors. So I had found a happy medium.
Lesson: Make friends with compromise. If you have to give up something, see if there is another area you can spruce up instead.
Shelving Matters
Now it is time to tackle the big item: shelving. One of the biggest things that I noticed over the years is that having good shelving has made a huge difference in my crafty life. Good shelving serves two functions.
- It holds all our stuff—as long as it is sturdy!
- It makes finding stuff easy. Thus, it also makes putting stuff away easy!
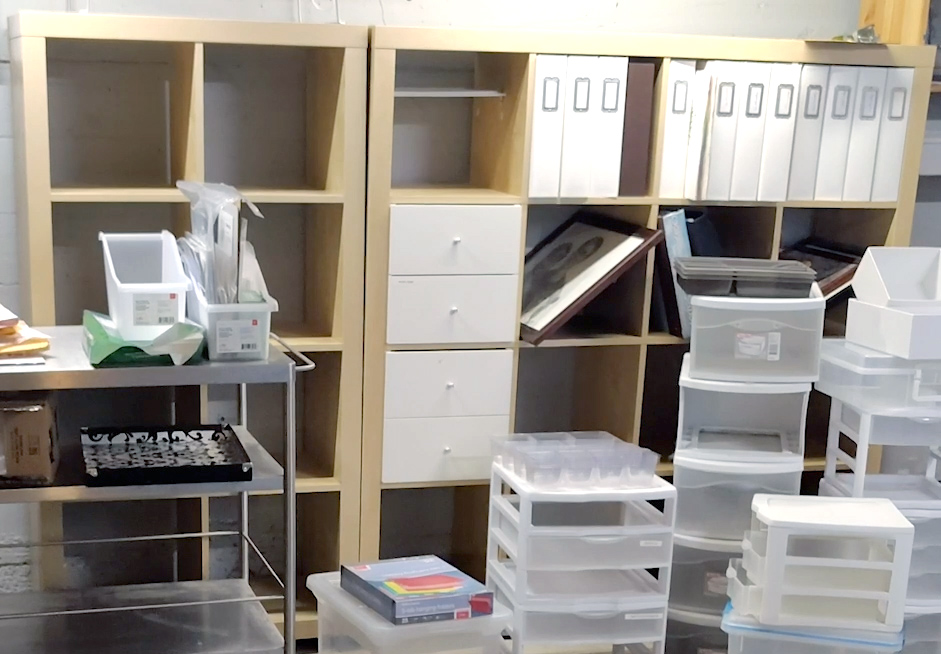
In the basement I had the very popular cube-style shelving. This style was good since it could hold the largest items, like 12×12 albums (which are really larger than 12×12!!) The flip side of that is they don’t hold smaller items as efficiently. No ability to adjust shelves meant smaller items had to be stacked in bins. Then those bins had to be stacked in cubes. This became very unkempt. It was hard to find things and put things away!
I ended up in a cycle of trying to find storage boxes that would fit in the cube shelves to organize all of these smaller items. I would buy and try one thing after another to maximize my storage. Yet I kept running into the problem of wasted space. It wasn’t the containers I needed to change, it was the shelves!
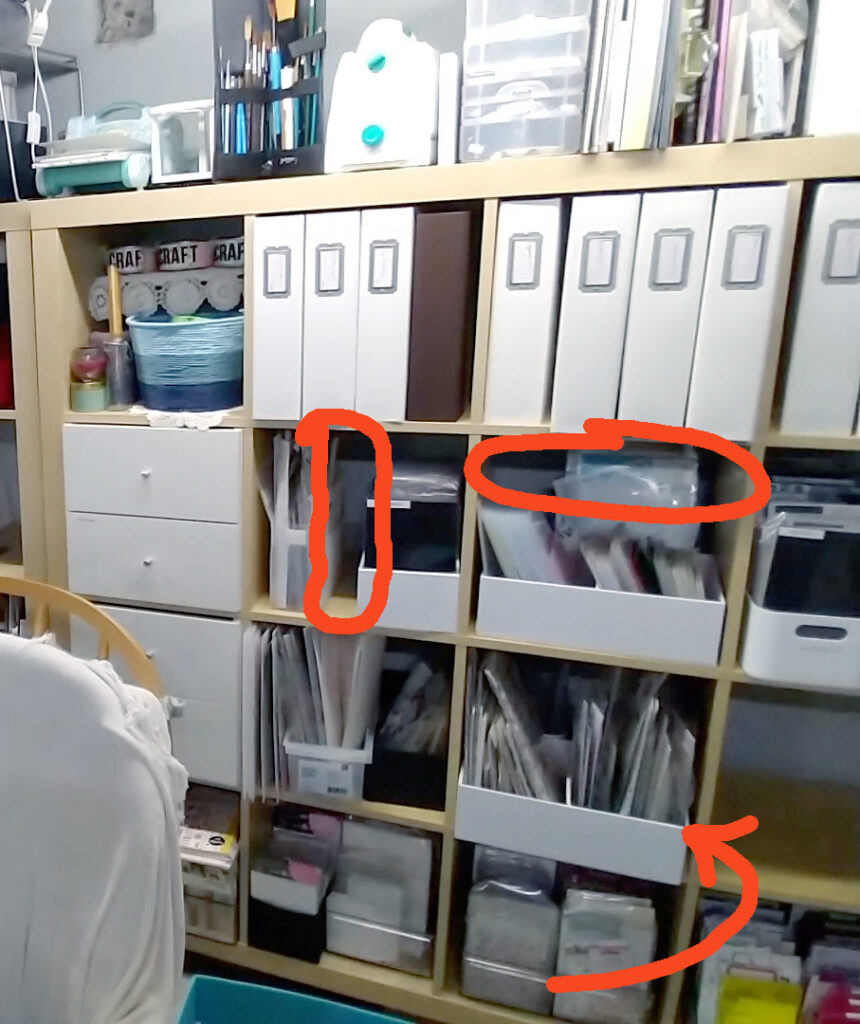
In the red areas are gaps in my storage that were being wasted. Spaces between items, above items or even, as indicated by the arrow, behind items. My storage boxes were never going to over come this. I needed new shelves!
Lesson: Investing in a good solution may be better than spending time & money on “bandaid” solutions.
When Repurposing Works
I don’t want to imply that you have to buy everything new again to get what you need out of organizing! Yeah, we can have the dream craftroom, but there is always a reality waiting for us. Often times that is budget!
What was working:
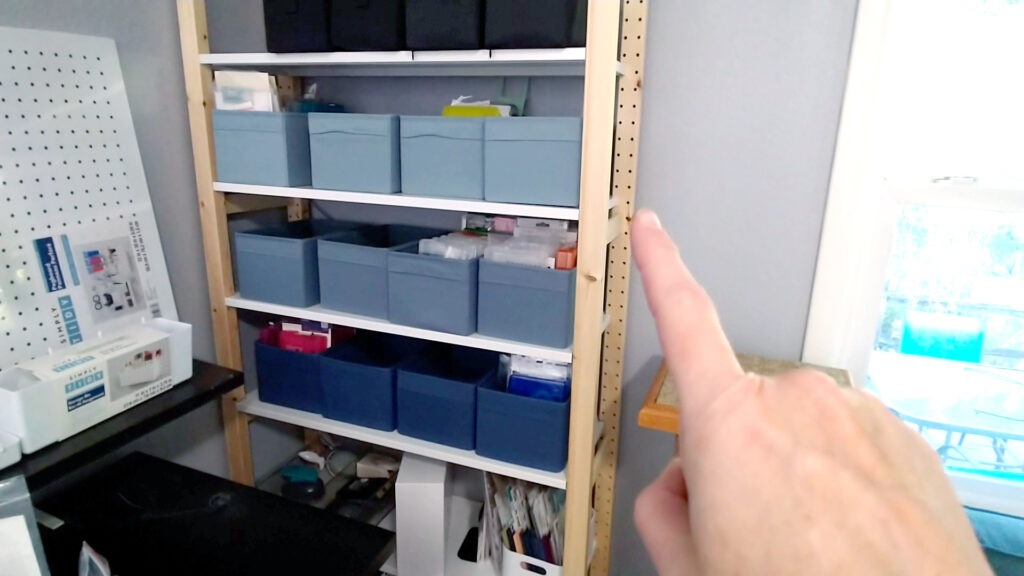
I had found bins that nicely held my stamps and dies. The bins were affordable enough, could hold a decent amount of items, yet didn’t get too heavy for me to pull off the shelf to look through. These bins worked for me, plain and simple. My task was to find shelves that worked for the bins.

I tried out a couple of shelves that I had in the house. The one on the left had semi-adjustable shelves at wide intervals. It kind-of worked. However, in the spare bedroom was a set of shelves that I had just dismissed, and it turned out these were perfect. The shelving was fully adjustable! What an amazing feature! Plus my bins fit the width of the shelves very well. There is still space between and above the bins. But instead of feeling like wasted space, it feels like “breathing room”.
What wasn’t working
It just wasn’t lovely. It didn’t match the new furniture I had in mind. I had to take a deep breath and remind myself of a previous lesson—make friends with compromise. It fit perfectly and it was free. I could make lovely things happen in another way.
I got lucky finding something in my own home to repurpose. If this isn’t the case in your home, don’t give up. You can try finding items on places like Facebook Marketplace or Goodwill. These can always save money. However, they do take some time to track down. In organization there is always a time vs. money equation to deal with.
Lesson: Try things you have first. Or take some time to find used things with specific dimensions to fit your needs.
Maximizing Space
Many crafters have confined spaces to work in. Not everyone has a spare room like I do. So it is crucial to find ways to maximize space. Maybe you like to stack bins in a closet so they are out of the way. Perhaps you prefer to just toss things in one larger tub so that clean up is a breeze. For me I like things to be fairly open. That leads me to specific choices in maximizing my space.
In the basement I didn’t have the option of wall storage. We did not want to add bolts into a concrete wall that was already cracking with age. Eek. The new space gives me the flexibility to tuck smaller things on little shelves. I put things there that I want to easily reach for and can easily put away. These shelves gave me new zones to work with. We’ll talk more about zone organizing in a minute.
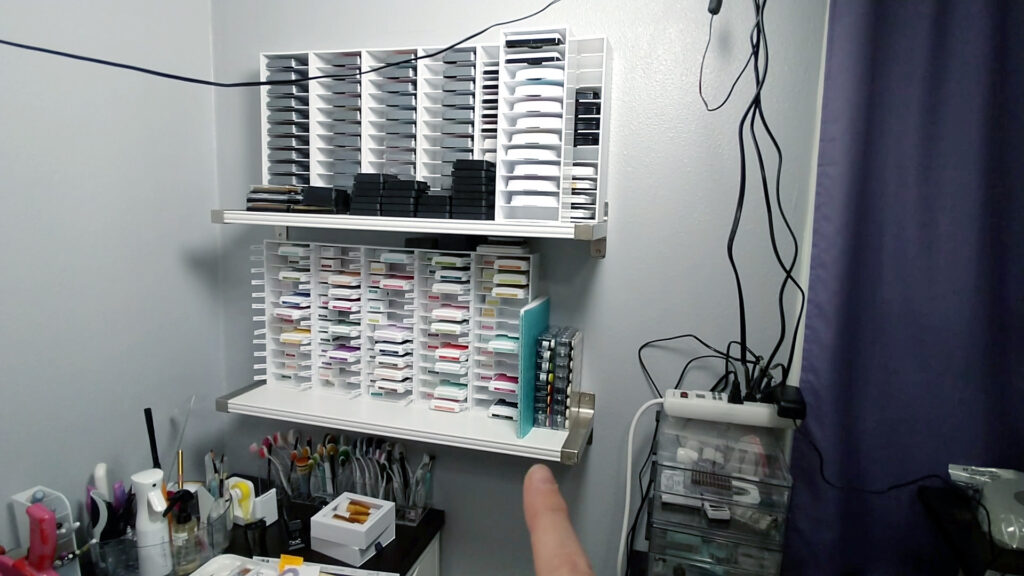
Wall shelving doesn’t have to be huge. Plus it can be a great place to store really specific things. My ink storage is one example of where specialty storage was right for me. I tried all the bandaid methods of storing my ink and I was constantly annoyed. I would drop and topple piles of ink pads on a regular basis. It was time to invest in a practical solution.
While this example uses special products, the next few examples are simple “hacks.” See if any of these will work for you.
Speaking of wall space, peg boards are my new love. They make it so easy to grab things and then put them away again! If we don’t put things away when we are done they can easily go missing. When we know where our stuff is, we are more likely to use it! Organization really does matter.
I used my pegboards to two purposes: to make things easy to see, grab and use; and to create pretty color! Remember I’ve compromised on furniture that wasn’t pretty. This is my chance to bring pretty color to my space!
A good note here, pegboard is readily available at most hardware stores. You may be able to save money by avoiding specialty craft versions! You can always paint industrial board to tie it into your decor. For me, I got mine from Michaels while it was on sale. It wasn’t a deal at full price, but on sale it rivaled the DIY option.
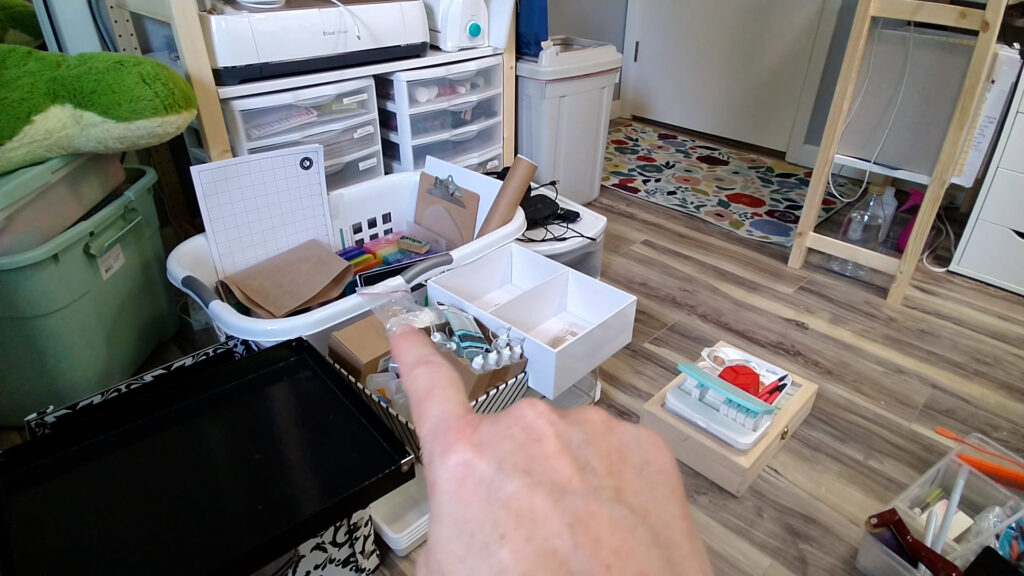
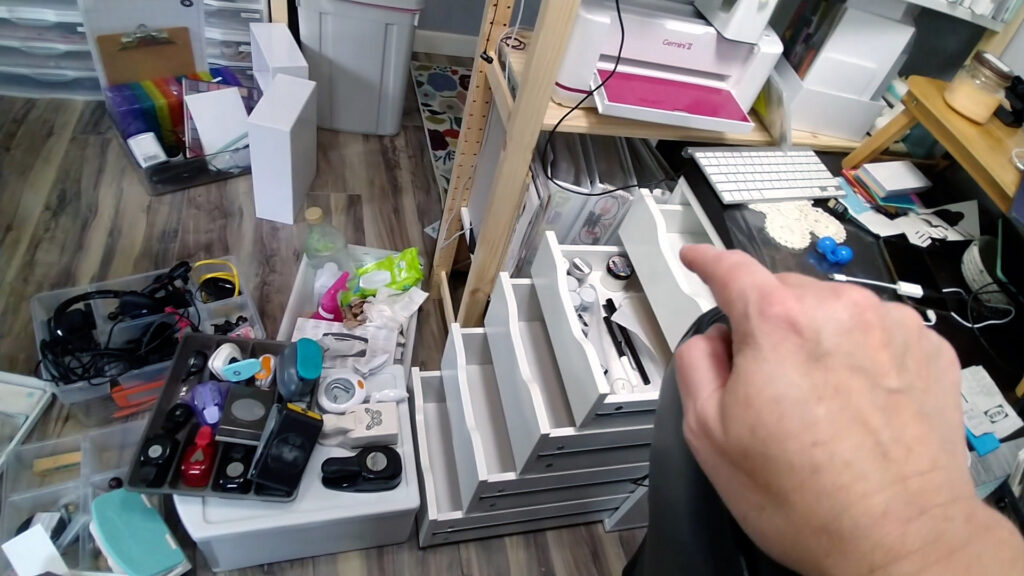
These small drawers are from the general storage department. This kind of organization is both cheaper and easier to find than specialty craft organization. I was able to pick up bins when they were on sale. I could also add more bins over time if needed. They tuck away into smaller nooks. Plus they store odd things like extra glue, trimmer blades, power cables, reinkers, etc.
This stuff isn’t what I reach for often so it doesn’t need to be close to my work space. Plus it is all small fiddly things. I would be hard to find what I needed if I dumped it into a bigger bin. These bins fit the motto a place for everything and everything in its place.
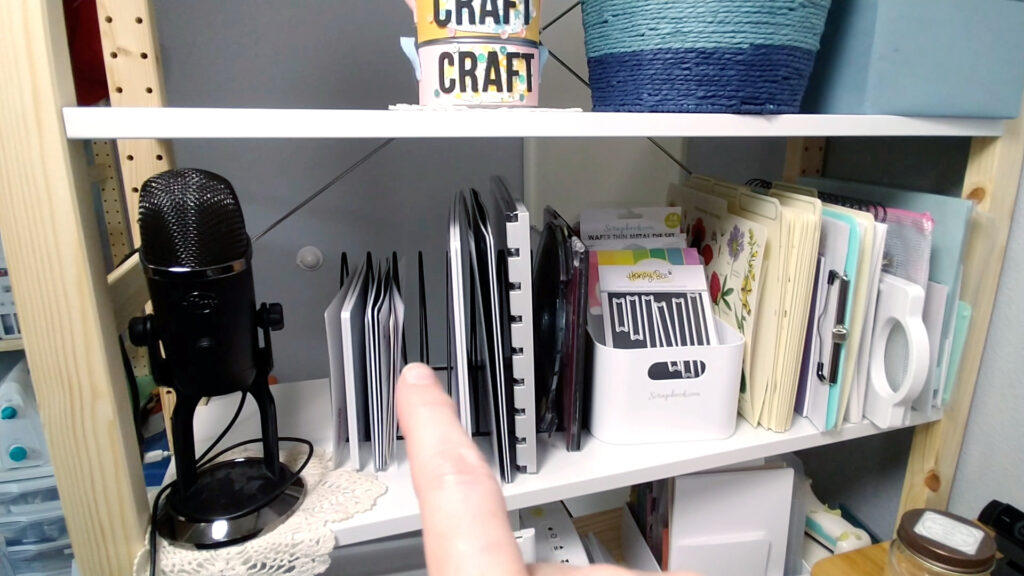
That tower of bins was way too tall. Yet is provides a lesson… Going vertical with storage really helps. Tall shelving helps maximize floor space, obviously. But what about going vertical on a shelf? I found I had a lot of flat objects that were taking up a lot of space: a Misti stamping tool, cutting plates for my die machine, photopolymer craft mat, clipboard, notebooks, even a pile of scratch paper for inky messes. I wanted to figure how to get this stuff out of a big stacked pile. I had to take it vertical. Enter the kitchen rack.
This little metal stand allows me to slide flat things in. It holds them upright. Then I can easily pull them out to use. Plus these racks were cheap on Amazon.
Lesson 1: Evaluate when you need special storage and when finding a hack makes sense.
Lesson 2: Consider if you can hide lesser used items away in a corner.
Fine Tuning
As I moved everything into my room I wanted to place it in areas of most used to least used. This zoning style of organizing is an important one that we don’t consciously think about often. I did mention storage zones just a bit earlier, but let’s take a closer look.
I pointed out having my inks close to me so I could easily grab them. My spare glue is tucked in a storage drawer in a farther corner. When you really think about what you use most often, you’ll be happier if it is easier to access. Maybe your ribbons can all get shoved in a bin, but your bling needs to be in a tub on your desk. It all depends on the things you use most.
Take a look at these drawers. I have the chance to fill them with the things I use most. They are right by my side and have super easy access. Now look at the pile of punches. Do I want to take up most of the drawers with all those punches? Even the ones I don’t use often?
I decided that not all my punches had to be stored together! Okay, I’ve been doing this a while, but it makes a good illustration to my point. Not all like items have to stay together. I put my most used punches (circles, tabs, hearts) in one drawer and tucked the rest away somewhere else.
I also used this opportunity to get as much stuff off my desk as possible. Sticky notes, tweezers, paperclips all make sense to go in the drawer. But I realized I could put tape dispensers and my tissue box in there as well. I’d never thought about this before. Desk space is at a premium so it just made sense. Have you ever had an aha moment like that??
Lesson: Use zonal organizing—even if it means breaking up types of supplies!
Other Considerations
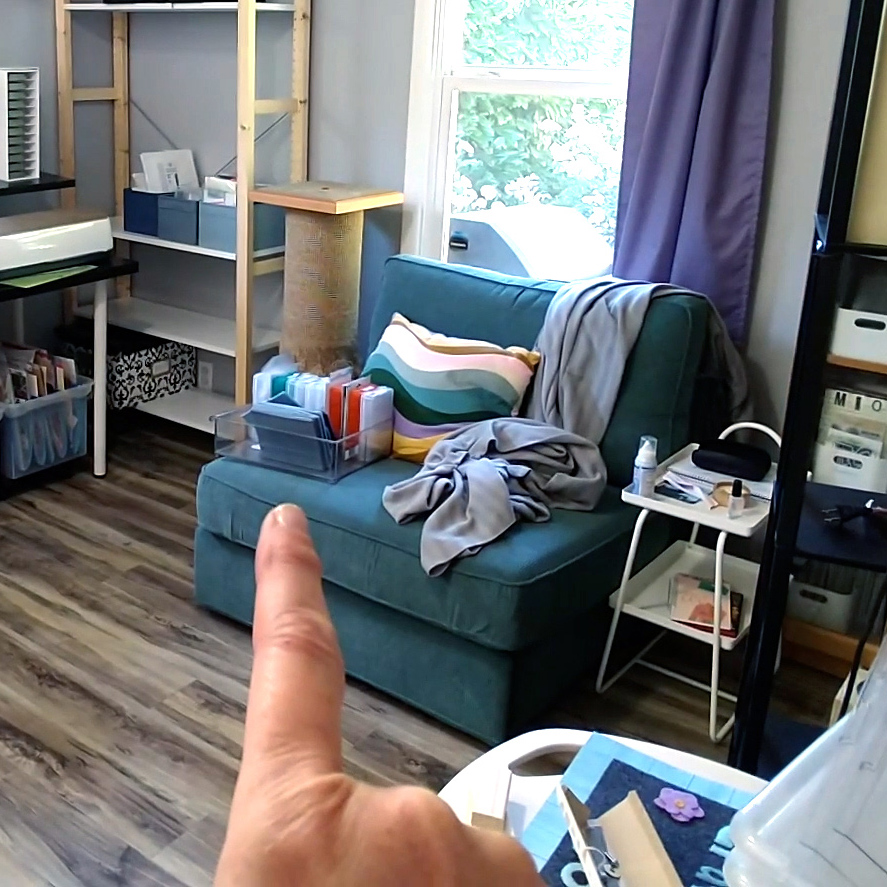
My room, like many crafters’ spaces, needs to serve more than one purpose. This room actually still needs to be a spare room for when my middle kid comes home to visit. That meant another creative solution. Fortunately, Ikea did all the creative thinking for me. I bought this sidechair that folds out into a small twin size bed.
During most days it is a comfy chair for me and the cats. A few days a year it can be turned into guest space. It did cost a bit, but it is still cheaper than buying a bigger house with an extra bedroom. 😂
I know most crafters are dining room crafters. There are really interesting unique tables on the market these days. Try looking into YouTube videos or a search site to find unique dining room furniture. You may be surprised at the wild, foldable contraptions!

Lesson: Does it just need to be your space? Or does it need to share functions? Are there ways into invest in dual purpose furniture to get the best of both worlds?
Am I done?
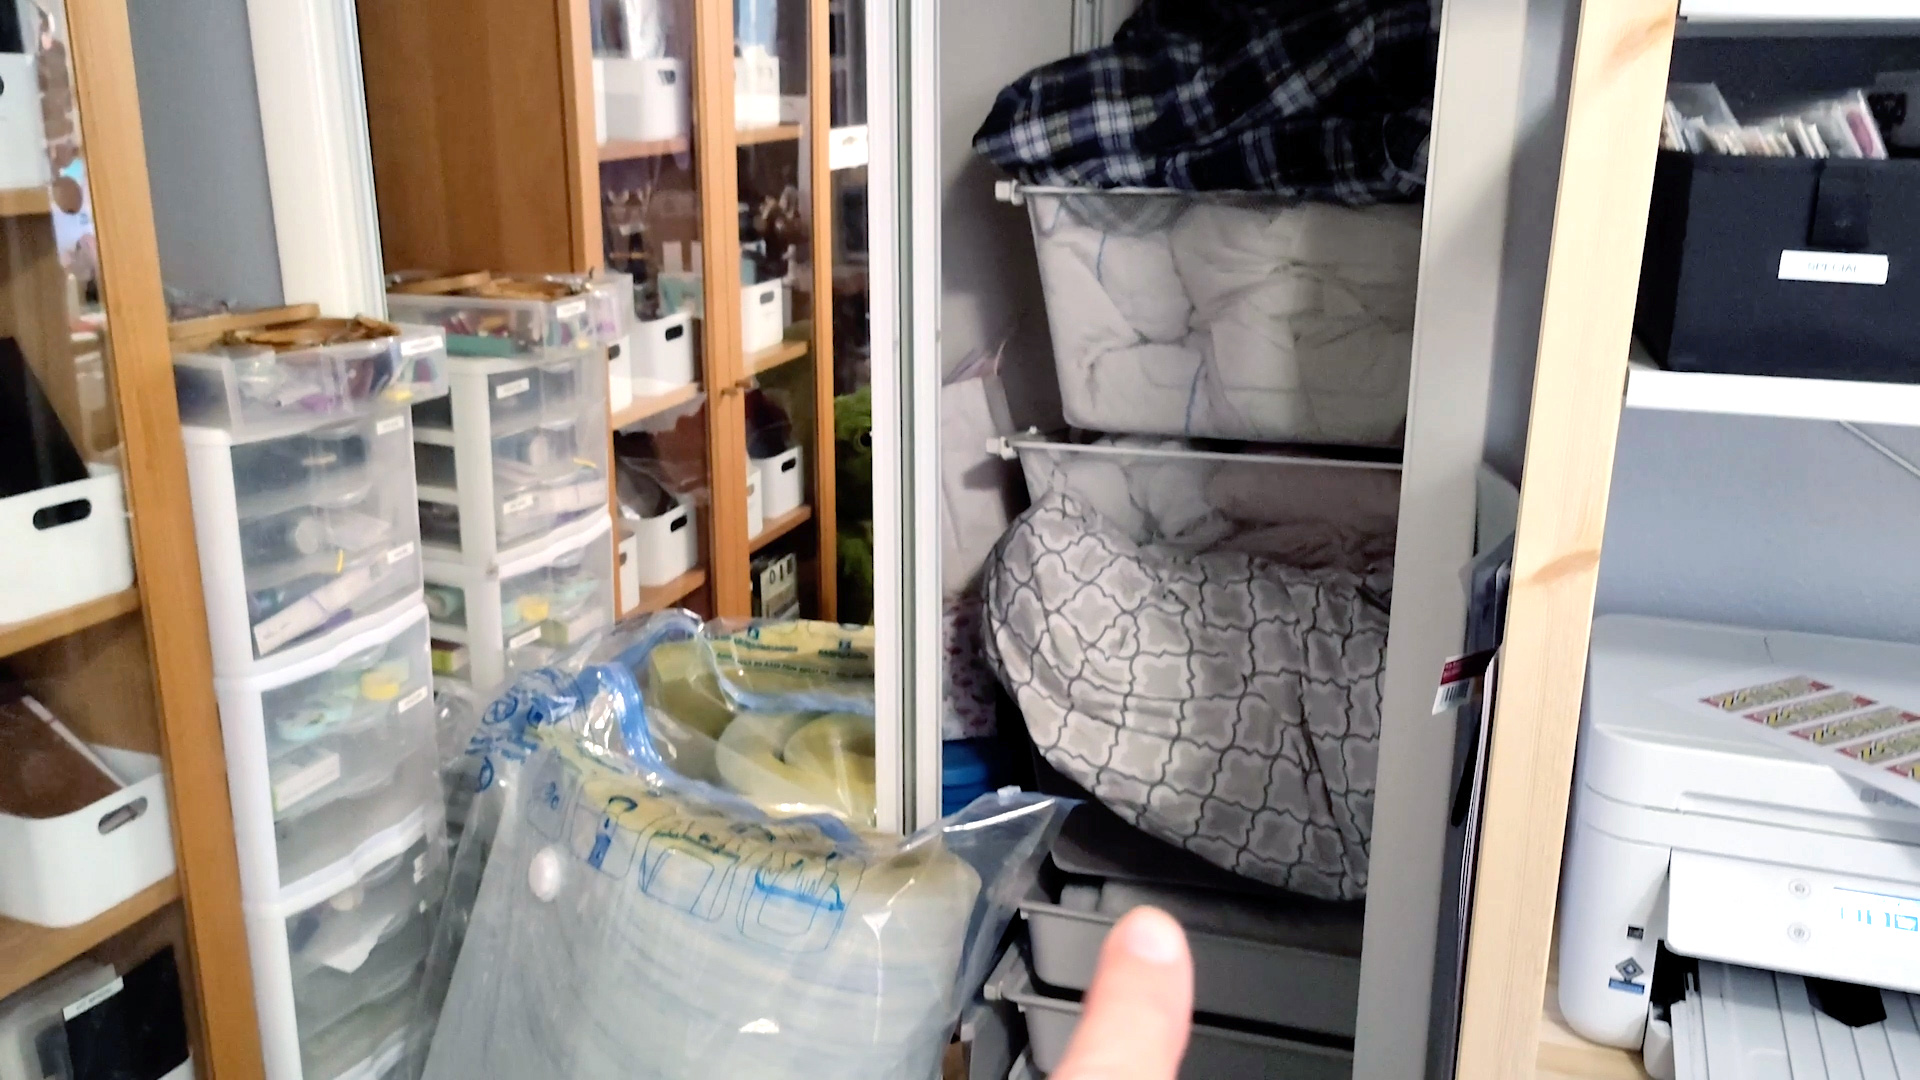
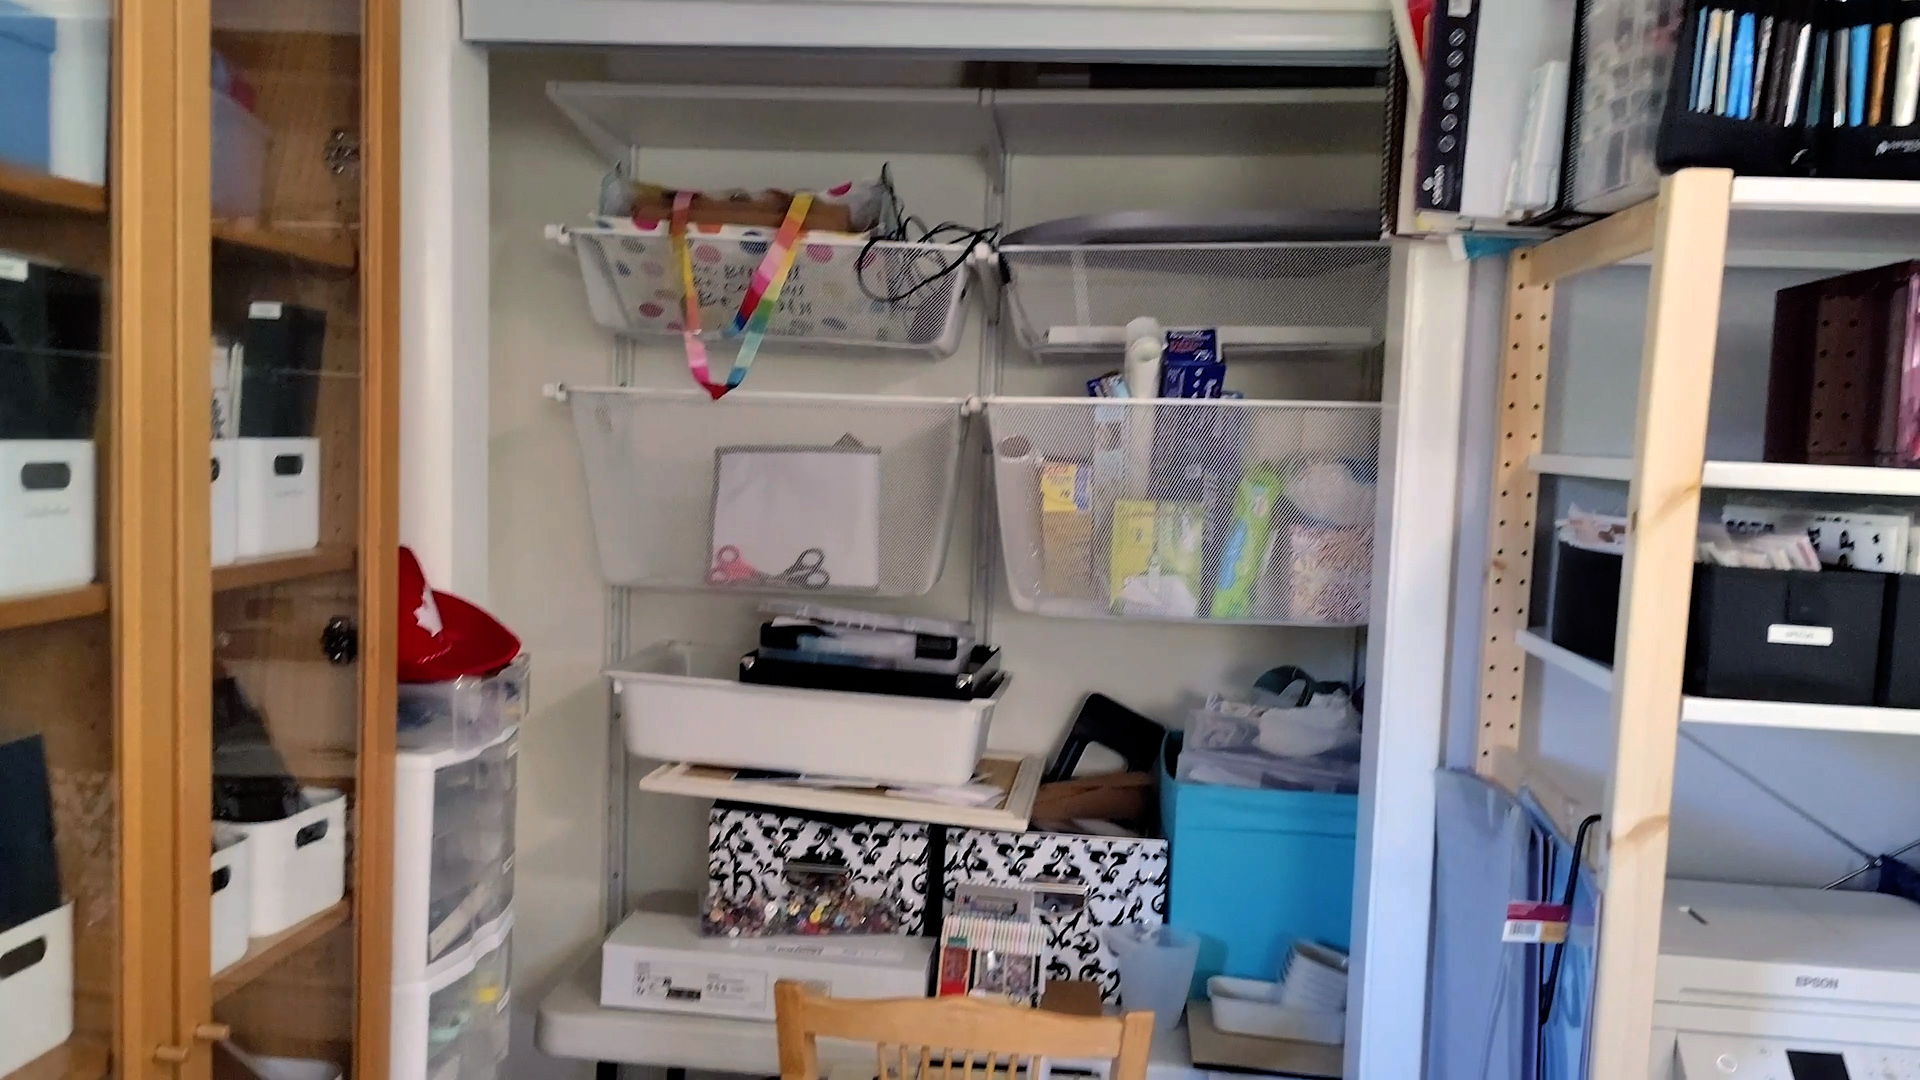
The short answer is no. I still have a closet to work on. I’m having another creative solution challenge. I have these old closet racks that are no longer manufactured. I don’t like the drawers and I want to put in more shelves instead. They are a bit of an odd size and finding shelving to fit is proving difficult. So until I go through my evaluation process, this section remains unfinished.
Heck, I’m not even touching most of the stuff I have shoved in there. So perhaps another purge is in order? Wish me luck.
Helpful Tips
While much of this post is specific to my needs, I hope I’ve been able to share enough ideas with you. Organizing can be very personal and a bit difficult with budget, space and life constraints.
Let’s just recap the lessons as a final reminder of ways to adjust organizational thinking to your needs.
Lesson: Don’t rush in. Take time to think about the problem.
Bonus Lesson: Don’t be tempted by the new shiny storage solution. Put it on a wishlist and let it brew.
Lesson: Make a list of what is working and what isn’t. Really think about the reason why you do or don’t like those things. Details will lead you to the better solutions!
Lesson: A to-scale floor plan is super helpful if you are doing a larger organization project. Grid paper or Canva can be helpful for this.
Lesson: Make friends with compromise. If you have to give up something, see if there is another area you can spruce up instead.
Lesson: Make friends with purging. It’ll be with you for the life of crafting!
Bonus Lesson: Keep an ongoing purge bin somewhere in your room. Make it a regular part of your normal crafting to let things go.
Lesson: Use psychology hacks to get yourself through sticking points. I’ve only mentioned one here, but there are many. Do some research.
Lesson: Consider if you can hide lesser used items away in a corner, or even in another room.
Lesson: Use zonal organizing—even if it means breaking up types of supplies!
Lesson: Evaluate when you need special storage and when finding a hack makes sense.
Lesson: Try things you have first. Or take some time to find used things with specific features to fit your needs.
Lesson: Think about the wider use of your space. Does it need to share functions? Are there ways into invest in dual purpose furniture to get the best of both worlds?
Lesson: Investing in a good solution may be better than spending time & money on “bandaid” solutions.
As always we love to hear from you. If you have any thoughts on this post, feel free to drop us a note! Until next time, Happy Scrappin’!
PS If you want to see all the behind the scenes elements that went into this big move, I’ve got a series of videos sharing daily updates of the process. Here is the first one, which will link you off to the next videos.