
One of my favourite things about sketches is how adaptable they are. So when you fall in love with a 12×12 sketch but you’re working in a Traveler’s Notebook, 6×8 album, or even on a card, don’t stress! You just need to think about proportions and overall composition.
Start by spotting the big pieces:
- Where’s the photo or focal point?
- What makes my title or sentiments look right?
- How will I journal to tell my story?
- In what ways can I incorporate embellishments?
Once you’ve got these in mind you can start shrinking, stretching, or rearranging to fit your page…no matter the size of your project. The trick is to keep the feel of the layout, even if the pieces look a little different.
In the end, a good sketch is just a jumping-off point. That’s the fun of it! Every new size gives the same sketch a whole new personality.
Start Your Sketch Adventure
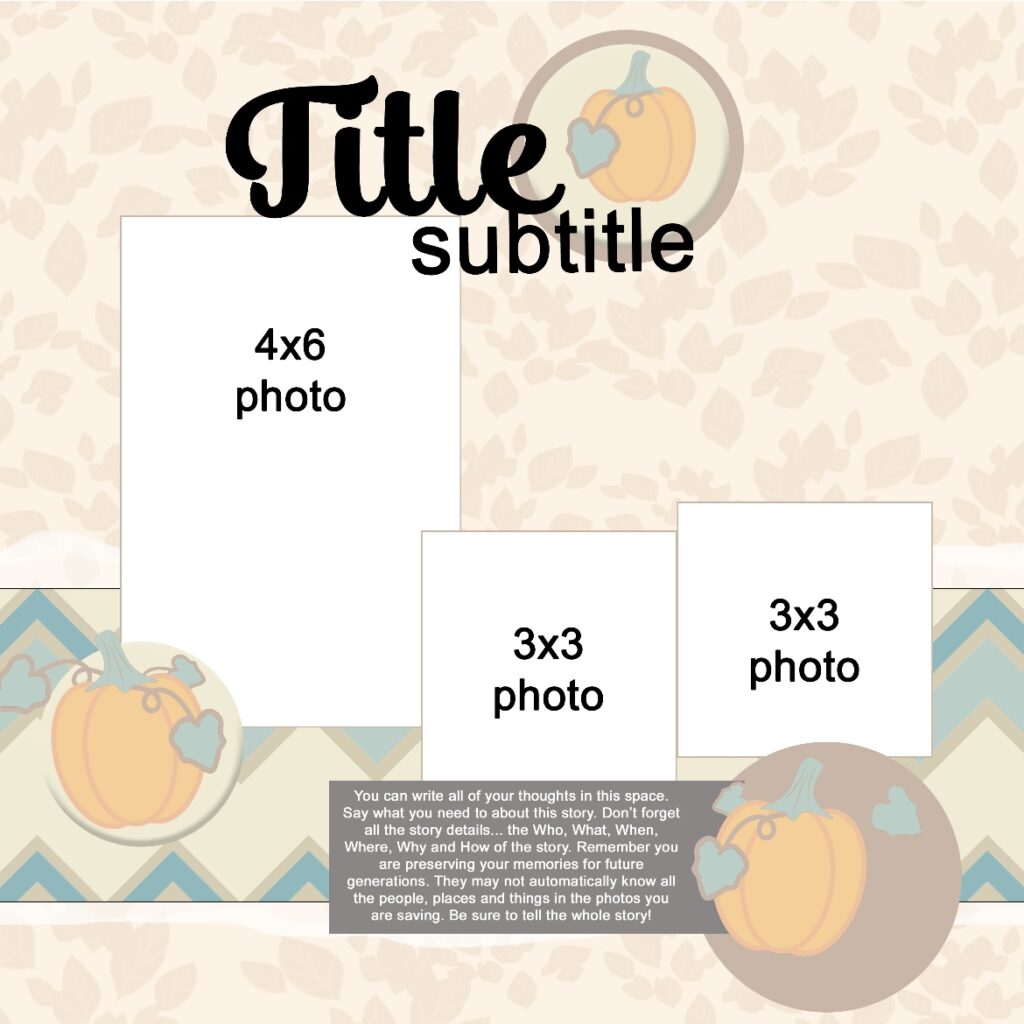
This month’s sketch, designed by Team Member Misty Murphy, is extremely versatile when it comes to thinking about the various sizes of your projects.
For this post I wanted to walk you through how I took inspiration from the sketch as usual, but applied it in a way that feels unique and fresh.
- First, I will showcase how I took the sketch and adapted it to an 8.5×11 format (for all you smaller-sized scrappers out there).
- Second, I will take that smaller layout and show how I easily adapted it into a 12×12 layout (which just might help for those “Oh my goodness, I need a layout quick!” moments).
- Third, I will highlight how I used further inspiration (our October colour theme) to enhance my project.
Time to Downsize
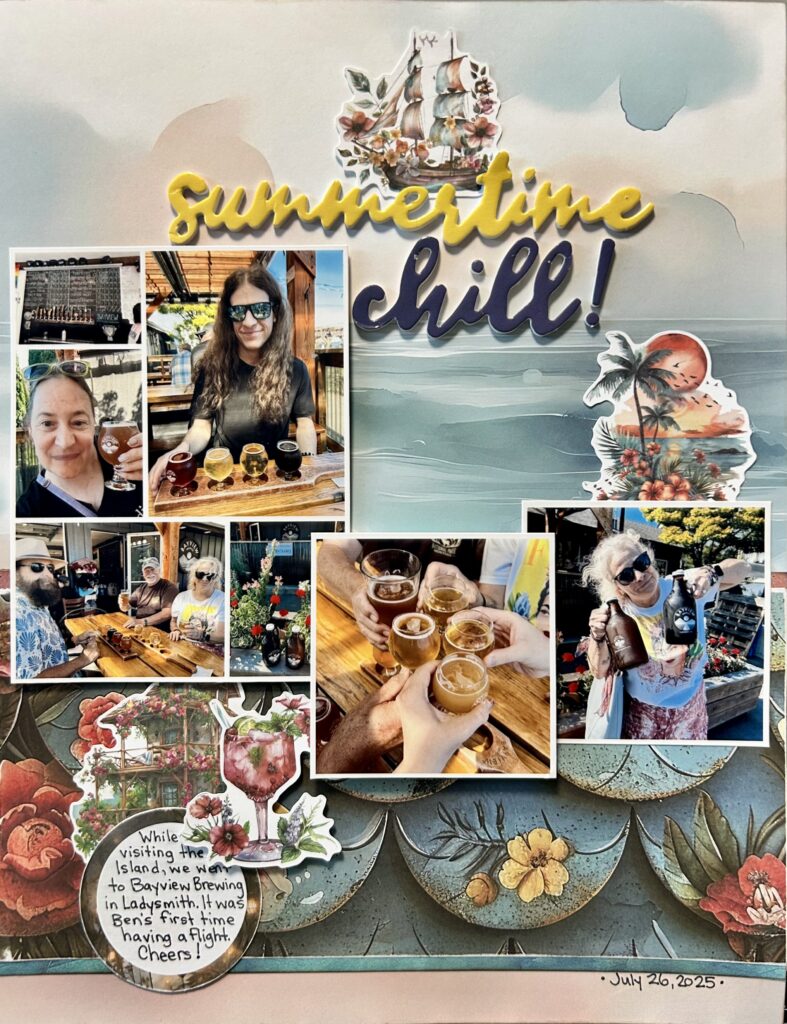
Turning a 12×12 sketch into an 8.5×11 layout is kind of like resizing your favourite outfit. The style’s the same, it’s just tailored to fit your needs. Thus, I took Misty’s sketch and narrowed it to suit a vertical orientation. This slimline shape is perfect for creators who naturally work smaller (think TNs or 6×8 mini-albums). It’s also an interesting approach for anyone curious enough to dabble in a new size without starting from scratch. Or, as you’ll see in my next section, perhaps you’ll recognize a quick way to rush a layout when you need it. Ahem…LOAD, anyone?!
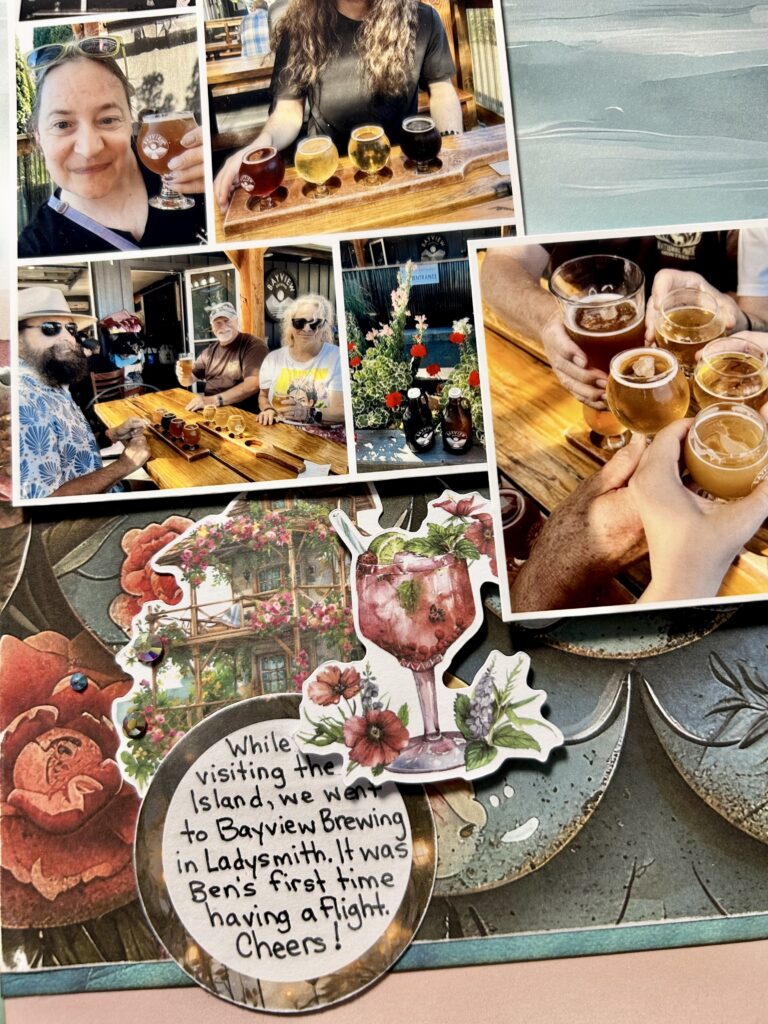
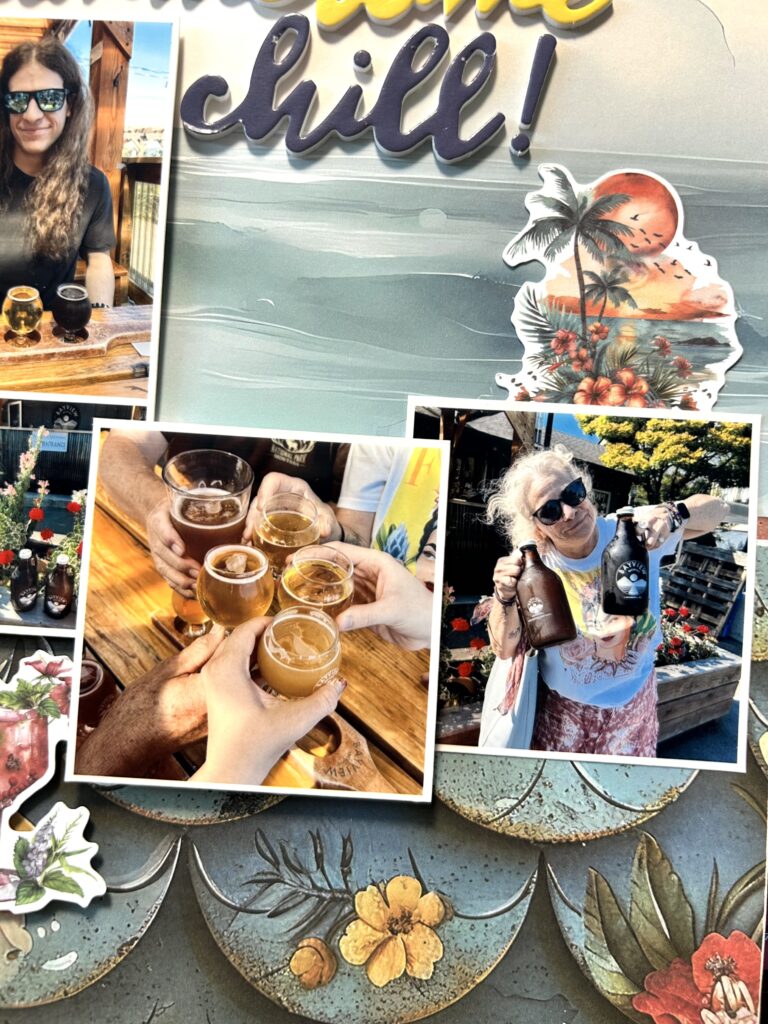
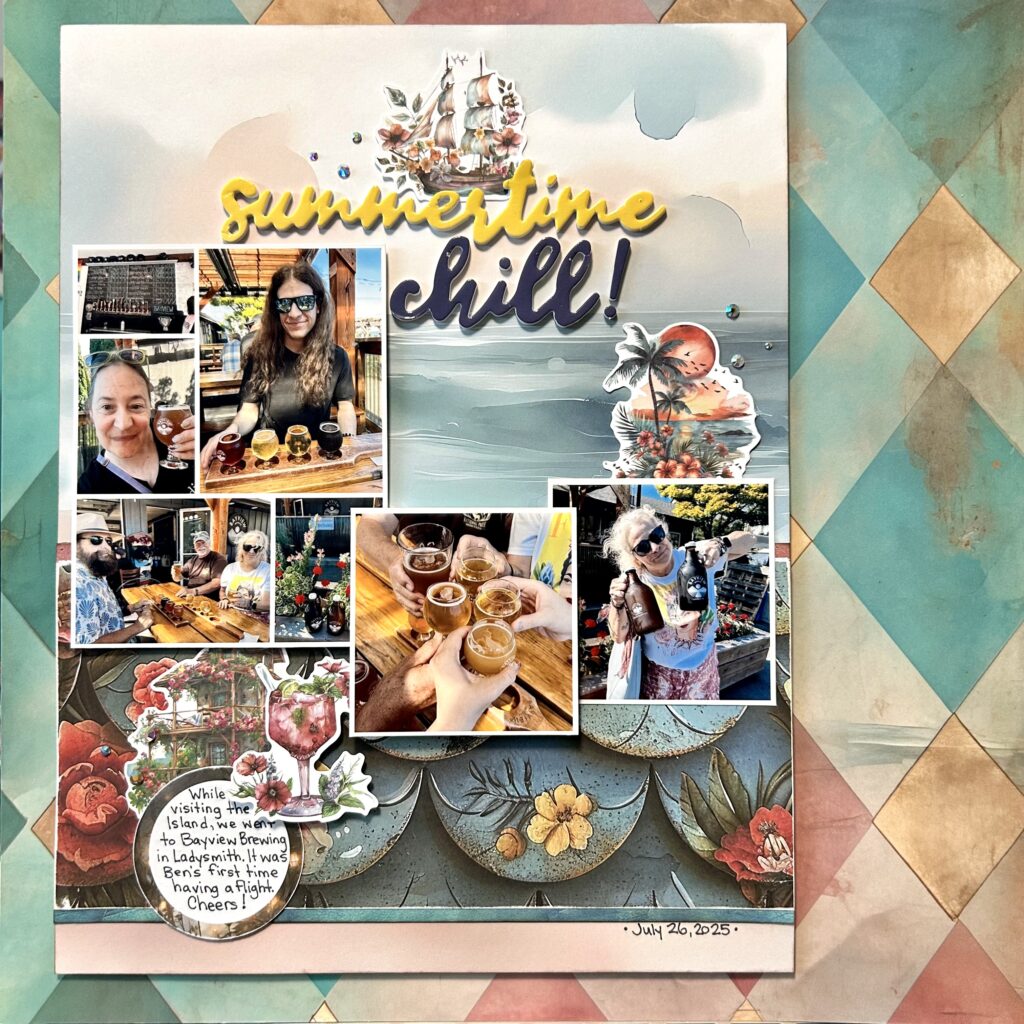
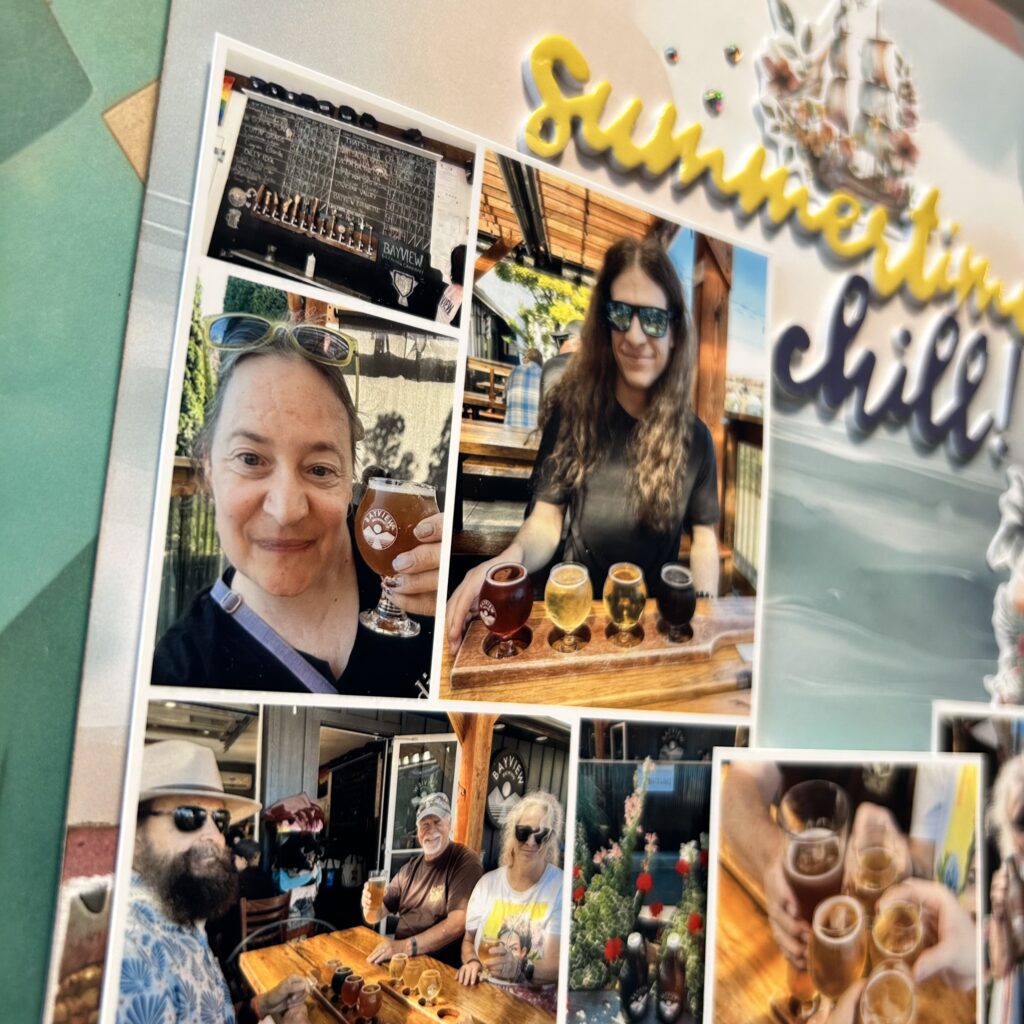
I kept the same number of photo spots, general title placement, and three embellishment clusters on my smaller layout. However I did scoot things around, to fit the taller format, and added dimension using foam squares to give the elements separation in a smaller space.
The Little Layout That Could
When you’re looking for creative ways to document, especially if you have a limited amount of time, sketches are a great go-to. Scrapping smaller can actually help you create bigger, and faster, too.
For me, working in 8.5×11 with a sketch kept things compact – there was less space to fill, fewer decisions to make, and somehow, the project came together faster than I expected. When I first had this experimental idea, I wanted to inspire those of you out there who prefer smaller formats. But, I still hoped for a finished project I could fit into my own standard-sized album.
So, simply mounting the smaller layout onto a 12×12 page gave me all the drama of a traditional layout plus some beautifully open negative space to let the design breathe. I guess I sort of found a way to cheat the scrapbooking system…small scale for speed, big scale for impact, and zero guilt.

Colour Swatch It Up!
As you’ve seen, we’ve been featuring a gorgeous colour palette throughout October. To look at how it’s been used in other projects you can check out my ATC post from earlier this month (Creepin’ It Crafty With ATCs), as well as the latest posts from Alex (Why I Love Digi Scrapping For Big Photos) and Misty (From Experiment to Finished Project!).
Colour swatches can provide great inspiration when creating, although I understand people can feel overwhelmed with how to incorporate them. Don’t let yourself get bogged down with complicated over-thinking.
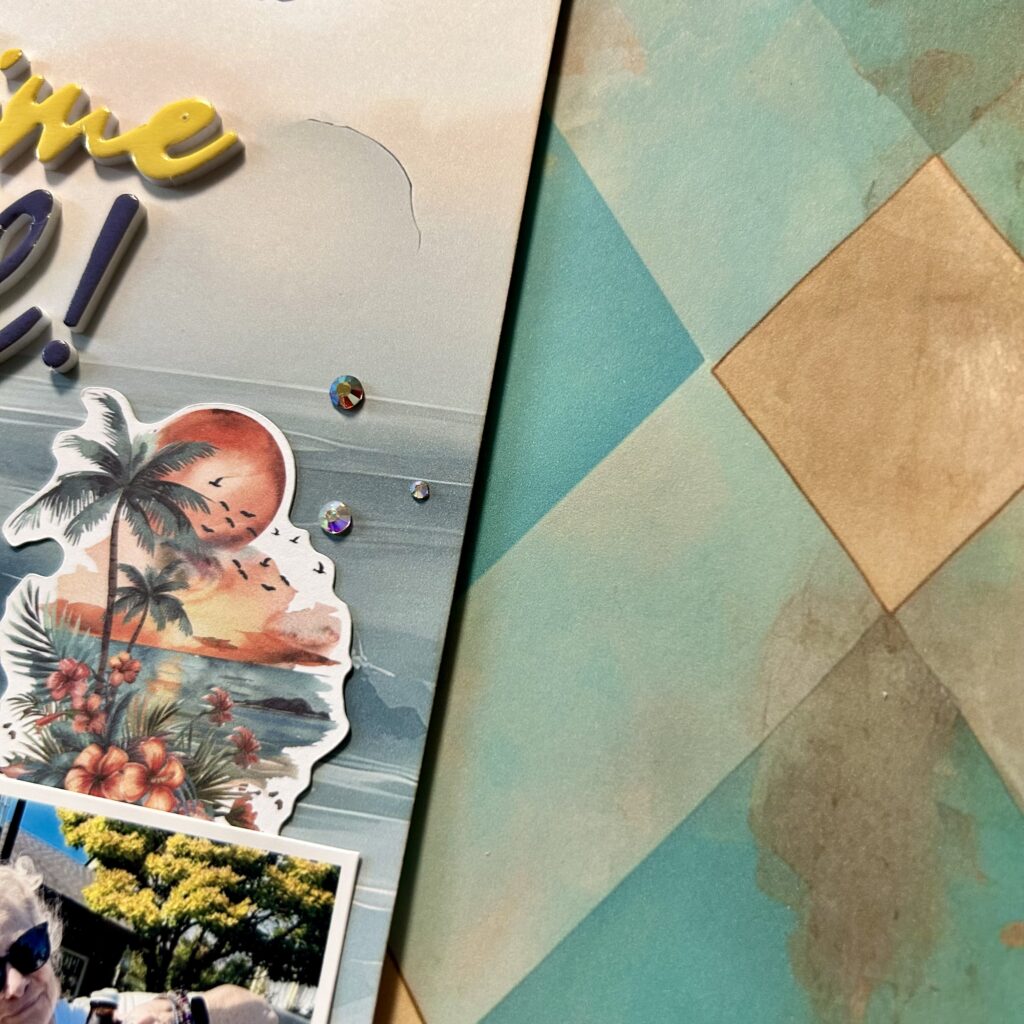
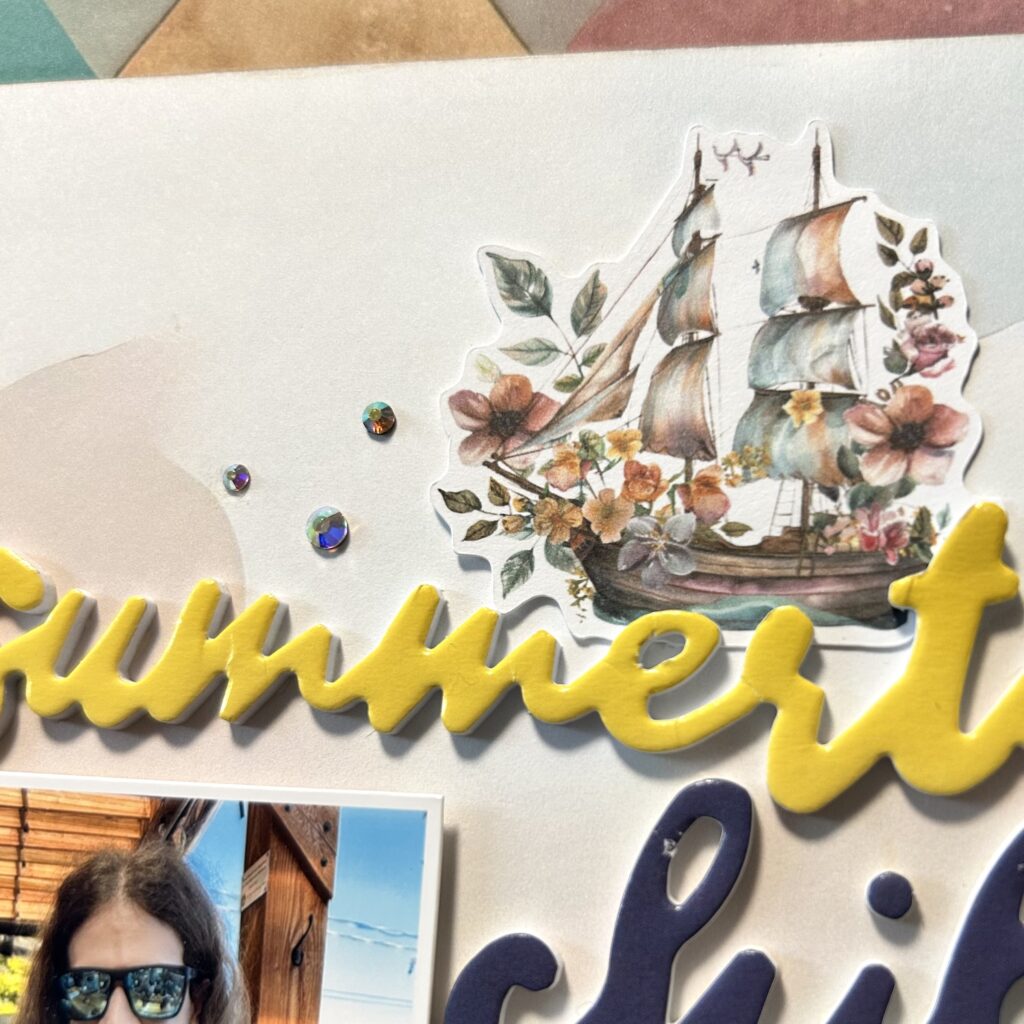
Using a swatch to express artistry can be as simple as choosing gems to reflect the colour scheme. That’s what I did! I selected jewels in iridescent pastel tones of teal and peach. When I set out to mount my smaller layout onto my 12×12 page I also pulled a selection of cardstock and prints with the swatch in mind. If they didn’t work, I figured I would just use white. By pure accident I found a pattern from my stash that not only showcased multiple colours from the October palette, but also complemented my smaller creation. Winning!


Sketch-Stretch Yourself
I now encourage you to take this sketch and make it work for you (and throw in that colour swatch while you’re at it). You might feel inclined to try ideas I’ve shared, or perhaps are ambitious enough to choose your own crafty, size-bending, adventure. Regardless of the path you choose, we cannot wait to see your creations!
Until next time…stay fun and fantabulous, scrappers!