
As the saying goes, “April showers bring May flowers.” In the scrapbooking world perhaps a better mantra might be, ‘April crafty cleaning brings newfound May creativity.’
If you’re anything like me, we all have those supplies lost to the depths of the most cluttered drawer or precarious corner stack. When you re-find these little treasures (the products you’ve forgotten about or, heaven forbid, bought twice!) it’s almost magical.
Today I’m going to share a few projects made from items I’ve “dusted off” and finally put to use, most of which are cardmaking supplies (such as stamps and dies) I had previously never opened. I’ll also share a couple of layouts utilizing new/barely-used merchandise from my stash, one of which adds the perfect pop-culture twist that – for those who know me best – definitely screams, “Lindsy!”
So “come with me and you’ll be in a world of pure {crafty} imagination…”
THE PREVIEWS: New-ish Goodies, New Projects
Ephemera and Border Punches
Nearly every scrapbook collection has an assortment of matching ephemera (especially if you’re addicted to Simply Stated Design collections, like me). There are often SO many pieces you could never use them all up in a lifetime, which opens up opportunities for using an eclectic mix on a variety of projects.
For example, why not create jumbo tags featuring ephemera clusters?! Notice how I even folded some of the pieces to become the ‘ribbon’ at the top. Jumbo tags are one of my fave things to make when I’m in a crafty funk because they can be used as decor, added to gifts, or glued onto future projects (like cards, journals, folios, or layouts).
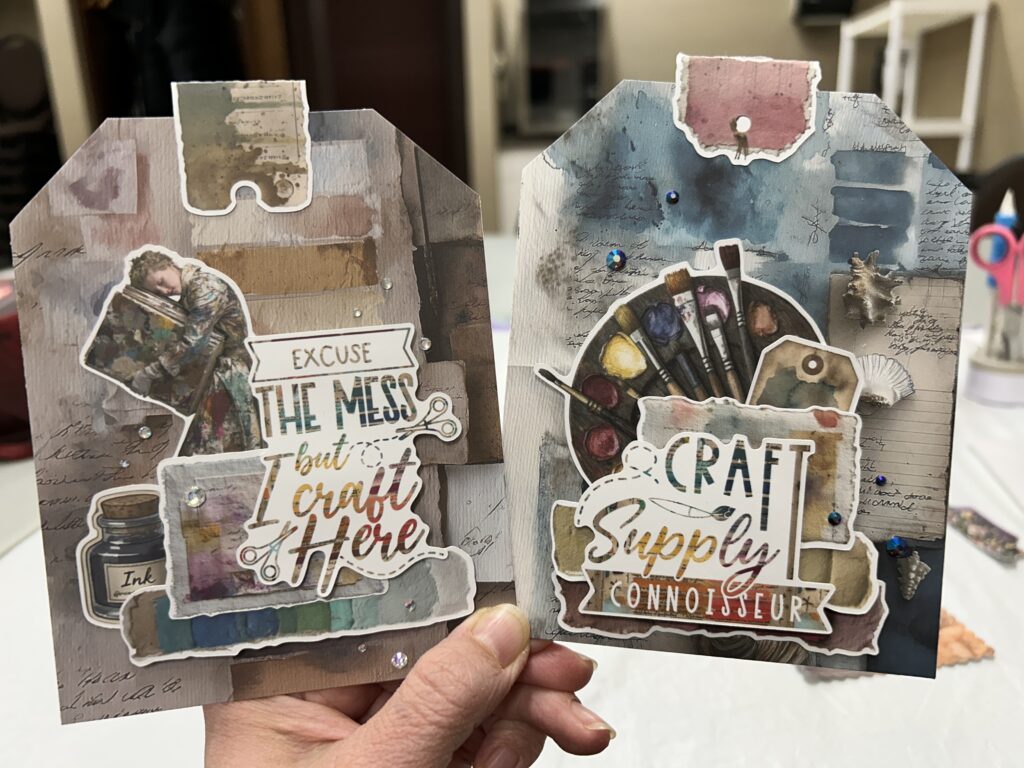
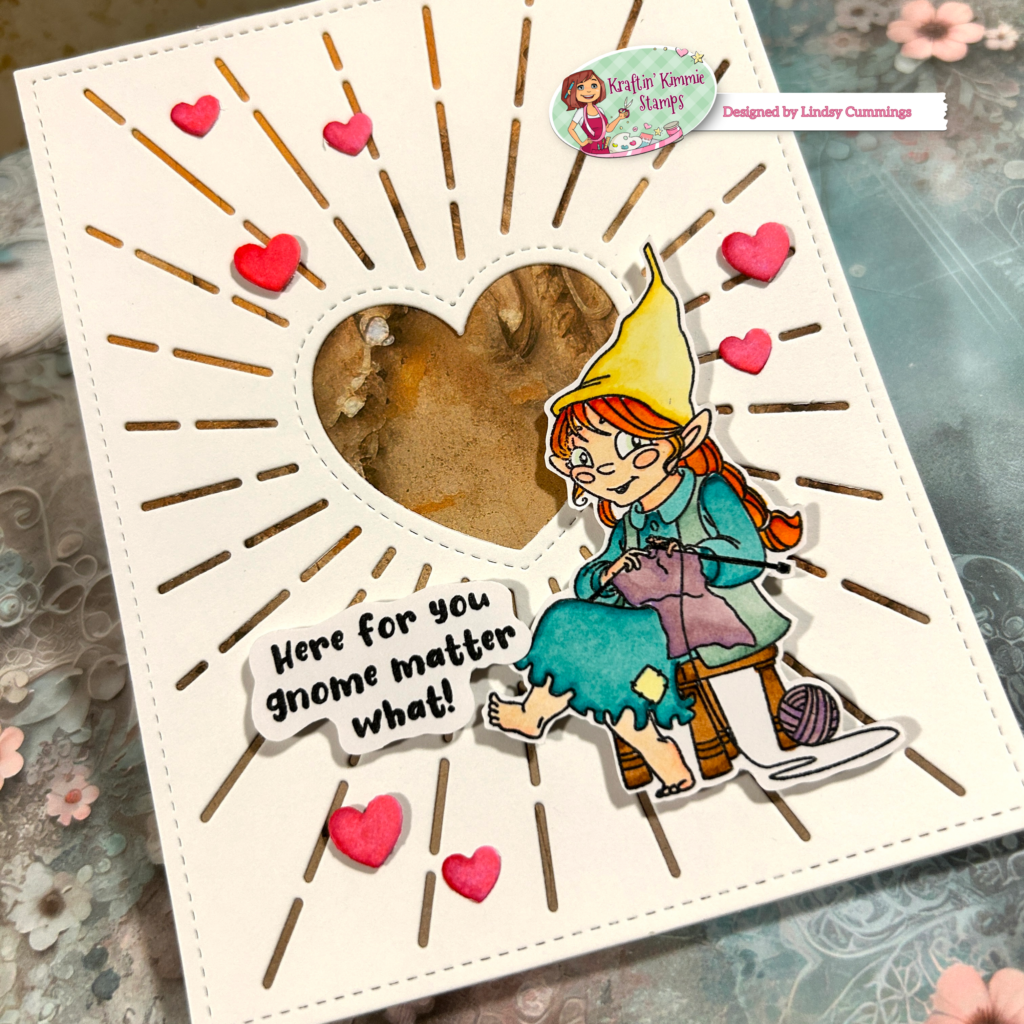
Ephemera (both large and small) can also be incorporated onto cards. Layering dimensionally onto an embossed card-front is such a quick, easy technique.
Another reminder is to pull out those border punches! My mom recently cleaned out her punch drawer, and there was such an assortment we didn’t even remember buying all of them. For these cards I used a Creative Memories scalloped border punch to help create a wainscoting-esque effect.

Frame and Cover Plate Dies
Another cardmaking product that has grown in popularity over the past few years are cover plate dies. I’d be lying if I said I haven’t made a few impulse buys (or two) because the designs were just too cute!
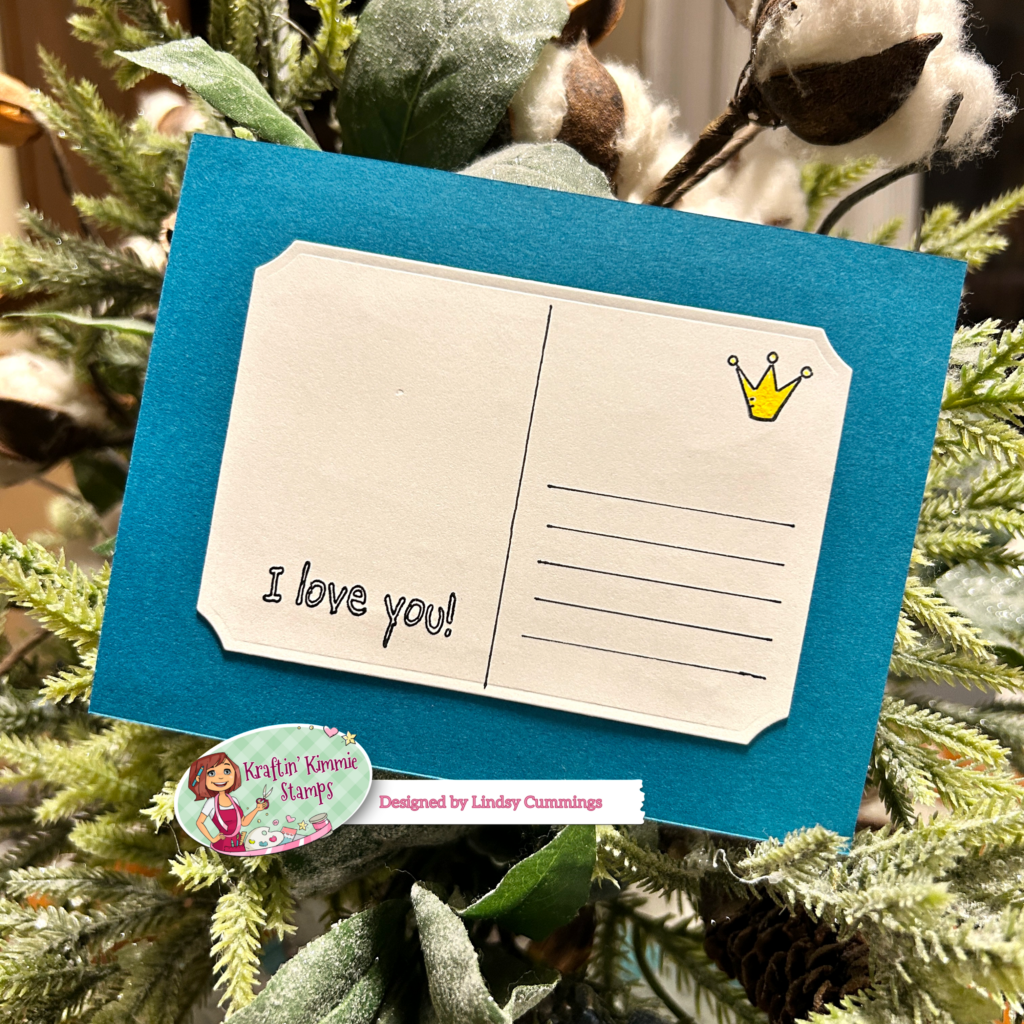
One way to put them to use is as a decorative element for a homemade postcard. This art deco-style die from Pink Fresh is especially neat because it can be glued down as one piece, or as a separately framed border and insert.
My next featured cover plate, from Lawn Fawn, creates a textural focal point. Pops of colour peek through, both coordinating with and highlighting your image, sentiment, and embellies. A die like this provides an easy-breezy option when you want to elevate a standard A2-sized card.
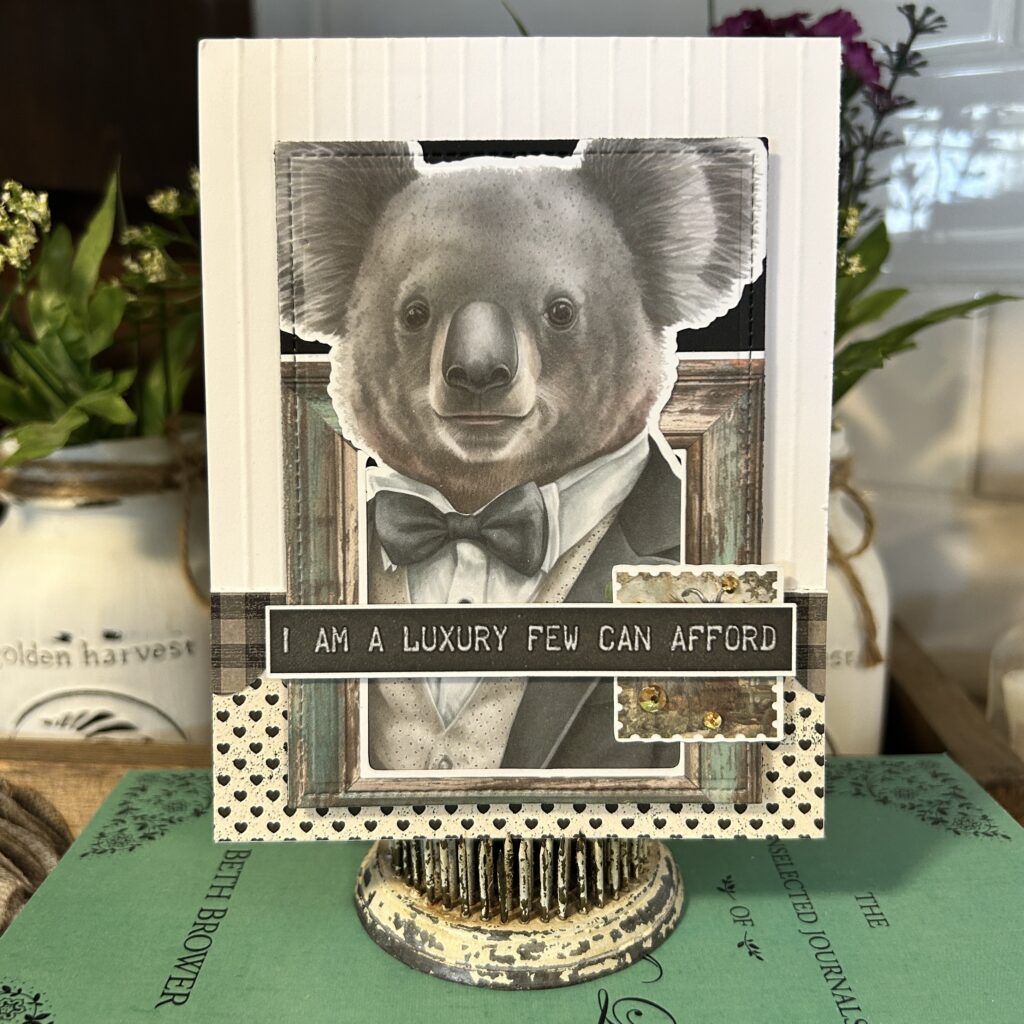
ATC Die Sets and Stamps
Although ATCs (Artist Trading Cards) are not new, they have definitely gained popularity and taken the crafting world by storm. I recently put some of my own The Sassy Club & Waffle Flower ATC die sets to use to make the following two projects. I might keep them to trade, but might also end up inserting them onto a card or layout.
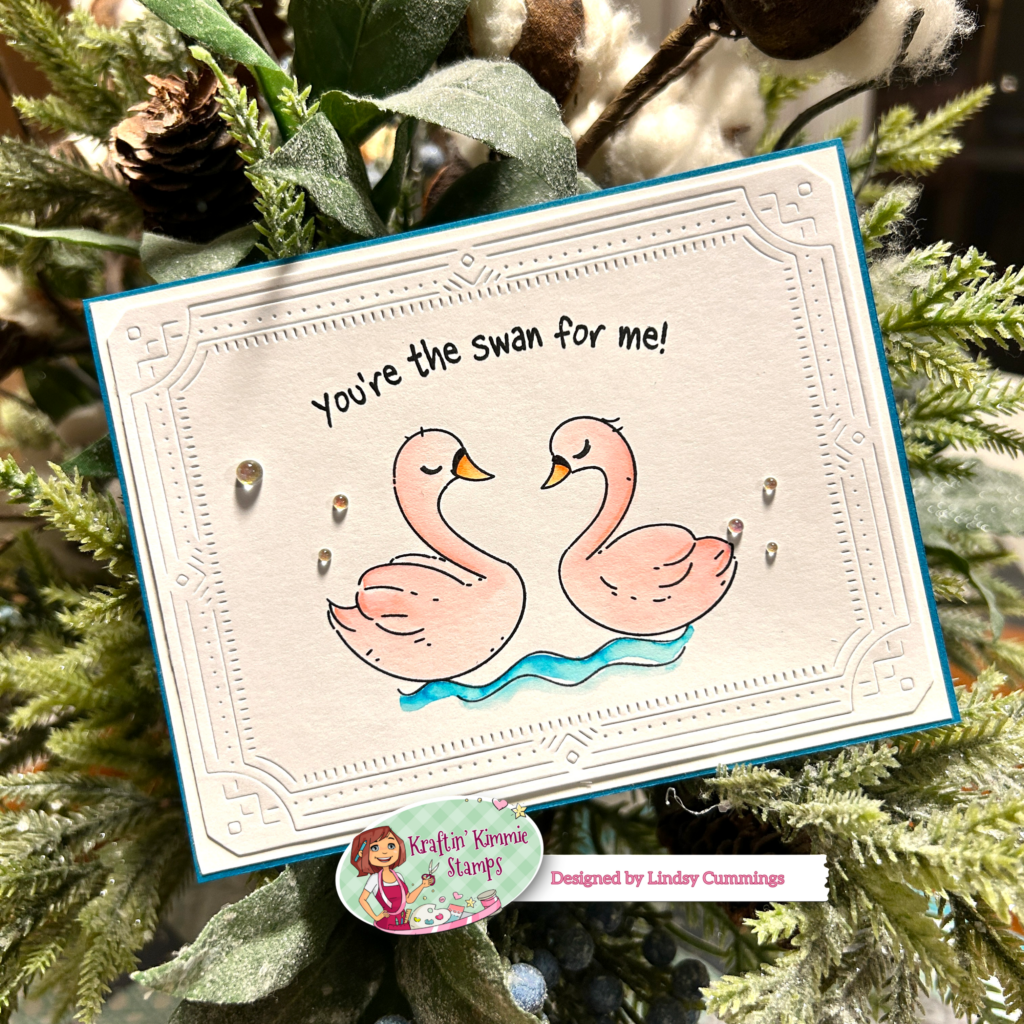
When it comes to utilizing items more traditionally considered for cards, stamps are likely the number one product that comes to mind. How many of us have stamps scattered across our desk, stashed into bins and baskets, or perhaps (effectively or ineffectively) organized onto shelves? Don’t let yourself stare at those unopened stamp sets. Open them up, pull out your colour medium of choice (be that crayon, markers, or watercolours), and get them onto your creations. There’s truly a stamp out there for everyone…perhaps a galactic Jedi or a banjo-playing amphibian!


THE MAIN FEATURE: Have the Time of Your Life with Layouts
As previously mentioned in the “previews,” stamps deserve all the accolades. Now it’s time for the “main feature.” Sometimes we need to remind ourselves stamps can take centre stage on our larger projects, too. Layouts can be the perfect platform to highlight these (acrylic, rubber, or foam) images, often in a fun and whimsical way that complements your style.
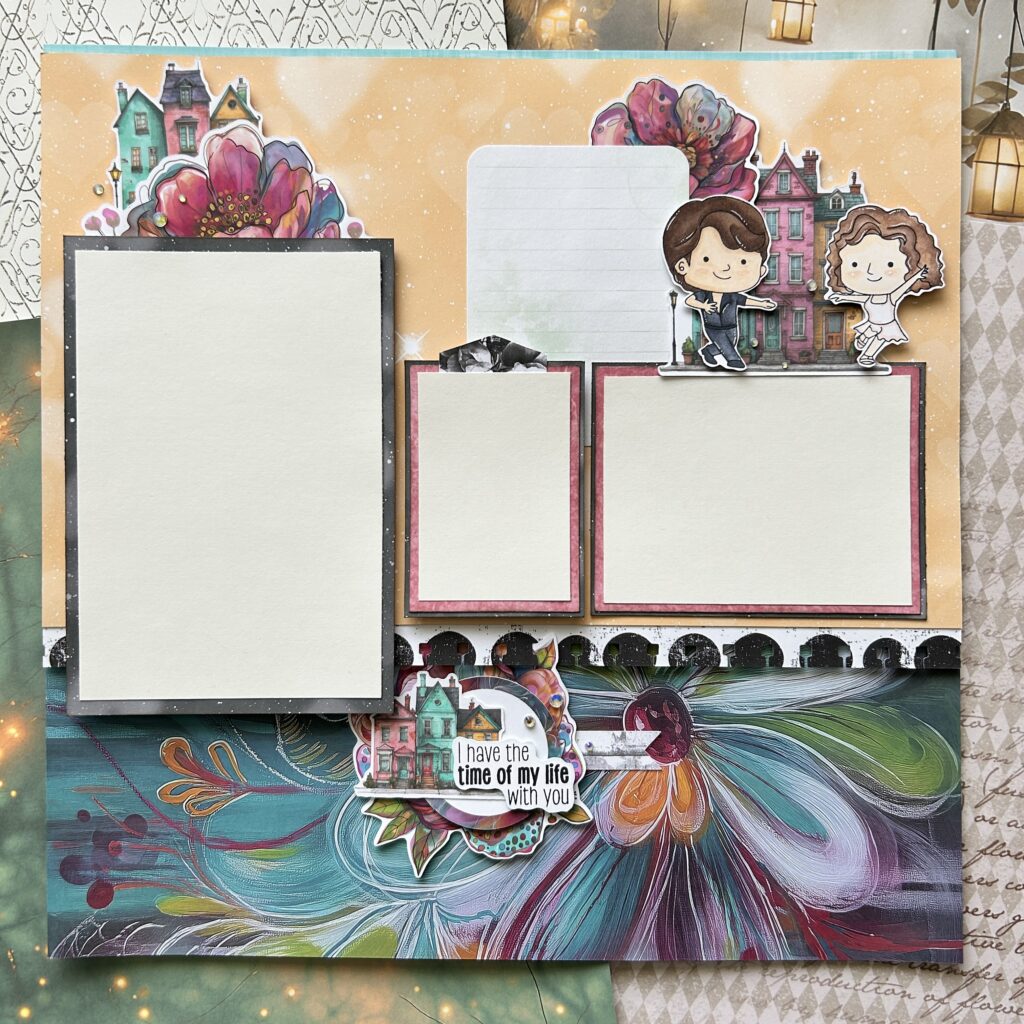
Whimsical Stamps in the Spotlight
When deciding to incorporate stamped images onto a layout, it may be helpful to loosely set things out onto your page before adhering. This allows you to play with placement and elements before committing. For this layout that’s exactly what I did. Before “finding their mark” I moved my two characters around, first trying them on either side of my journaling spot as well as without the larger ephemera pieces. Notice I also experimented before colouring.
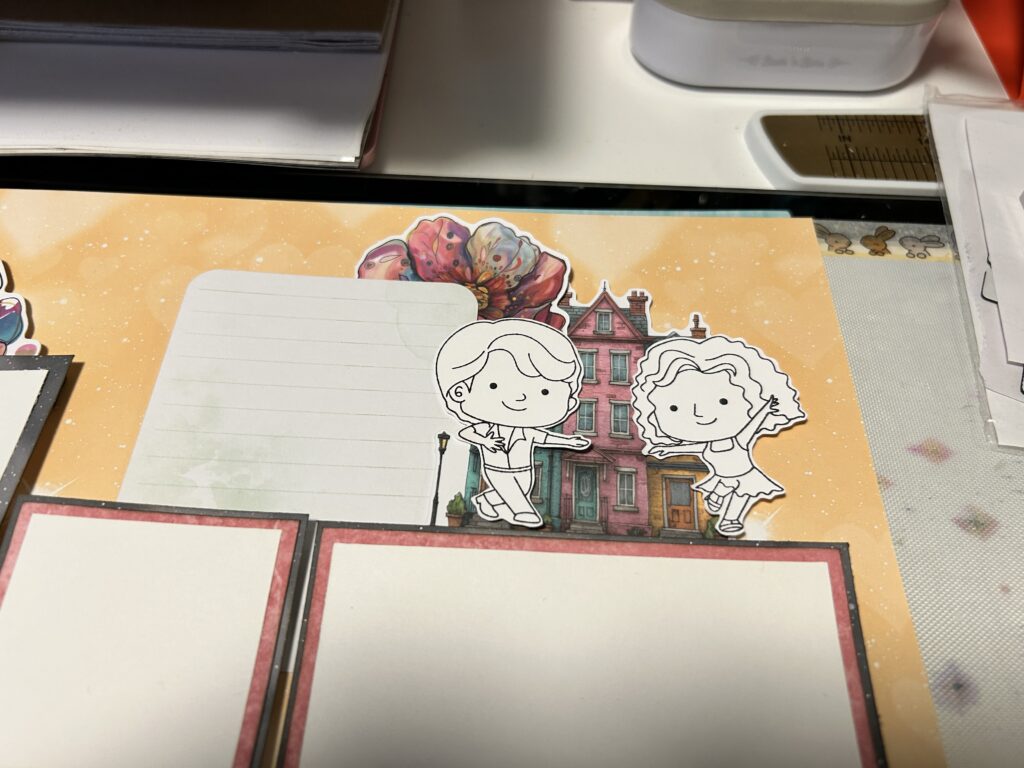
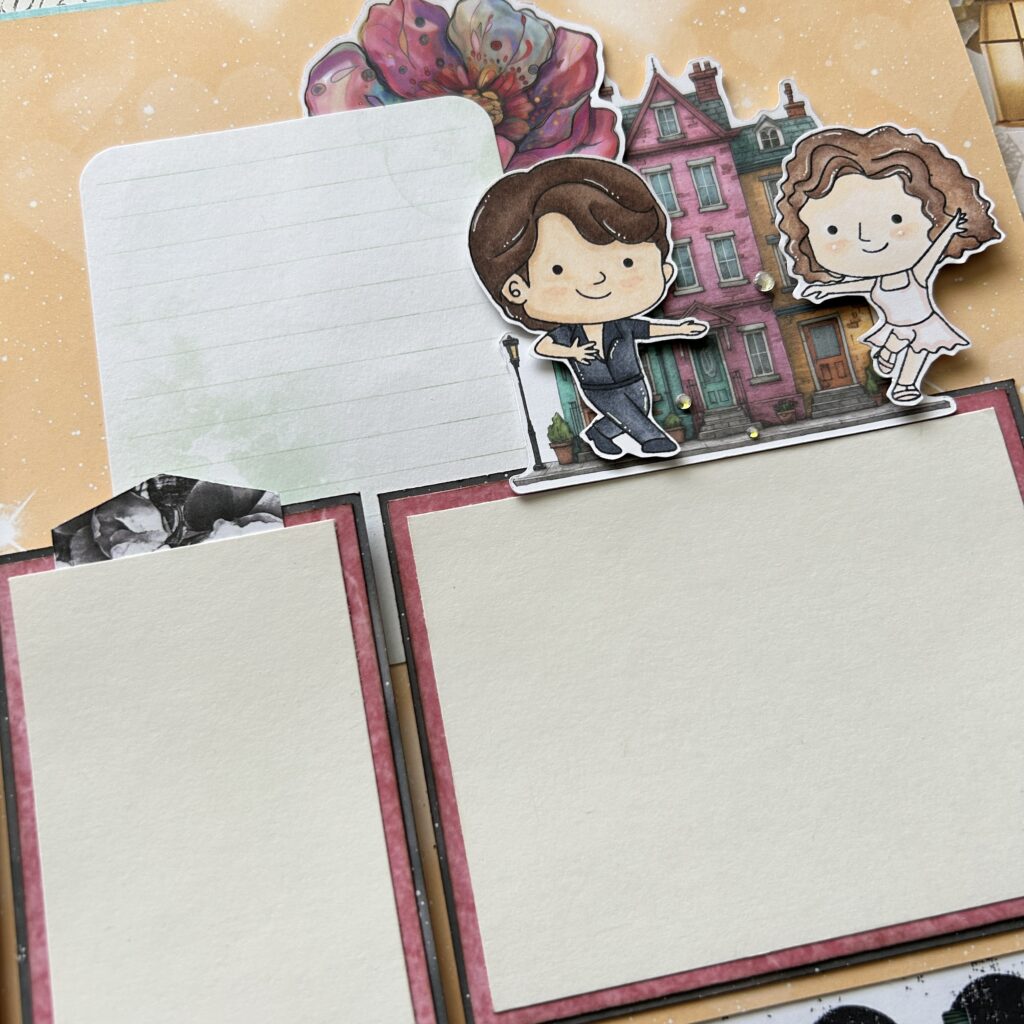
In true technicolour fashion, using my alcohol markers truly brought the characters to life! I used my Spectrum Noir TriBlends, keeping the shading simple. A few highlights with a white gel pen gave a finishing touch, before officially adhering all the elements into place.
My stamps of choice tend to be from companies leaning towards a more pop-culture vibe, such as Kindred Stamps (after all, nobody puts Lindsy in a corner). But if that’s not the genre you seek, perhaps animals, florals, objects, or icons might be better suited to your tastes.
Don’t forget that stamped sentiments are also your best script partner. They can be added to clusters, either as part of an ensemble of phrases or as a show-stopping title. For my layout I even used a lightly-shaded blue Copic marker to create a subtle border along the fussy cut edge.
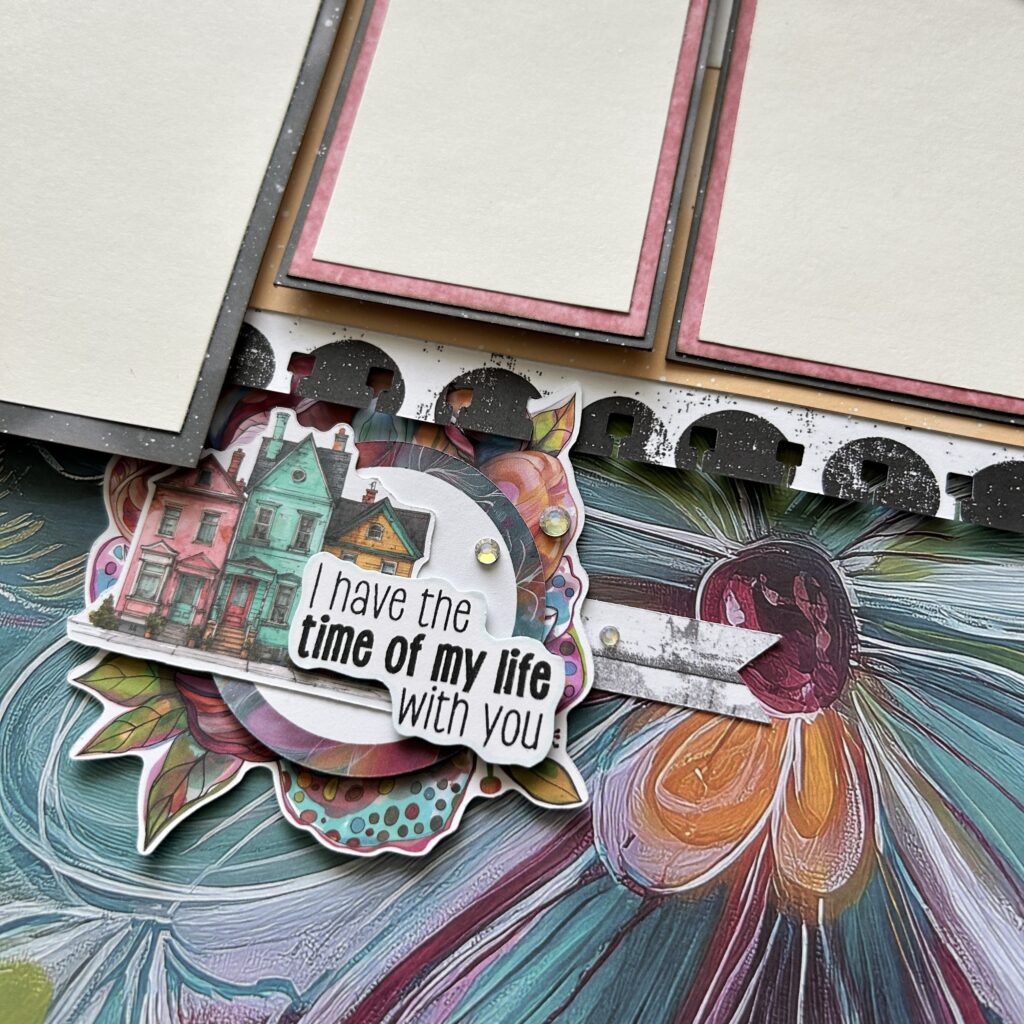
If you’re interested in seeing more of the design process for this “Time of My Life” layout, here’s the link to my demo video on YouTube: Scrap & Smile: Lindsy’s May 2026 Layout Demo
A Thematic Match
Featuring stamps on a layout can also take a more thematic approach. This can make additional images or sentiments feel as though they belonged to a collection in the first place.
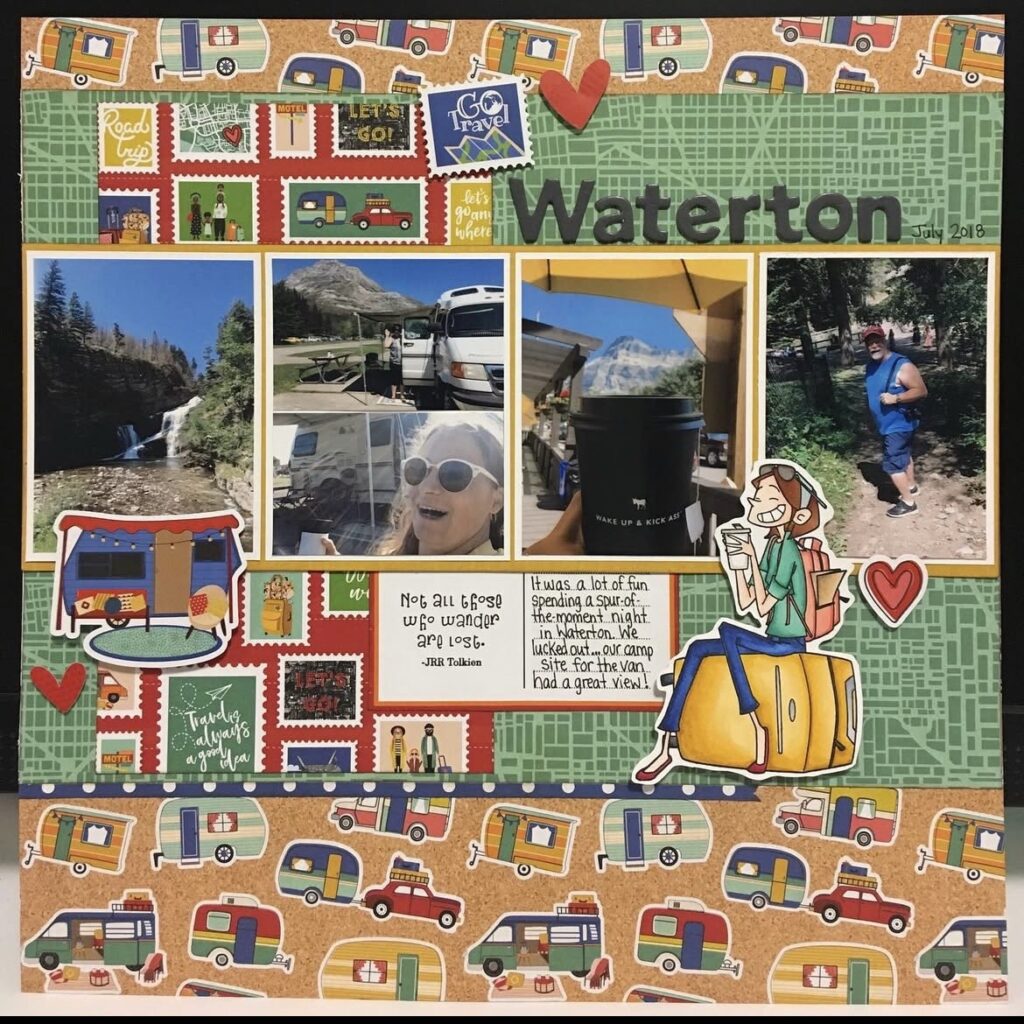
Can you tell which components on this road trip layout were stamped to coordinate with the Photo Play travel-themed pack I used?
- The Happy Wanderer: The traveler holding coffee, sitting on the suitcase, is a stamped image from the Kraftin’ Kimmie Stamps set ‘Life is a Journey.’ When colouring I carefully selected colours to match the collection. I also fussy cut my border to mimic the white borders on the paper imagery & stickers.
- The Quote: On my journaling card, the quote by JRR Tolkien (“Not all those who wander are lost”) also came from the ‘Life is a Journey’ Kraftin’ Kimmie set.
Both of these stamped elements blend in with the rest of the patterns & design seamlessly. Because of this, it’s one of my favourite created layouts to date.
Sometimes scraplifting from your own cardmaking supplies can breathe new life into your projects. Giving a die, stamp, or piece of ephemera their “shining star” moment is a clever twist of creativity we don’t always think of. You are the true director of your own stories, so I hope some of these ideas give you the confidence to give a few of these techniques a shot.
And, stay tuned for Scraplifting From Your Own Supplies: Episode Two, coming this summer! Until next time…stay fun & fantabulous, scrappers!