
Earlier this month when I was preparing to make a layout I wished to quickly print a number of photos sized for using on a Traveler’s Notebook page layout. I have learned from past experience that 2″x3″ photos are a good size photo to use on that page size. In the past I have printed them 4 at a time on a single 4×6 using a Canon Selphy and my phone or a or an Epson Picture Mate. This time I wanted to print a bunch at once with my regular photo printer.
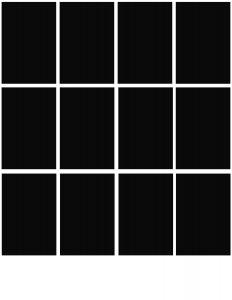
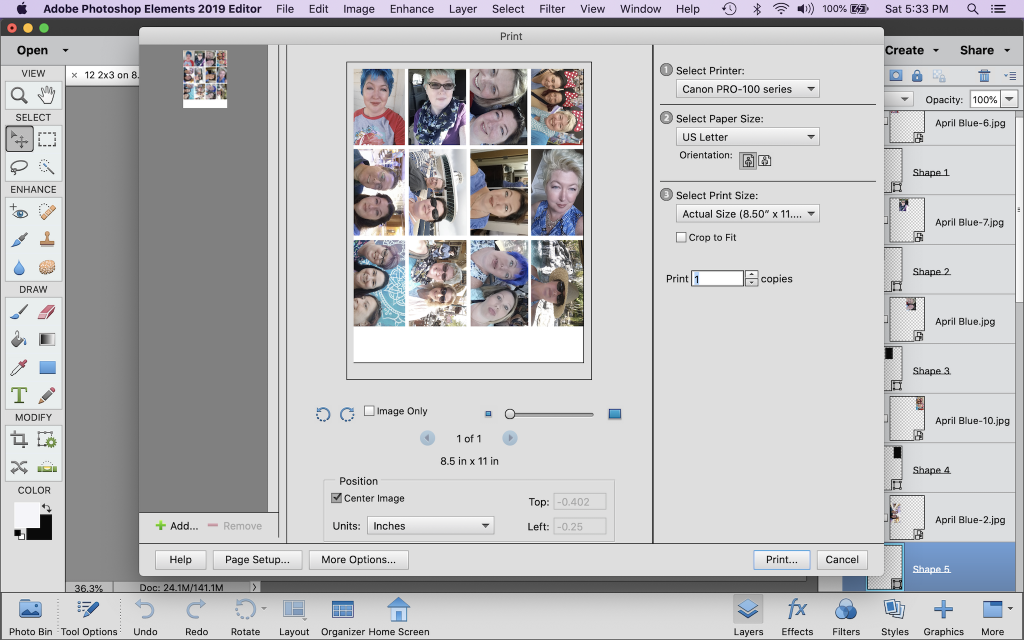
I have 8.5×11 Photo paper so I went looking for a quick printing template in the digital scrapbooking shops I frequent. I didn’t find anything like what I was looking for so I created my own Photoshop Elements Layered Template of 12 portrait 2×3 photos that will print on an 8.5×11 sheet of cardstock or photo paper.
I wished to share this resource with all of you. So just in time for October LOAD here it is!!!
This is what it looks like, and I will teach you how to insert photos into it in Photoshop Elements.
Most users of Photoshop Elements will already know how to use this but if you are new I’ve included a tutorial how to use it. If you have an ipad or tablet I suggest pulling up the tutorial on that so you can refer to it as you work in Photoshop Elements on your computer.
I’ve also included some Traveler’s Notebook travel pages at the end of this post.
I created the photos all oriented portrait to make it easier to cut them apart using a standard paper trimmer, but I will show you how to rotate your landscape photos so that you can include them as well. If you want your photos to have a slim white border cut them accordingly, if you want borderless photos just trim off the extra white.
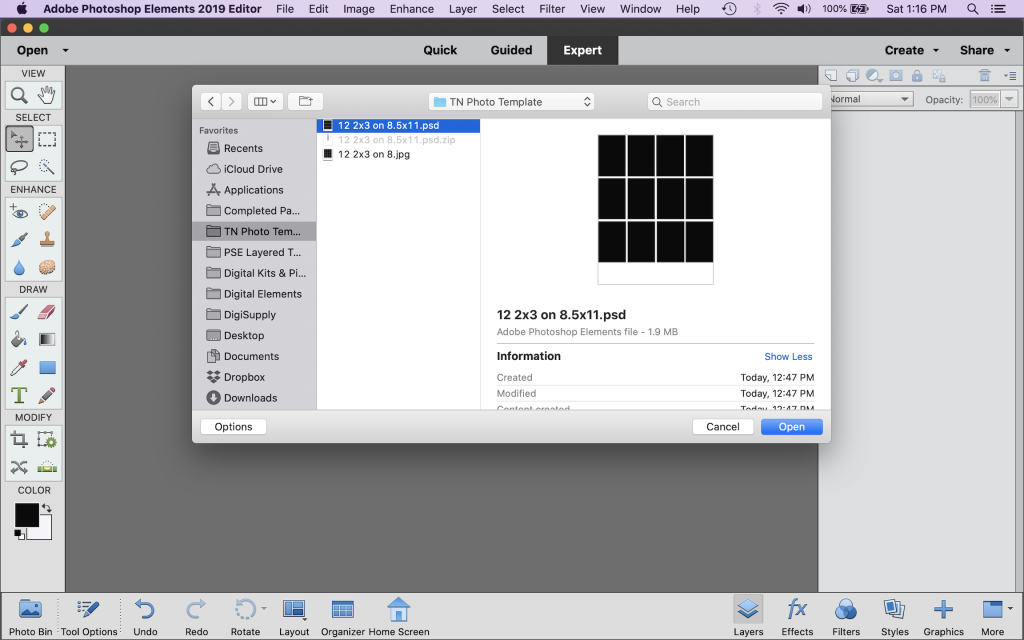
Begin by downloading the Template and saving it to an area where you will be able to find it later. I have a specific folder in my media library where I store layered templates. Next you will need to unzip the file. On a Mac I just double click the file and it unzips for me. Select the unzipped file 12 2×3 on 8.5×11.psd save a copy of it with a new name so that you can keep the unedited file for future use.
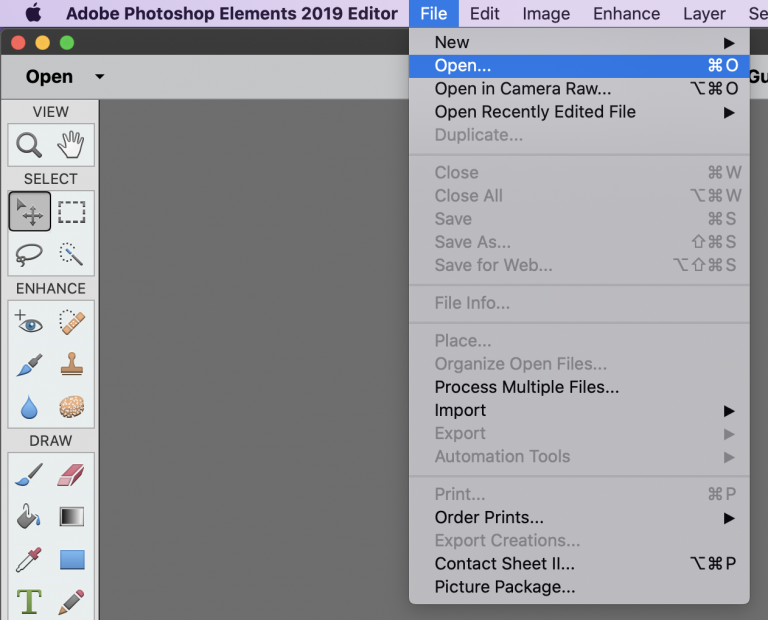
Next open the file in Photoshop Elements. Open Photoshop Elements Editor and click the toolbar at the top of the page FILE / OPEN then navigate to where you have stored the file. Select the unzipped file (the file extension will end with .psd) and click OPEN.
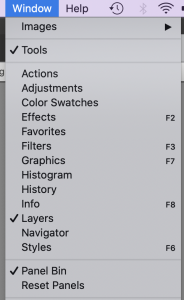
Lets set up your work area From the top menu click Window then make sure the following items are checked Tools, Layers, and Panel Bin.
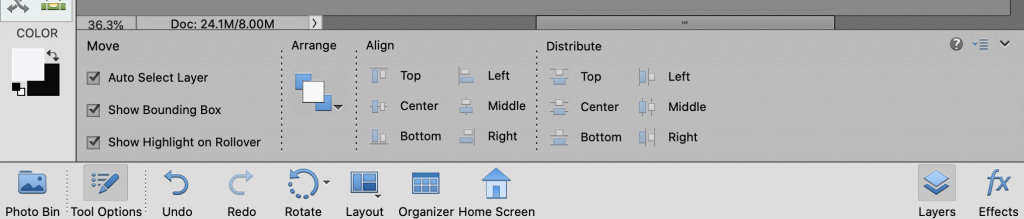
Now let’s check the Tool Options Settings. The Tool Options are at the bottom left of the screen next to the Photo Bin, click on Tool Options to see the settings.
We are only concerned with the first two
Auto Select Layer if this box is checked you can select a layer by clicking on it in the work area. If you are having difficulty selecting the wrong thing you can turn it off and select your layers by clicking them in the layers palette. For this simple task you probably will want it turned on.
Show Bounding Box also should be turned on
Now I will teach you to insert your photos into the photo place. I generally select my photos and then copy them to a temporary working folder on my desktop. I created on for each project and when the project is completed I can delete it knowing that I have not made any changed to my photo library.
You can import photos one-at-a-time or if you put them all together in one place, you can open them all at once as I will demonstrate.
From the toolbar at the top of your screen select File Open then navigate to where your photos are stored and select the ones you want to use. To select multiple contiguous files select the Shift key to select non-contiguous files (when other non desired files are in between) hold down the command key and click all the files you want to use. Click Open
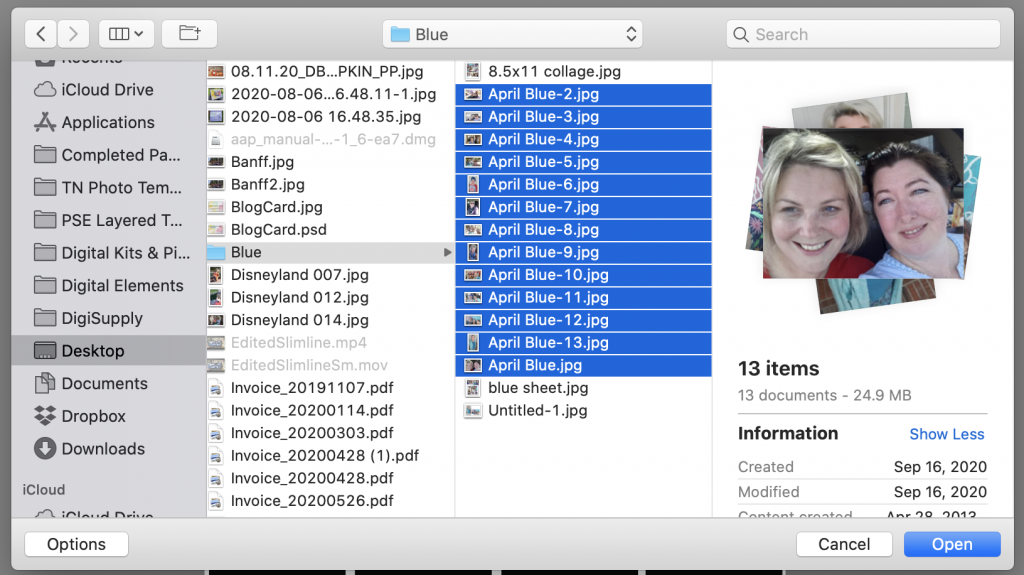
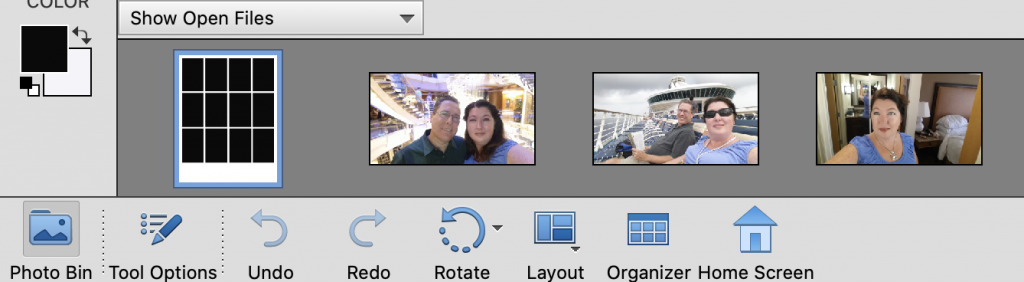
Photoshop Elements will now open all those files. To see the template you are working with again find the Photo Bin at the bottom of the screen, click Photo Bin and click on the template in the Photo Bin
Now we will begin to attach photos to the photo layers. Make sure you have The Expert tab selected across the top of your screen. And the Layers Panel selected at the bottom right. Now click to select Shape 1 in the layers panel at the right side of your screen.
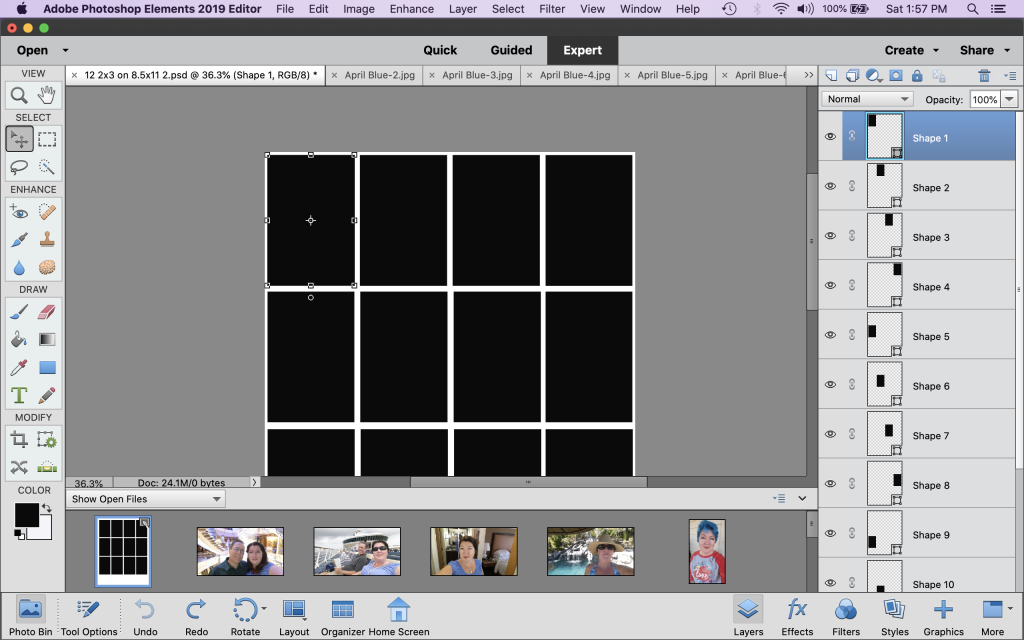
https://youtu.be/YdHTlUGN1zw?t=188Let’s pause a moment to talk about Layers. The layers of the layers panel allow you to specify which items are above and below other items in your page. For printing photos you won’t need this much but let me share the concept with you for just a moment. The Layers panel shows what is at the top and what is at the bottom from the top to the bottom of the screen. This was an easy concept for me to grasp because as a child I learned about Disney’s Multiplane Camera which they developed for Snow White back in 1938. The film clip should begin at 3:08 where the camera is explained. (The embedded video is not playing today so here’s a link to the video on youtube I’m interested in the part from 3:08 to about 6:00) https://youtu.be/YdHTlUGN1zw?t=188
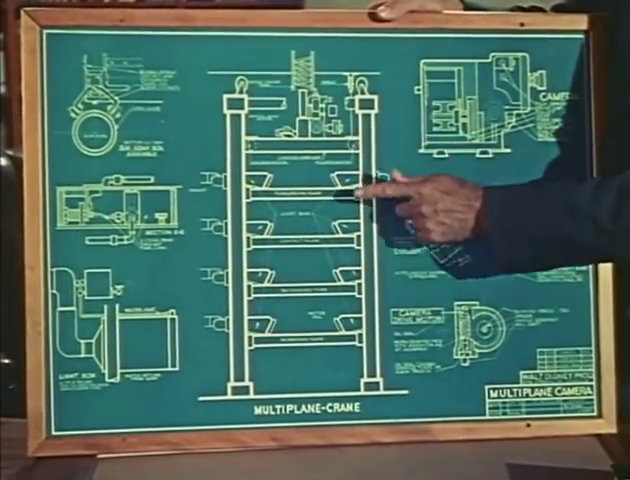
I always think of the layers palette (far right) as the multiplane set-up with the camera at the top and the main work area is the view you would see if you were the camera man looking down through all of the layers.
Now we will insert our first photo. The goal is to insert the photo ABOVE Shape 1. By selecting this layer before adding the photo Photoshop will position it above Shape 1 in the layers palette. Click on the photo to be imported in the Photo Bin and drag it up into the workspace. See how it is also shown above Shape 1 on the layers palette on the right.

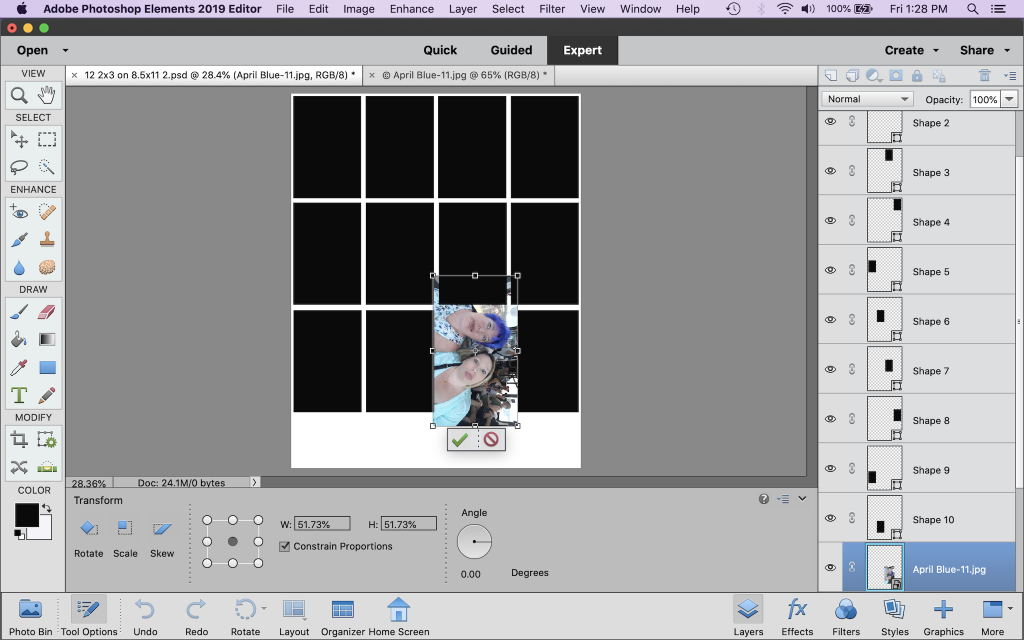
Now it is time to position and resize the photo. Make sure that the Move Tool is selected from the toolbar on the left as shown above. Now mouse over the photo, click and move it to the upper left corner of the photo sheet while holding down the mouse button. You can minimize the Photo Bin by clicking the down arrow at the top right of the photo bin.
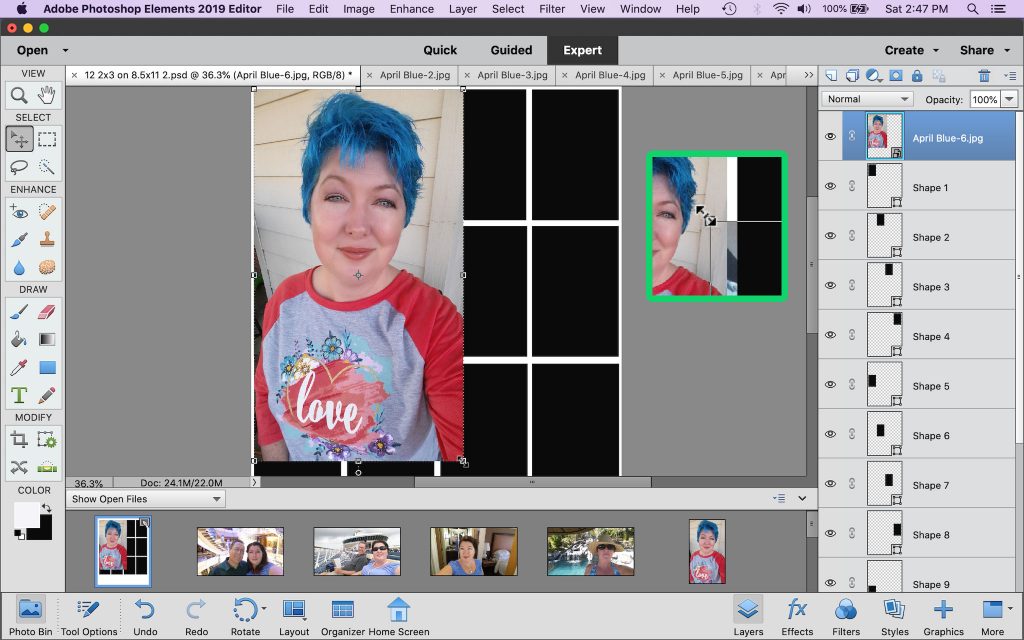
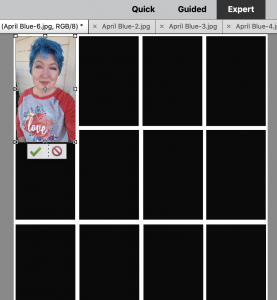
To resize the photo position your cursor over on of the four corners until it turns in a diagonal double arrow (as shown in green framed inset) then drag it to the desired size you want to be sure the photo is big enough to cover the full black square. Using the drag handles at one of the four corners will preserve the aspect ration of your photo meaning it will not distort with resizing. If you are satisfied with the resizing click the green arrow to accept it. If you want to discard the change click the red circle with the line though it.
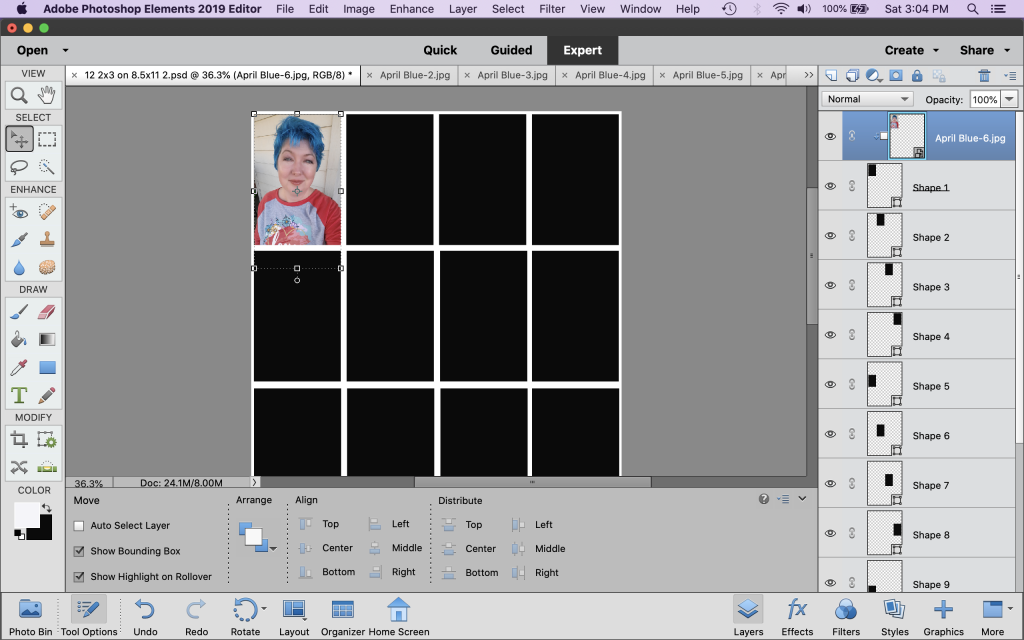
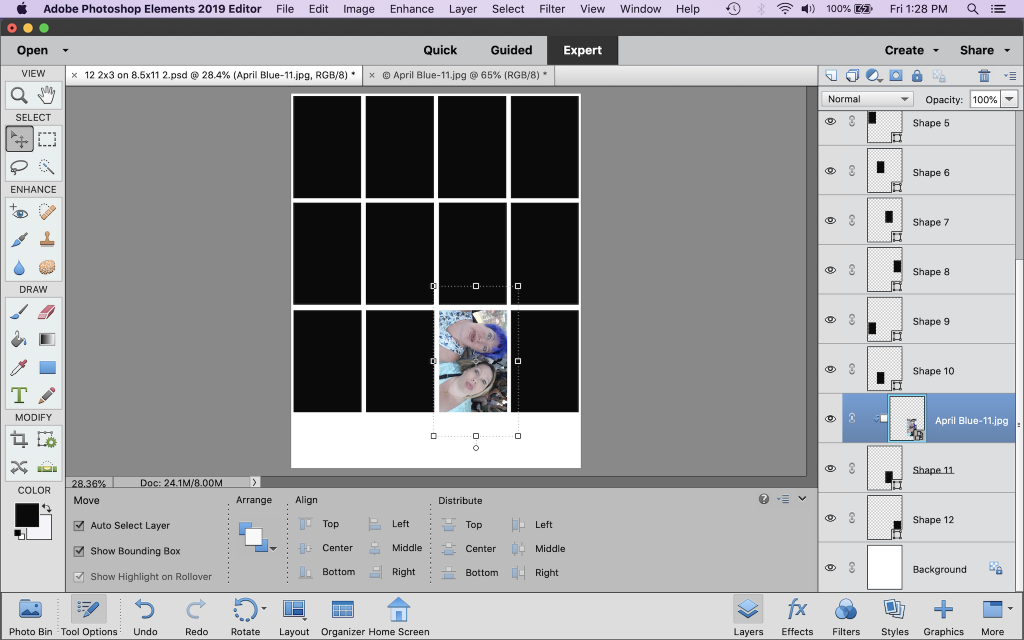
Now we will create a clipping mask. Make sure the photo is selected in the layers palette. On a windows computer click Ctrl+Alt+G (for mac Command+Option+G).
The photo will now be cropped to conform to the size and shape of the black rectangle and you will see that it it is now indented in the layers panel to indicate the layers are clipped. To un-do the clipping mask you can repeat the key combination or if you select Edit Undo in the main menu it will undo your most recent edit.
Now you can readjust the size of your photo by grabbing one of the four corners when the diagonal double arrow handle appears (see white framed inset), or you can use the move tool (the one that looks like a cross) to move the image up and down or left or right to adjust what appears inside the clipped area. In the next example I will how you how to adjust and insert a landscape photo.
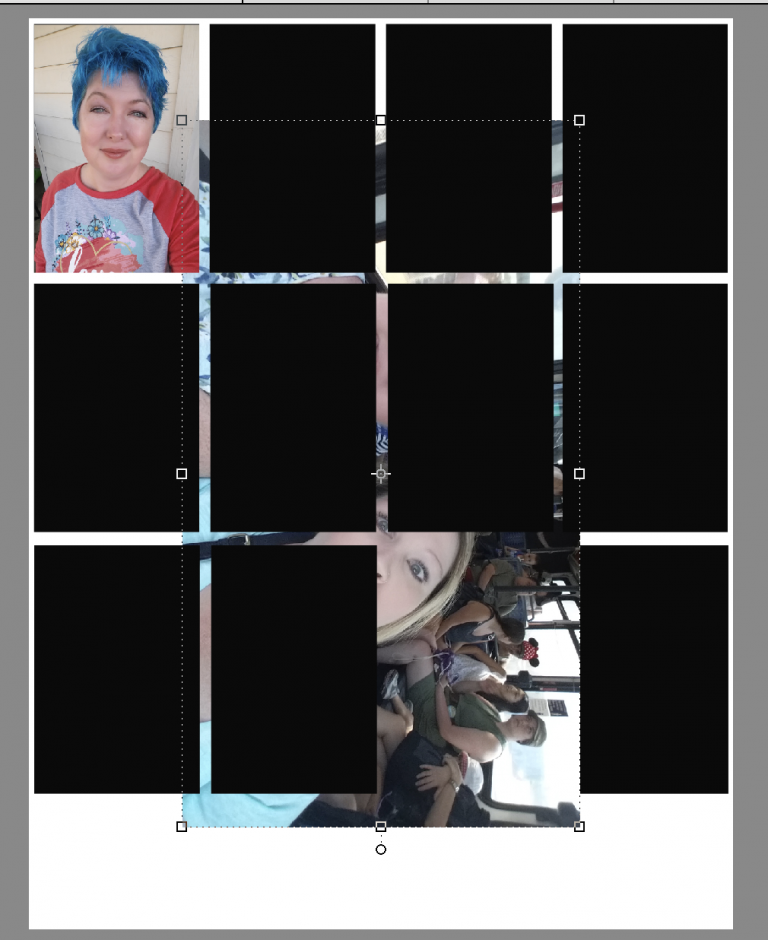
I will insert this photo into Shape 11 so first I will click to select Shape 11 either in the main work area or in the layers palette on the left. Now I will click to open the Photo Bin if needed. The photo I am going to insert is horizontal/landscape so I will right click on it and select Rotate 90º Right

I need to select my template again in the Photo Bin and again select Shape 11. Now that I have rotated my image I can drag and drop it into the main work area.
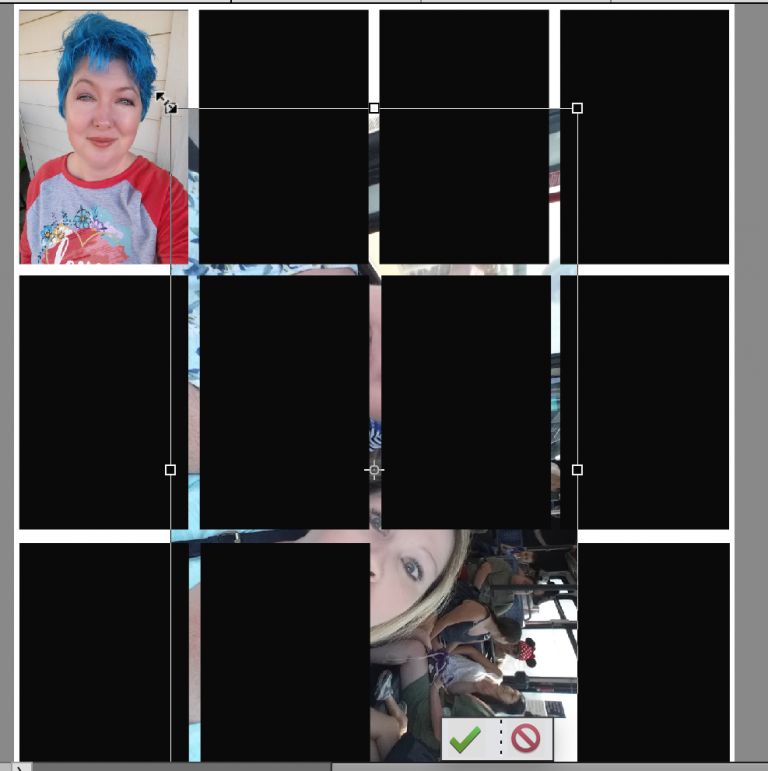
Part of my photo is hidden behind the layers which appear above it but I can see where the photo is because of the dashed lines of the bounding box and the handles at the corners. Position your mouse over one of the corners until you see the double ended diagonal arrows then drag to resize the photo and click the green arrow to accept your changes.
Now we will create a clipping mask. Make sure the photo is selected in the layers palette. On a windows computer click Ctrl+Alt+G (for mac Command+Option+G).
Continue to repeat these steps to insert all the photos you wish to print.
Save your file if desired.
To print the photo sheet From the menu bar at the top of screen select File / Print.

Change your print settings as appropriate for your computer and printer and click PRINT.
Use a paper trimmer to cut your photos.
Now I will share a few pages from one of my own Traveler’s Notebook travel scrapbooks. I created these pages while on vacation in October 2019 at North, Carolina’s Outer Bank. I took with me a tablet of 12×12 water-themed paper from Hobby Lobby as well as a few packs of water and mermaid themed stickers and die-cuts. This is made in a Wild Whisper 8.25″x4.25″ Traveler’s Notebook that I picked up during the Calgary Reunion trip.
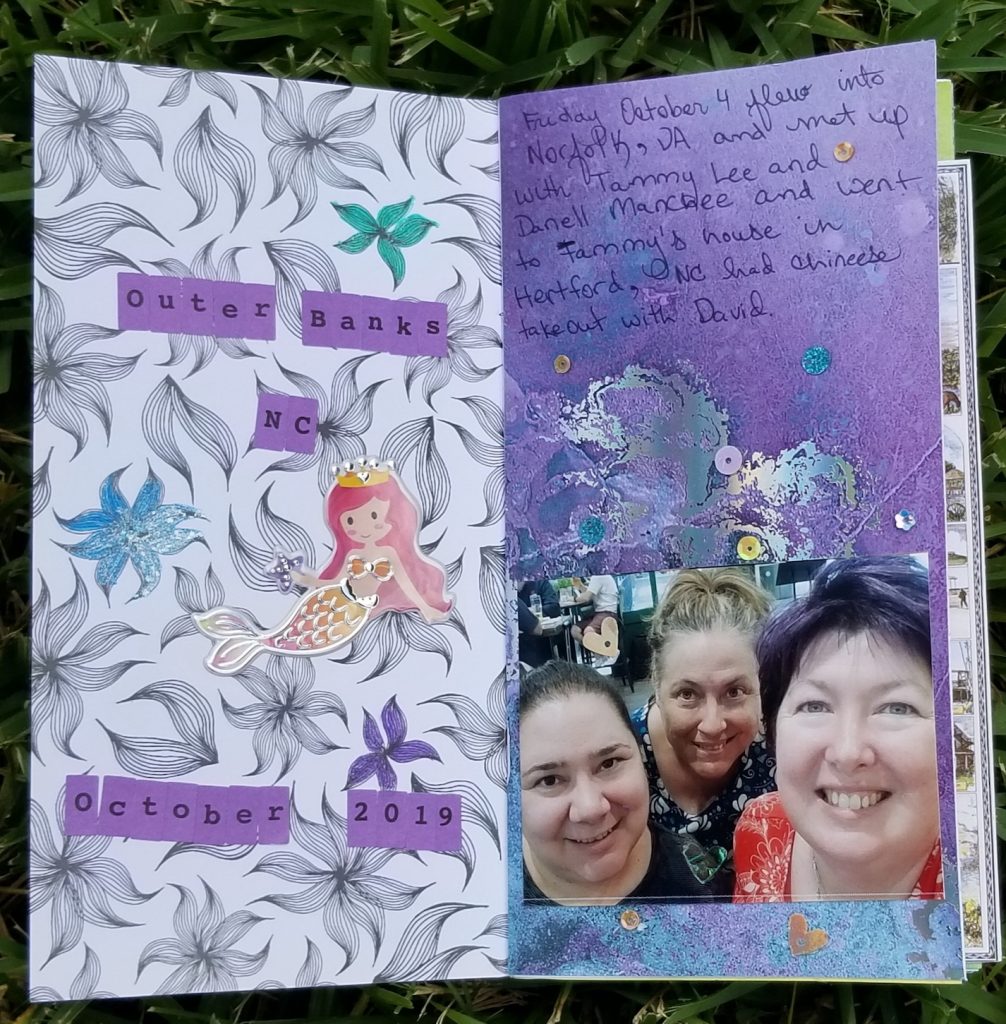
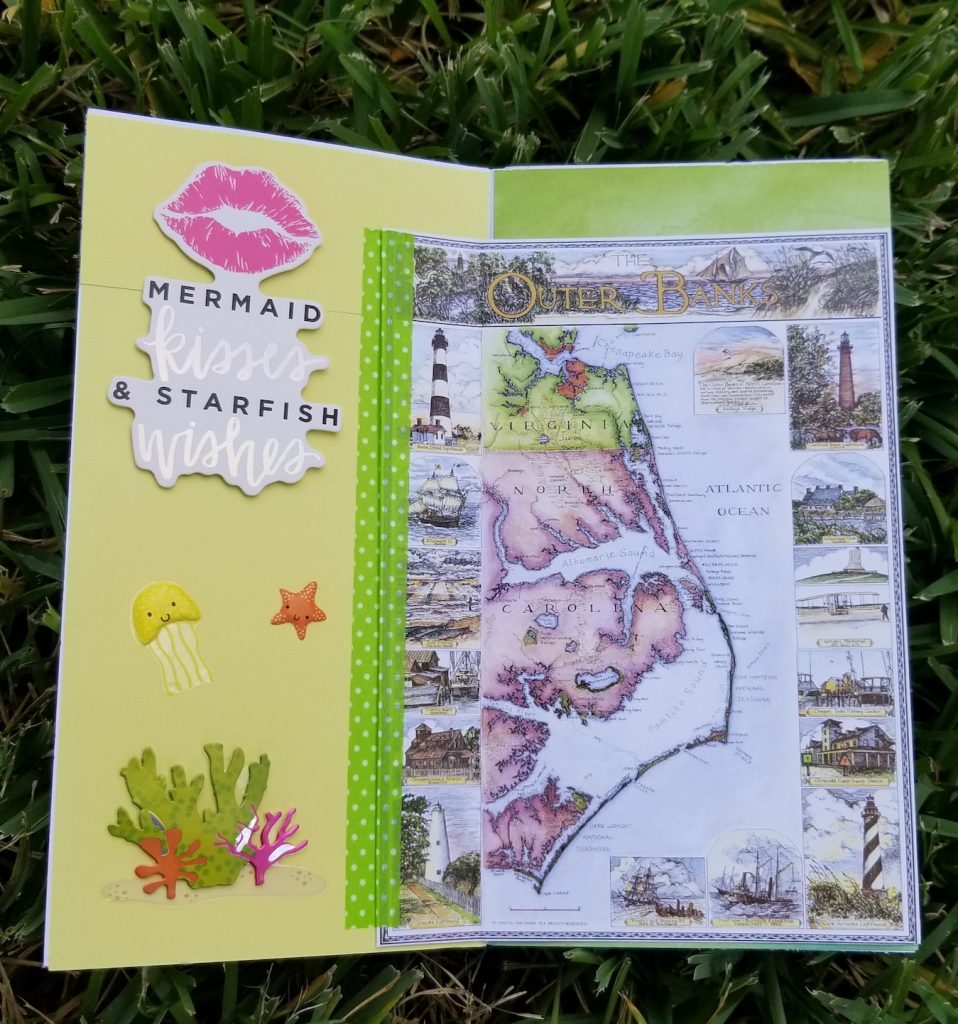
Postcards and maps are a great way to evoke the location of a trip.
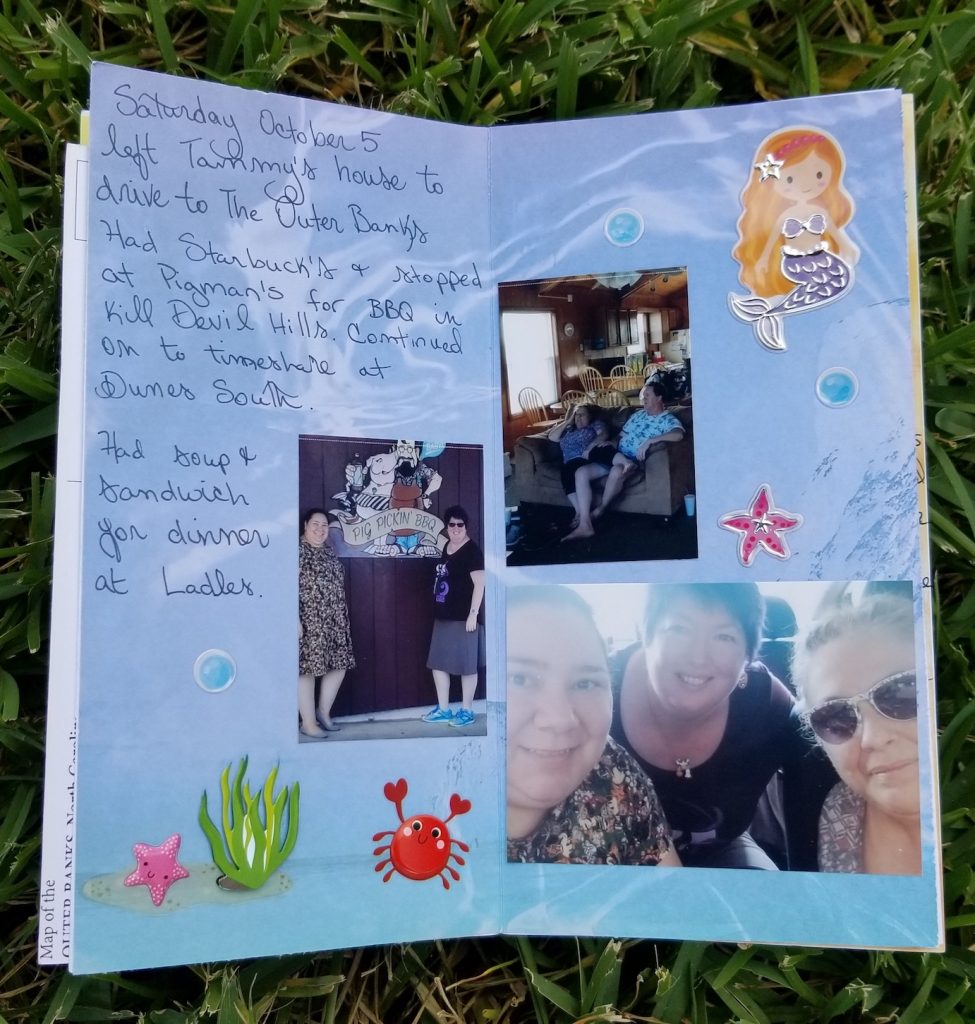
I used ink and blending brushes to created the background for this page. Don’t forget to include memorable details like a book you read during the trip. Particularly if it ties into the places you visited.
I hope this template proves useful. For Much more accomplished instruction in Photoshop and Photoshop Elements I recommend you give Melissa Shanhun’s tutorials a try. She has wonderful classes and resources on her website https://digitalscrapbookinghq.com/.
Melissa has a tutorial for printing photos on a letter sheet of paper https://digitalscrapbookinghq.com/print-multiple-photos-one-sheet-8-5-x11-letter-paper/
Here is her Photoshop Intro class http://digitalscrapbookinghq.com/peab