
This month we’re talking about obsessions. I thought I would share my three C’s.
The first of these is Comfort. I’m no daredevil. Comfy, cozy and tranquil are the things I’m looking for in life. My family has a cabin at the lake. I love to escape the city to soak up fresh air and look at growing things. Cuisine is my second C. I love to cook because I love to eat. I’m pretty good at photographing food. The real secret to my Instagram worthy food photography is my blue dishes. Food looks beautiful on blue. This brings us to my third C which is color.
I’m a blue girl, I love all things blue. I have blue dishes, I have a blue blog. I have blue eyes so I wear a lot of blue, I often even have blue hair. The only thing better than blue is blue and aqua or blue and purple I just love cool color combinations. All these areas come together in a bonus C creating. I’ll admit that I also get a boost when I get a nice reaction to my creations.
The projects I’ve created this month are all about blue.
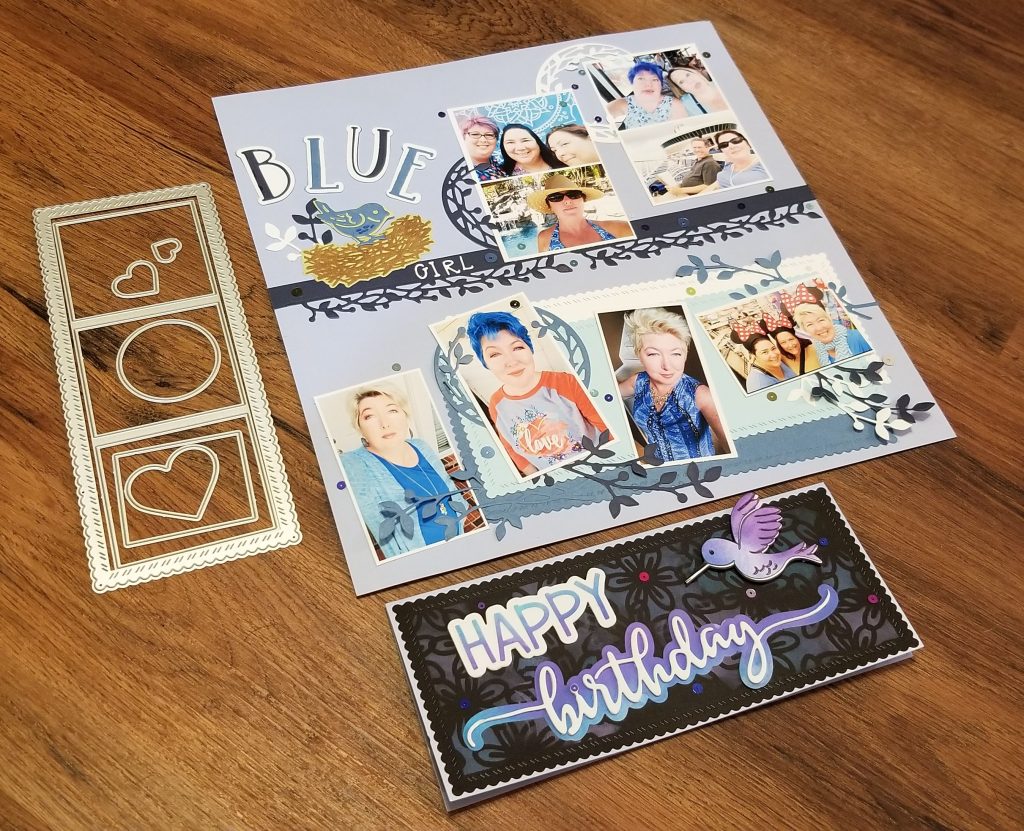
First I created this beautiful slimline birthday card. The slimline card is shaped to fit into a standard business #9 or #10 envelope. This trend was last seen in 2008 but back then we didn’t call it a slimline.
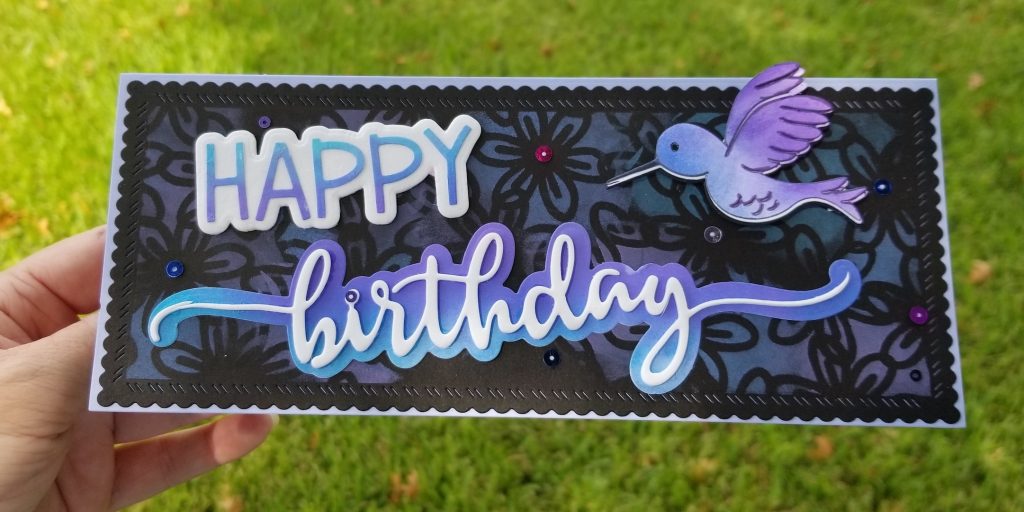
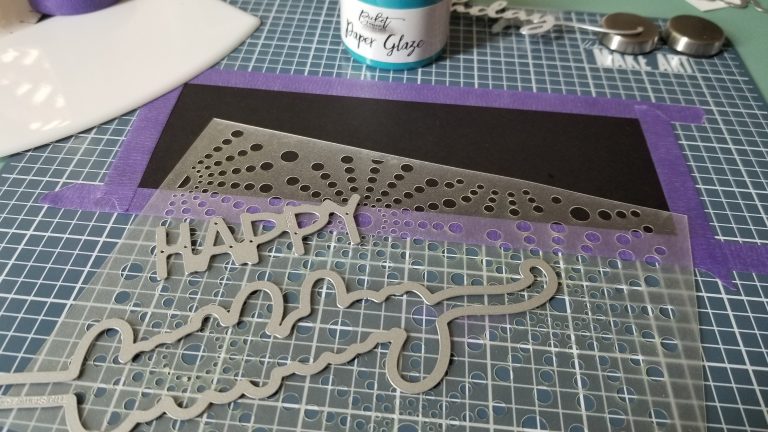
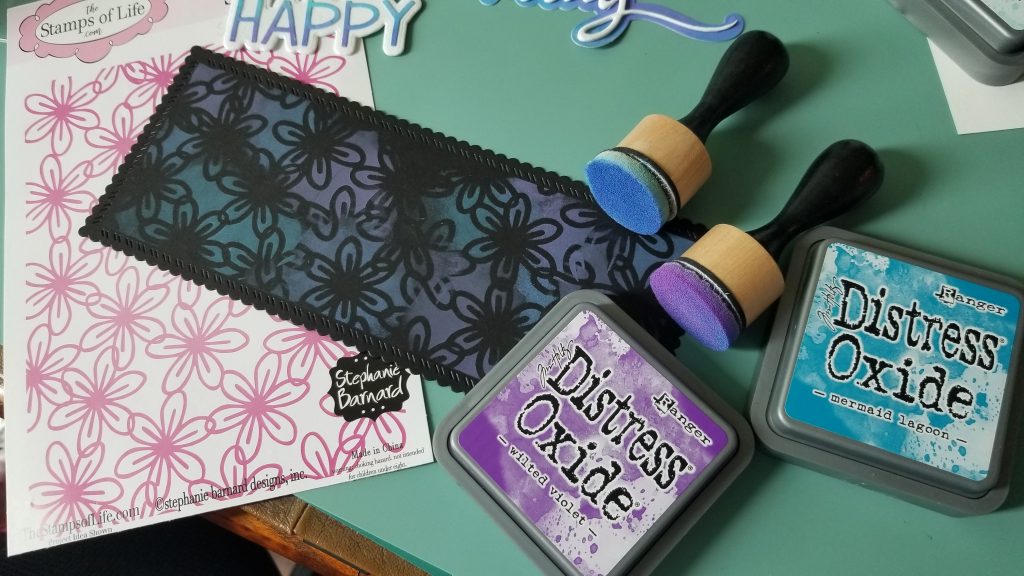
I began by ink blending on a piece of white cardstock with Distress Oxide Inks in Wilted Violet, Mermaid Lagoon and Blueprint Sketch. I die cut the birthday shadow and HAPPY words from the blended cardstock.
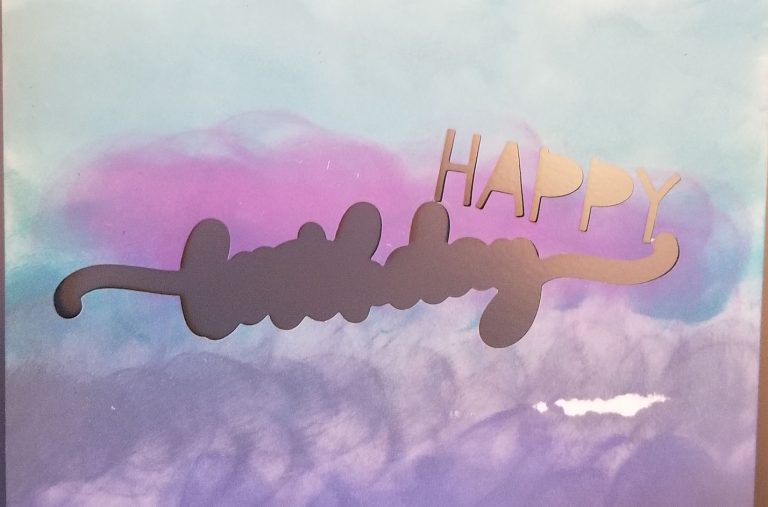
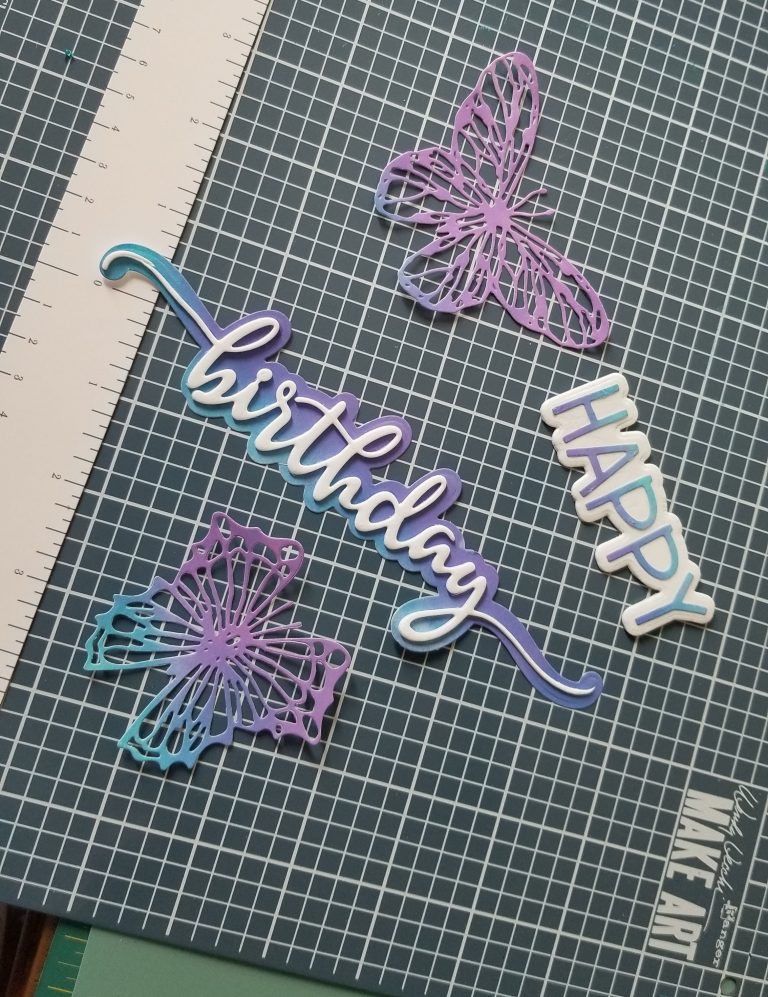
I cut the cursive birthday and HAPPY shadow from white fun foam and adhered my layers.
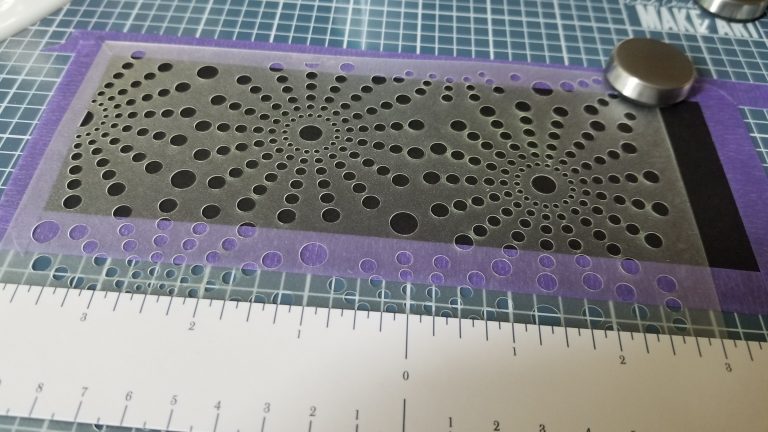
I used Catherine Pooler Essentials Slimline Dies, cutting the scalloped layering piece from black cardstock. I used purple tape to secure the black piece to my metal mat masking off the scalloped edge so it would remain black. I used a magnetic ruler and magnets to hold my stencil in place while sponging with the same colors of Distress Oxide Inks I used for the sentiments. I ended up using The Stamps Of Life Open Flower Stencil instead of the one shown.
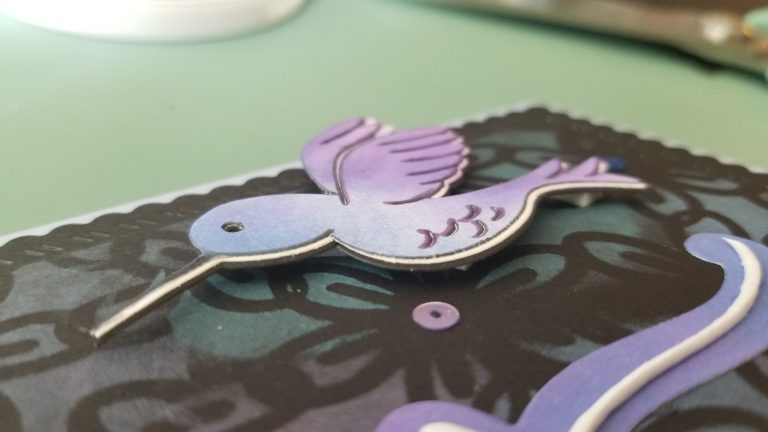
I stamped a hummingbird from The Stamps Of Life Hello Hummingbird stamp set and colored the bird by blending with the Distress Oxide Inks then I cut the image out using the matching dies. I cut the hummingbird again from white cardstock and black cardstock and glued the three layers together staggering them slightly so that the white center layer would help the hummingbird to stand out against the black card. I assembled the layers of the card. I mounted the hummingbird on foam tape for dimension.
I finished off the card by adding Picket Fence Studios Berry Infusion Sequins.
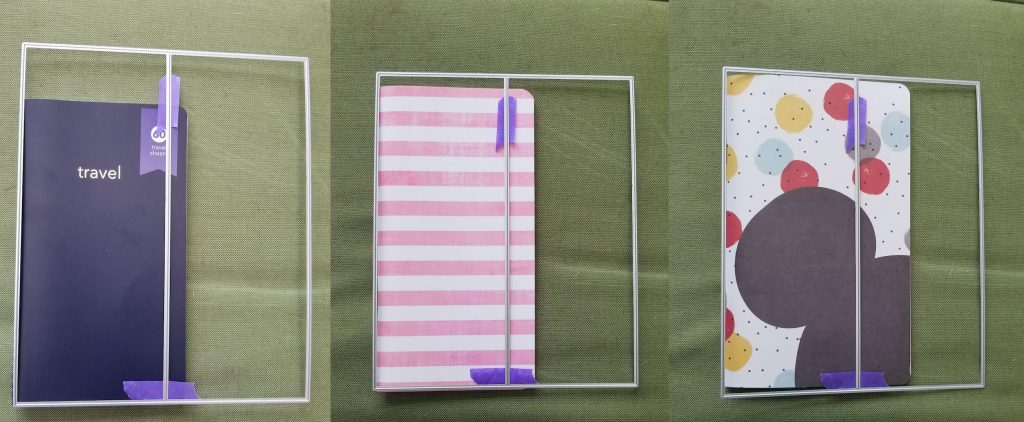
One of the reasons I so enjoy card making is that it gives me a smaller canvas with which to experiment and try new techniques which I can later use in my scrapbooking. I wanted to use my slimline dies to create a Traveler’s Notebook scrapbook page. I began by comparing my Slimline Base Card die to the size of my various Traveler’s Notebooks. I ended up going in a different direction but I have included the size comparison photos for your information.
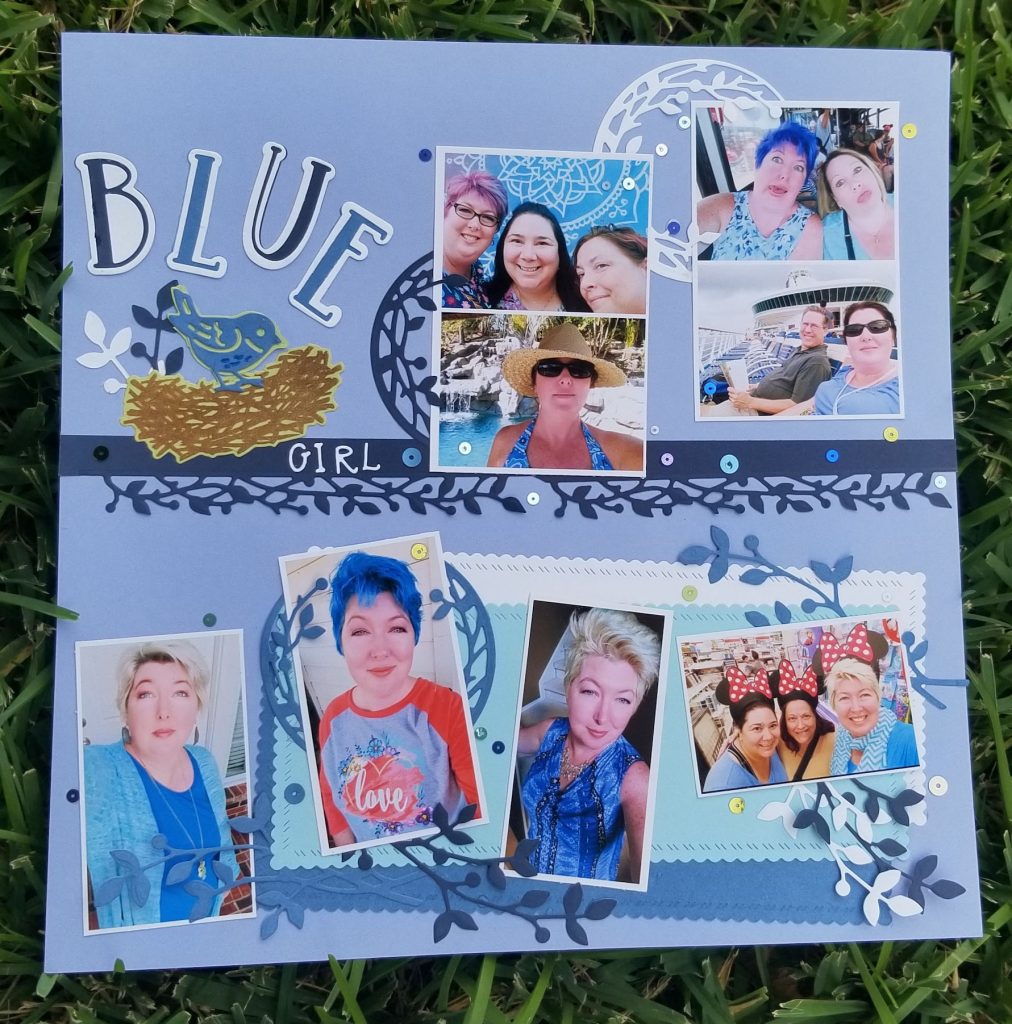
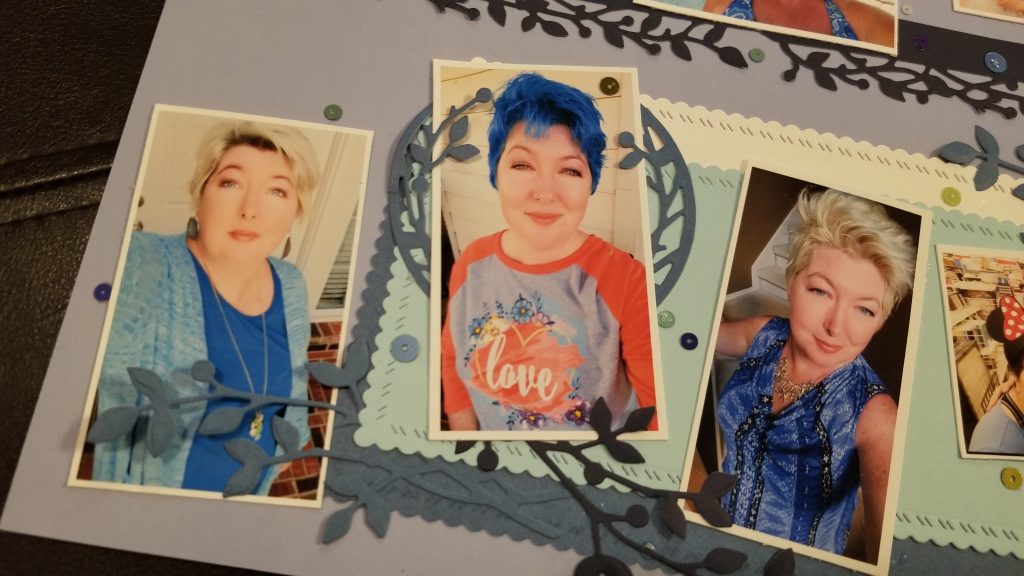
I decided to make a scrapbook page showing how much I love blue. I searched photos tagged April Swingler and 1 star or greater in Lightroom. I scrolled through those photos and flagged the ones I thought I would like to use. I then exported a copy of those photos into a temporary project folder on the desktop of my laptop.
I created a layered 8.5×11 template in Photoshop Elements which will size and print 12 3×2 inch photos. I have found 3×2 to be a good size for using on Traveler’s Notebooks. I printed 3 pages of photos. I printed on two kinds of paper. Epson Premium Presentation Paper MATTE and Office Depot Professional Photo Paper matte. The color was more vibrant on the Office Depot paper which are the two on the bottom row in this photo.

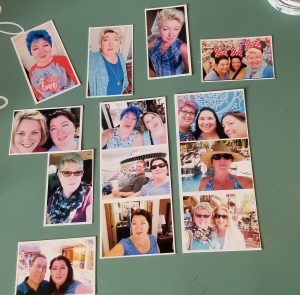
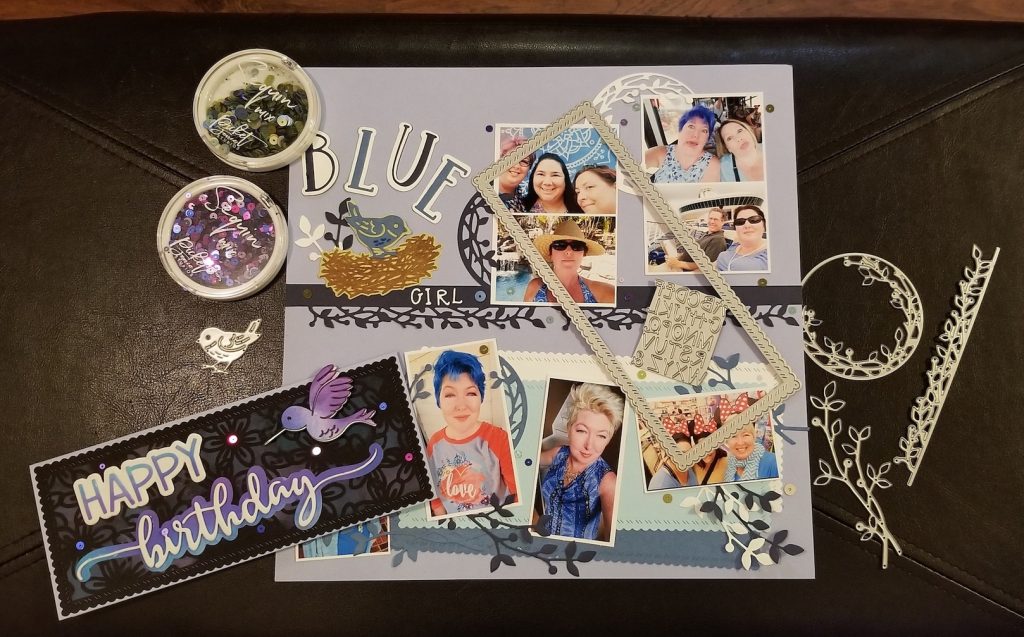
I cut all my photos and arranged them on my work mat to get an idea of what I had to work with. I considered making a Traveler’s Notebook layout with a gatefold on each side of the double page spread but in the end I decided to make a 12×12 page. I began with a 12×12 piece of Close To My Heart Spring Iris Cardstock which was the same color I had used for the card base of my slimline card.
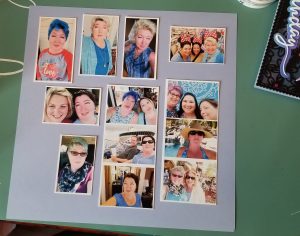

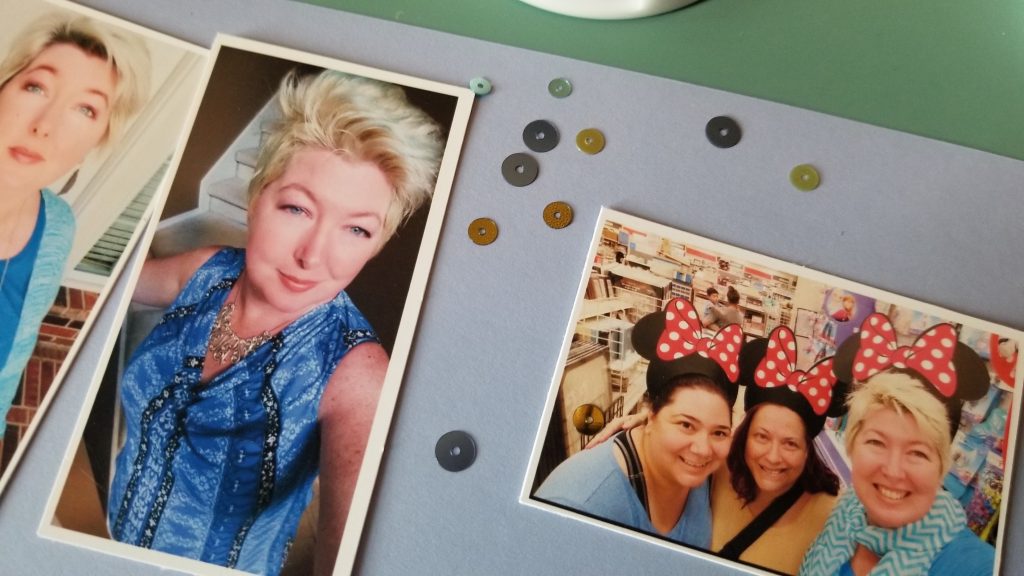
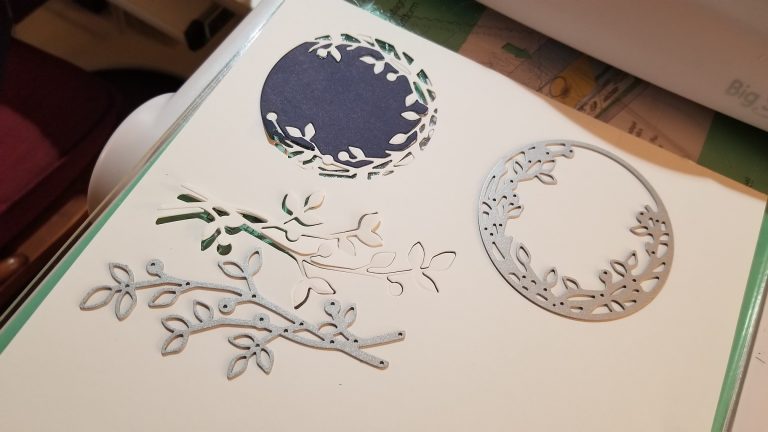
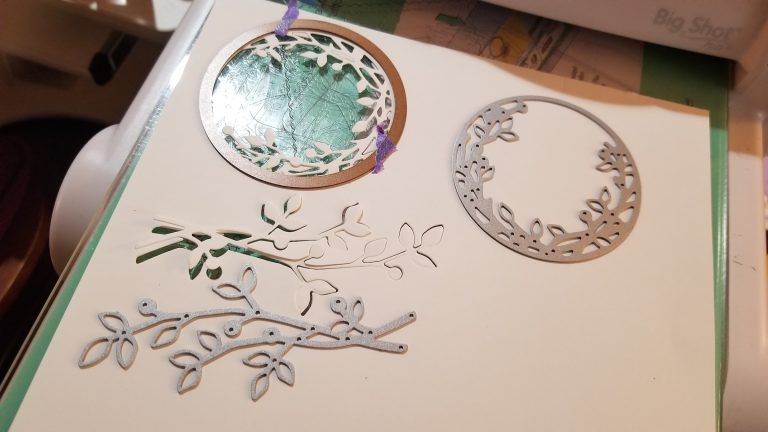
I took my color inspiration from Picket Fence Studios Blueberry Mojito Sequin Mix I compared the colors to find cardstock that I thought would work with the color blend. Where I used black on my original slimline card I chose to use Close To My Heart Outdoor Denim Cardstock for the strongest contrasting color on my page. Colors used are all Close To My Heart. Spring Iris, Outdoor Denim, Indian Corn Blue, Crystal Blue, Sweet Leaf, and White. I began cutting possible components to use on my page. I selected Stampin’ Up Birds and Branches matching Dies. There is a round vine frame which leaves a decorative hole cut into the paper. I experimented with inlaying the hole with a different color cardstock. In the end I used my Spellbinders Circle Dies to cut the frame out of the paper.
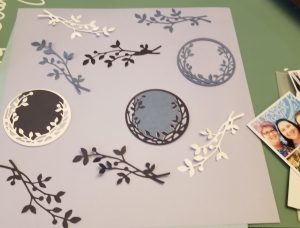
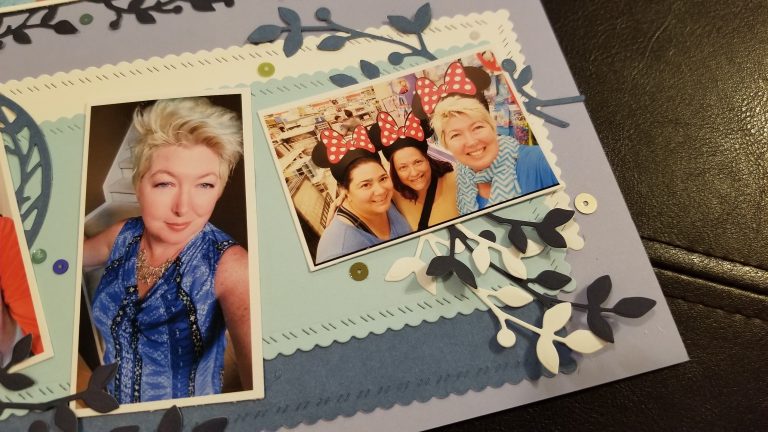
Once I had several components cut out I experimented to see what they would look like under my photos on the page. I refined the photo arrangement and decided that while journaling was not necessary to convey the meaning of this page, a title was! I didn’t want a floating title so I began to arrange the page so that I would have a foundation for my title. I created a horizontal vine border which I quite liked. this required me to recut and remove several photos alleviating the clutter problem.
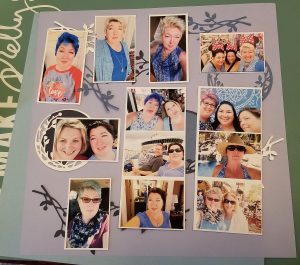
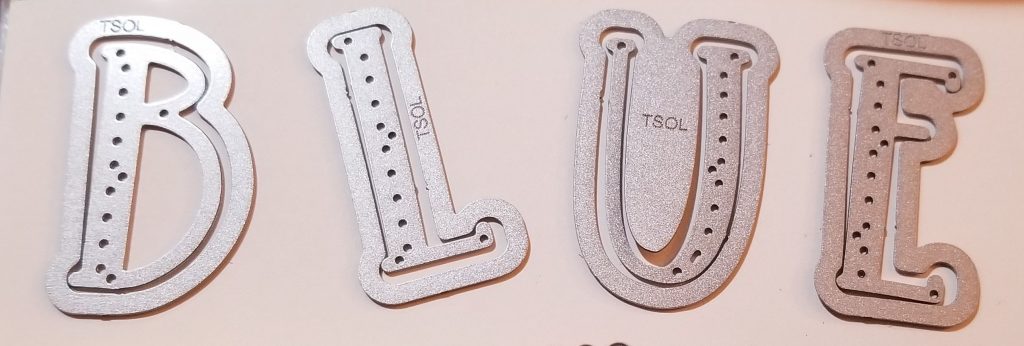
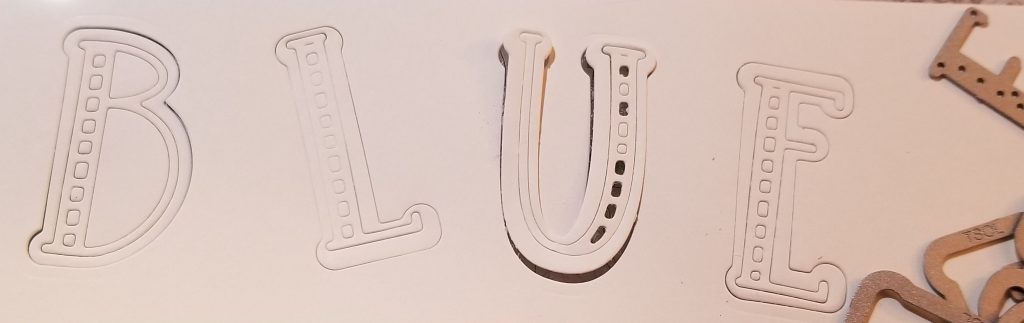
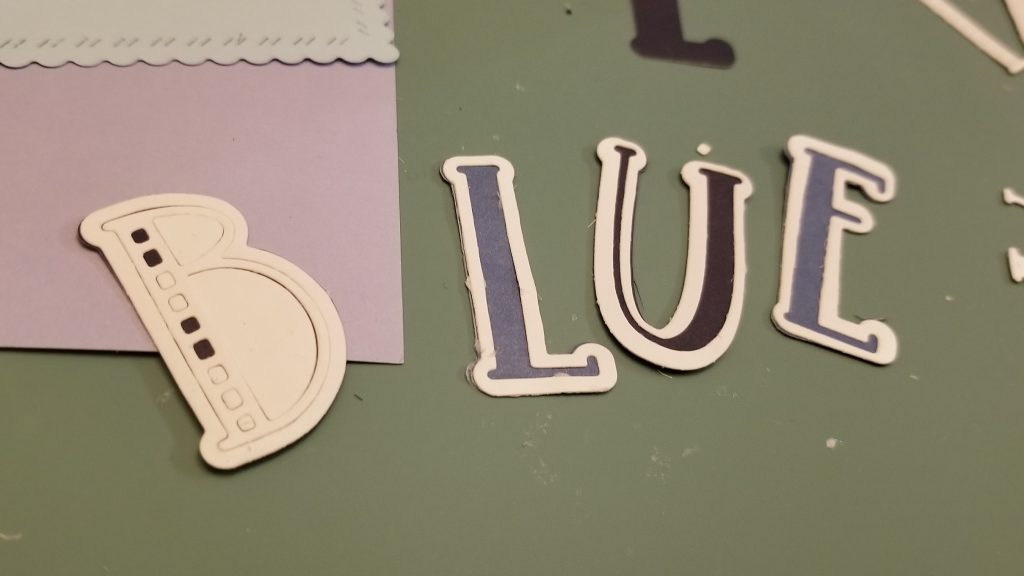
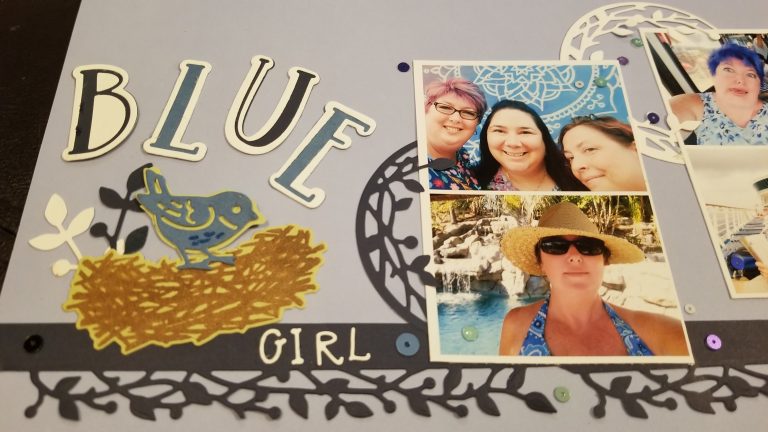
I selected fonts to use and began constructing the title Blue Girl. I chose to construct the title with shades of blue and white.
I didn’t want the intricate cut outs in the font I was using so I use a double cut method that I am fond of. I cut the white layer with the letter die nested inside the shadow dies. Then I cut the blue papers with the shadow only. I discarded the actual letters cut from white retaining the frame layer layering them over the blue shadow to achieve the final look.
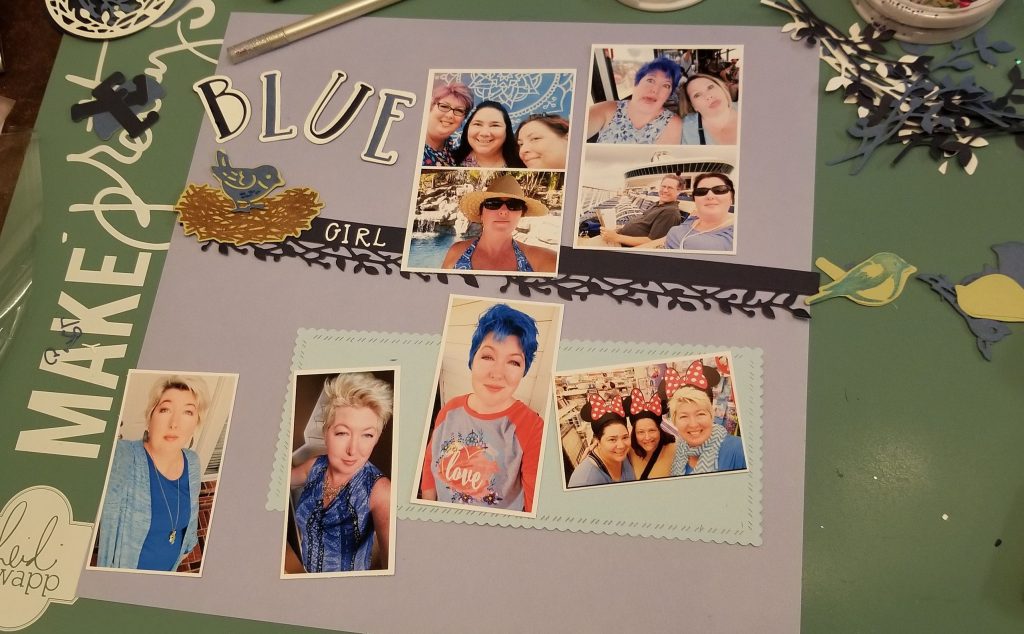
My title was coming along nicely. I added the bird and the nest which gave the title a nice shape. I wanted to incorporate several of the scalloped slimline layering pieces I had use on my card. In the end I decided to use them in stacked layers. Next I turned my attention the my vines and where I could place them.
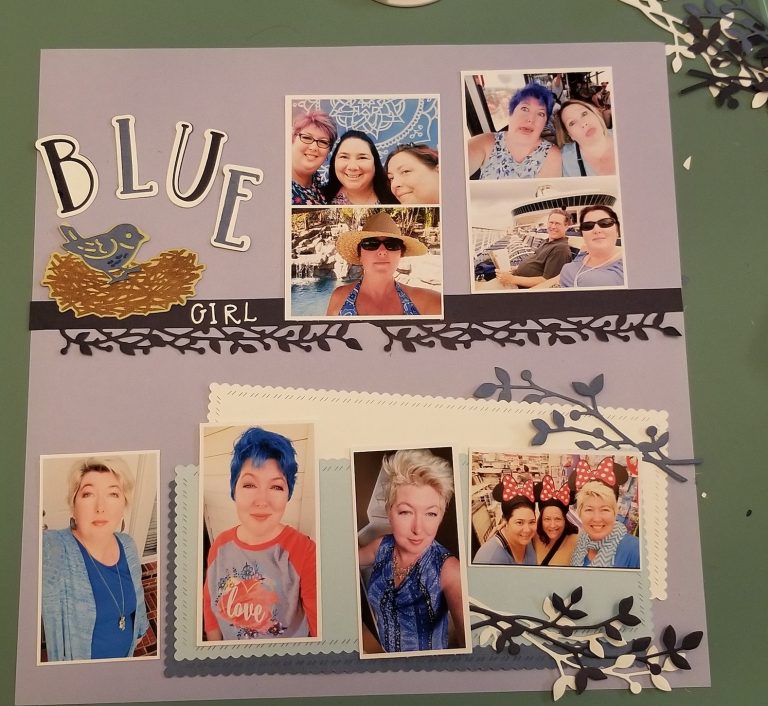
Here is the completed page.
There you have it. Two projects expressing my blue obsession featuring slimline card dies.
Links
April’s blue blog: The Fragrant Hand https://thefragranthand.blogspot.com/
April’s Instagram, see lots of food on blue plates https://www.instagram.com/sparrowapril/
April’s Stampin’ Up! Demonstrator Website https://aprilswingler.stampinup.net/
Reading is a TREAT bookmark/gift card holder card AKA Slimline card from 2008 because everything comes back around. https://thefragranthand.blogspot.com/2008/10/halloween-gift-card-holder-card.html
Products Used
- The Stamps Of Life Slimline Card Die Set
- The Stamps of Life Hello Hummingbird Stamps and Dies
- The Stamps of Life Open Flower Stencil
- Catherine Pooler Essentials Slimline Dies
- Time Holtz Distress Oxide Inks
- Ranger Mini Ink Blending Tool
- Wendy Vecchi Make Art Stay-tion
- Purple Tape
- Art Glitter Glue
- White Fun Foam
- Picket Fence Studios Berry Infusion Sequin Mix
- Picket Fence Studios Blueberry Mojito Sequin Mix
- Adobe Photoshop Elements 2019
- Adobe Lightroom
- Epson Premium Presentation Paper MATTE
- Office Depot Professional Photo Paper matte
- Canon Pixima Pro-100
- Stampin’ Up Birds and Branches Bundle (link to my demonstrator website
- Spellbinders Nestabilities Circle Dies
- The Stamps of Life HSN Alphabet Dies
- The Stamps OF Life Foxes2Stamp Dies (small alphabet)
- Marvy Uchida double ended jewel picker