
The design team is talking about Shelf Designs this month. Which got me thinking? How do you style your shelves?
But before I get into that, let’s answer the question of what is a shelf design? For visual designs like scrapbook pages, a shelf is any horizontal element that can act as a place to hold other elements. Those might be photos or journaling cards, or they might be ephemera and embellishments.
If you think about your shelves at home, what’s on them? Books maybe. They might also hold plants, decorative boxes, vases, candles, the list goes on. What about in your kitchen? If you have open shelves they could be styled with stacks of plates and bowls. They might also have mugs hanging from the underside.
How does this translate to the scrapbook layout? Let me give you a few examples.
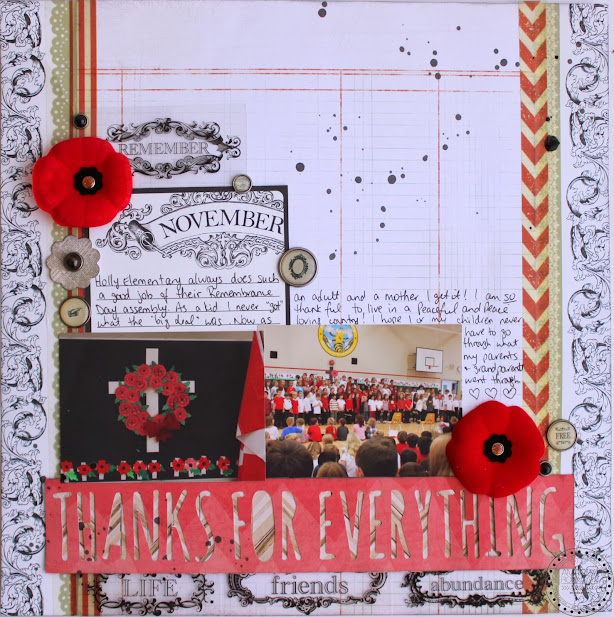
Your shelf doesn’t have to be a solid strip of paper, a piece of washi tape, or even a piece of ribbon. Sometimes your shelf can be your title.
In this example my title was a large cut file that everything else is sitting on. And if you go back to the book shelf analogy, this layout even has the vertical supports that some bookshelves do (thinking of the IKEA cube shelves). The point of a shelf is to give support to everything above it and this is a great example of that. Nothing is hanging over the edge … teetering over the edge if you will. The poppy embellishment is like a potted plant that slightly drapes over the front of the shelf. You see, it all comes back to your living room!
In this next example we see how a shelf design works over a double page spread just as well.
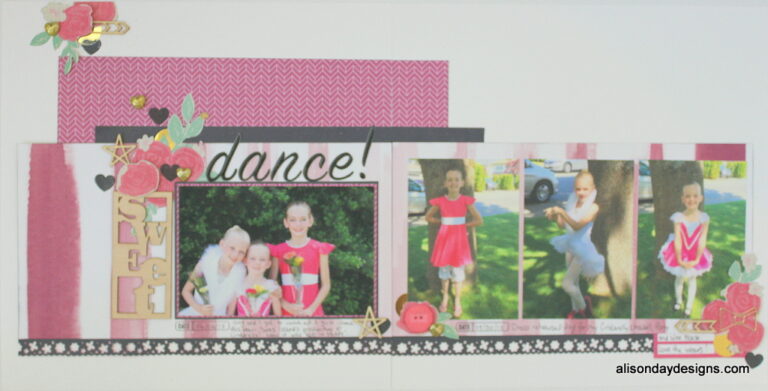
My shelf is that long, black border punched strip. And I hear what you may be saying “but Alison, everything is floating above the shelf!” True and not true. In between the photo blocks and the shelf is my journaling. Not visually heavy by any means, but it still carries weight and keeps those photo blocks grounded to the shelf.
Once again I’ve got embellishments that hang over the front of the shelf in the form of a cluster on the far right. The cluster is touching the shelf though so still very much a part of it. No floating there either!
I don’t have the vertical “supports” on either side like my first example, but not all shelves have those. This of this as a floating shelf in your living room that holds a few books, maybe a framed photo, and a plant. You may need a bookend to keep your books from falling over. That’s essentially what that large wood veneer title piece is doing here.
Now that we’ve learned what some of the “rules” are when it comes to styling our shelf layouts, let’s break them!

This layout is (ironically) about a shelf that fell down! And my shelf design reflects that.
I’ve still got a shelf – that piece of patterned paper with the telephones on it – but there are a few things that trick you into not realizing that this is still a shelf design.
1 – For us in the Western world, styling my shelf so that the highest element is on the right probably feels wrong to you. We are used to having the most important thing be in the top left quadrant of the page because we read from left to right. That’s chaos signal #1.
2 – You see those journaling strips on the far left? They are slightly hanging over the edge. Not enough to cause real concern that they would “fall off”, but enough that our brains clue in that something is a bit different here. That’s chaos signal #2.
3 – Chaos signal #3 is not what you might think it is – all the background confetti and swirls, it’s the confetti on the bottom left and the embellishment grouping on the bottom right. In my previous example when there were embellishments sitting on the shelf, they made sense. They hung over a little bit, but you could still think of them as a house plant with cascading leaves, right? This embellishment cluster is too heavy to be sitting nicely on the shelf with a bit of natural overflow. And then there’s that grouping of enamel dots on the left. They aren’t really connected to the shelf which means … they’re floating. Definitely floating.
So why does this shelf layout still work? Mostly because of all those background swirls and confetti. We know this is about a chaotic story so our brains suspend the normal “rules” of shelves to allow us to take in everything on this page.
And then there’s this rule breaking layout.
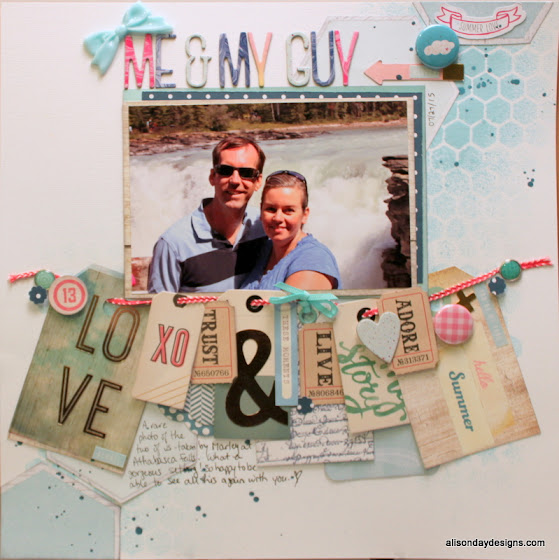
Can you see the shelf?
If you said the photo is the shelf then you are mostly correct. To find the true shelf we need to look at the main embellishment on the page. That banner.
Instead of the banner element hanging neatly from the bottom of the photo, it extends quite a bit further on either side. This actually tricks your eye into creating a shelf where one doesn’t exist. Or, extending the shelf that is already there if you will. One reason is because all the tags that are on that banner are overlapping which creates a more solid piece that if each tag was hanging alone with space in between. If I’d done that, my “fake shelf” idea wouldn’t have worked. You’d have seen that there was no shelf and dismissed this design.
Now it’s your turn. How will you style your shelf today? Symmetrical with vertical supports? Asymmetrical with lots of different objects? With just enough chaos to break the rules and yet still stay within the realm of plausible physics? Or will your shelf be a spot to hang other elements from? Or will your shelf layout be a whole bookcase like Nikki’s? Did you see her multi-shelf layout? It’s stunning! I just love rainbow layouts like hers where you get to dig through your stash to find all the things! Just gorgeous!
Be sure to share your layouts on social media with the #scraphappyfamily so we can all enjoy them and be inspired. Until next month, Happy Scrapping!