
Welcome to February with our first LOAD (LayOut A Day) challenge of 2023 already underway! Although registration, specifically for this LOAD, is closed, LOADs are always open for ScrapHappy members. If you are not yet a member, but are intrigued, click here for more details.
What is Cascading?
During February, the ScrapHappy Creative Team is discussing a technique we call cascading. I enjoy trying new techniques outside my natural tendencies, especially when I can find a way to use up my stash or play with tools and products that have been tucked away for too long. When Alice presented the idea to the Creative Team, she explained it this way, “…you start at the top and let your embellishments cascade down to where you include your photos and stories.” Essentially, the embellishments are heavier on one side, or most often, at the top. I haven’t used this technique intentionally before. For my post, I am trying this technique out for the first time with intent of using products I have on hand, then using technology to finalize it. As the month goes on, you’ll get to see our other talented Creative Members show sundry examples of cascading design.
Building the layout traditionally from my stash.
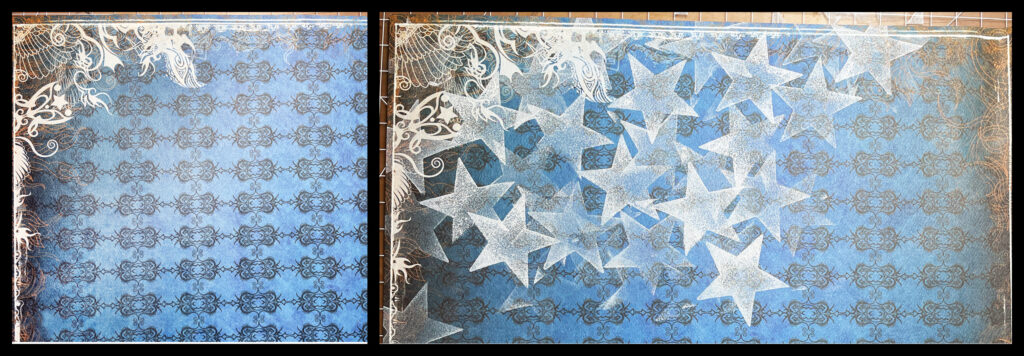
For this sample layout, I decided do a hybrid page about my son’s musical performances with School of Rock. The chosen background paper (I think it was from an old Close to My Heart kit) was muted blue with graphics in orange and black and ornamental line drawings around the edge in white. This inspired me to want to add to this playful drawing and create a cascade of stamps in white. To symbolize his rock star persona on that stage, I selected the only star stamp I could find in my stamp collection (believe it or not). I repeatedly stamped, creating a funnel-like cluster that leads the eye down to where the grouping of photos and layers will be at the bottom. Later, I located some Ali Edwards 3D plastic stars to add dimension in a monochromatic way and further lead the eye downward. A few other music related papers and embellishments were layered as well.
Enhancing with technology: going hybrid.
Five photos were chosen from each of the five events I wished to highlight. Using my favorite app called “Print to Size”, the photos were resized and cropped into 2 inch squares and printed from my Canon printer. Then, I trimmed them with a white border and backed them on black card stock. Because I liked the balance of six squares, the idea came to me to make the 6th square a question about his musical future. I adore layouts that show growth over time. (I guess this could be considered a timeline.) Making sure the font was a good size for the sentences to fit under the 2.5” wide black boxes, I typed out the details of his five performances in the Pages app. Once the page was printed, I cut the text into strips, and attached them each under the photos. At this point, all traditional elements were adhered (using either Tombow Mono Glue or Kokoyu Dotliner Tape Runner), so I took a photo of the layout with my iPhone.

Using Photoshop.
After opening the photo of my layout in Photoshop, I added the title, his ages in bottom right corners of each photo, and a paragraph of journaling to the left using this font: https://www.dafont.com/zai-remington-deluxe-typewriter.font. The reason that I used technology for this was that I knew the white text (however large or small) would stand out better and, when necessary, I could add a shadow behind the white letters to brighten them. Lastly, I needed to add a phrase about his future in the last empty black box. I finally decided on “Where will he perform next and with whom” with a large graphic question mark to emphasize the unknown future.
Don’t let the inspiration stop here.
There are so many ways to create a cascade, whether on a traditional page, a digital one or combining both into a hybrid layout. Perhaps, you will even use a cascade for a posted LOAD page. If you create one, please tag me. I look forward to the rest of the month to see other clever ways our ScrapHappy Creative Team showcases this look.
As always, come back to the ScrapHappy Blog each week for additional technique and design ideas!