
- Stamping
I’ld like to call this one item #0 since stamps and inks are an inseparable pair, but the list function of the blog doesn’t allow an item zero! At any rate if you are new to stamping I’d like to give you just a couple of ways to use your stamps besides just tapping in ink and stamping it down.- Stamp Masking
Did you know that you can cover up portions of your stamp (use tape, Post-It notes, etc) and ink up only parts of your stamp? This allows for eliminating areas you don’t want. It also allows you to use different colors on different areas of the stamp. - Scene Stamping
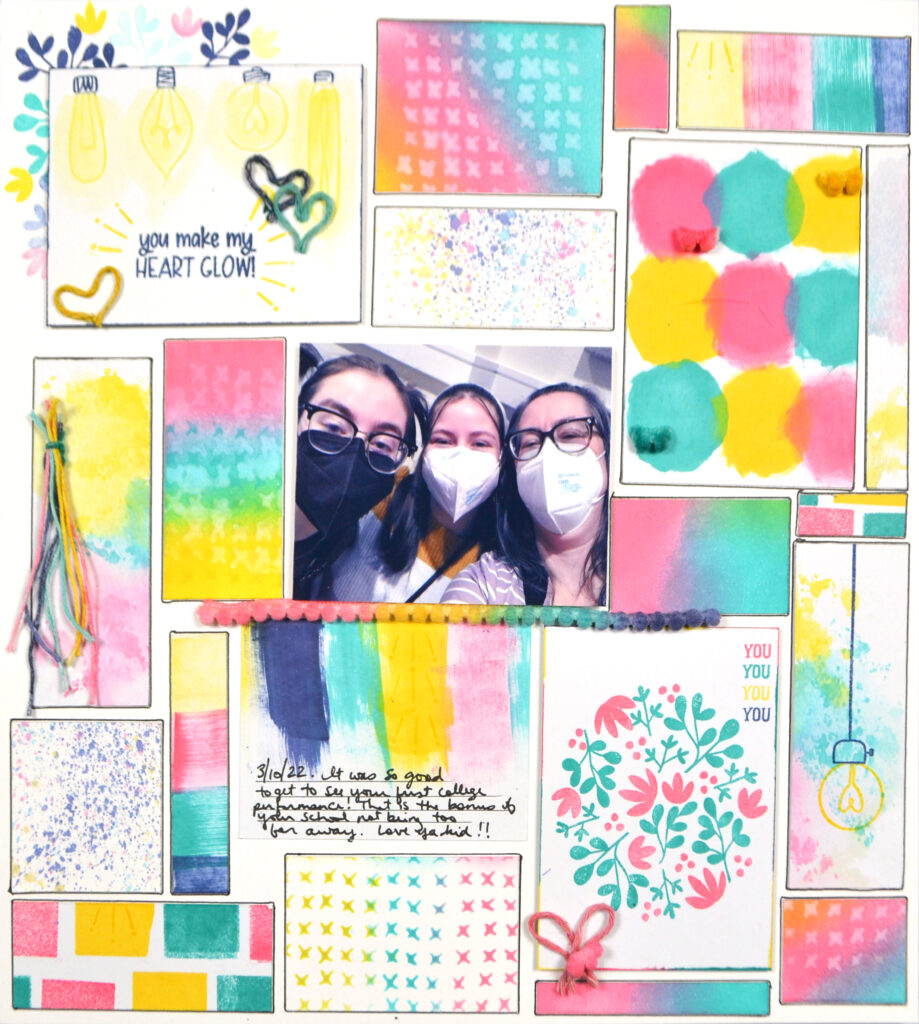
You can use a stamp set to create an entire scene. This is a great way to make your own journaling style cards! The one below uses both these first two tips.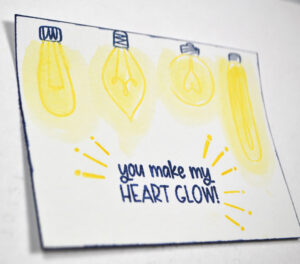
- Two Step Stamping
This is a process where you stamp once and then use a different (or sometimes the same!) stamp to stamp again to add more layers. If you don’t have those specialty stamps you can just use the tip below to get a version of two step stamping… - Repeat Stamping
Using the exact same stamp multiple times in different colors creates lots of impact. Here I did it on a small scale with the word “you”, but you can go much bigger, say with flowers, along the border of a layout. The sample below uses both two step and repeat stamping.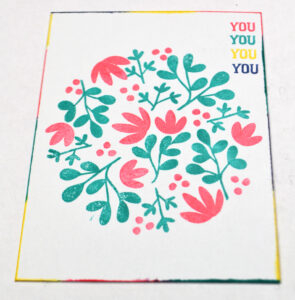
- Stamp Masking
- Inking Edges
Did you notice anything special about that last picture? Inked edges can easily add lots of dimension to projects without a lot of extra products or bulky layers. Have you ever considered inking your edges in rainbow colors rather than just a plain black or brown? Take a closer look and see what you think. - Direct to Paper
- Direct to paper just means that you press the ink pad directly onto your paper. Since most ink pads come in squares/rectangles you can create various grid patterns using this tip. (If you happen to have some of the fun shaped ink pads, like the ovals from Catherine Pooler, you can mix it up even more!) Having juicy ink pads is a big help here so buying reinkers for your pads is a good idea.
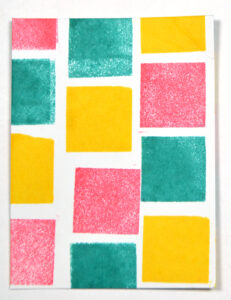
- Plus, if you put your ink pad down on paper and drag it across, you get stripes. Experiment with tipping the pad and applying different pressures to side edges of the pad and you may get a woodgrain look (depending on your ink color of course!). You can do full stripes or partial stripes.
- Direct to paper just means that you press the ink pad directly onto your paper. Since most ink pads come in squares/rectangles you can create various grid patterns using this tip. (If you happen to have some of the fun shaped ink pads, like the ovals from Catherine Pooler, you can mix it up even more!) Having juicy ink pads is a big help here so buying reinkers for your pads is a good idea.
- Direct to Paper, part 2
This deserves it’s own list item since I don’t think most people think of this. You can press your ink pad to your paper and while you do, rotate the pad. This will make circles! Wow! Thanks geometry!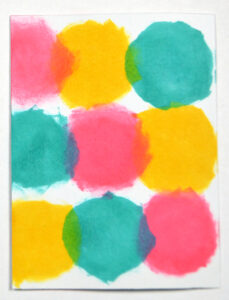
- Watercolor
- If you press ink pads to a plastic surface and add a touch of water, you now have watercolor paints. You can add little swishes of color to stamped images, backgrounds and even make your own journaling cards. Don’t forget that if you add more water you will get lighter colors and less water will give you darker colors. This makes a single ink pad into multiple shades. Super investment! Remember this image? I added a bit of watercolor to make the light bulbs glow.
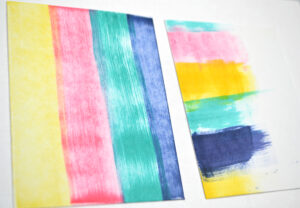
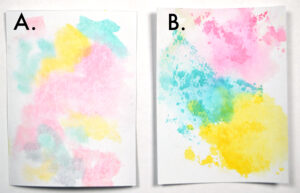
- If you ink your plastic and then press that plastic to your paper — this is called “ink smooshing” or the “package technique” — you get a different effect, especially when you layer it up several times allowing the layers to dry in between applications. Figure A shows watercolor direct on cardstock, and Figure B shows smooshing. Honestly I prefer smooshing on plain cardstock. (Watercolor paper will up your game even more, but start small and work your way up to more specialty supplies.)
- If you press ink pads to a plastic surface and add a touch of water, you now have watercolor paints. You can add little swishes of color to stamped images, backgrounds and even make your own journaling cards. Don’t forget that if you add more water you will get lighter colors and less water will give you darker colors. This makes a single ink pad into multiple shades. Super investment! Remember this image? I added a bit of watercolor to make the light bulbs glow.
- Splatters
While your ink is wet, you can use a paint brush to flick wet paint off the edge of your plastic to create spatters on your layout. No spray mist products required!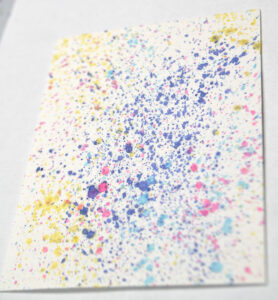
- Blending
This one is a bit more expensive as having some blending tools really helps. But I’ve seen people get away with cheap make-up foams or even cotton balls. Your mileage may very with those tools as well as which ink pads you own. However, I’ve found that most of my dye ink brands give me decent results.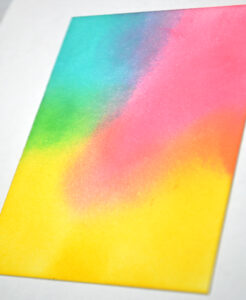
- Stenciling
You do not have to buy lots of stencils to make this one work. You can make your own stencils by punching out cardstock with various punches to create patterns. The only problem there is that is hard to see where you are stenciling. Here is a tip: die cut some plastic packaging that you would otherwise throw away, you create a free stencil that you can see through. It won’t last as long, but who cares, it’s free! You will need to be a bit careful using it though as it is pretty light weight and prone to shifting around on you. (Okay, sometimes free has it’s downsides.) Go ahead and stencil on top of plain cardstock or even on top of other inky/painterly techniques.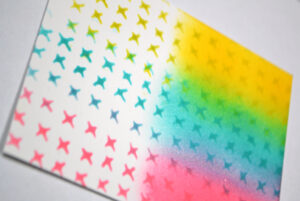
- Ink Lifting
This one is the opposite of stenciling. Instead of adding color to your project, you are removing color. Instead of using a blending tool with ink, you are using a blending tool (or paper towel!!) with water on top of already inked areas. Keep in mind that different brands of ink will lift differently, but most water based inks will react to some extent.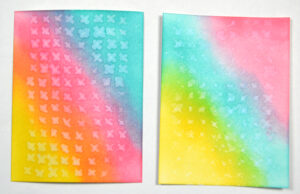
- Dying
If you make a puddle of ink and water and then dip things in it—say twine!—you can dye that material to match your project! Natural fibers work best, but experiment with the materials you have.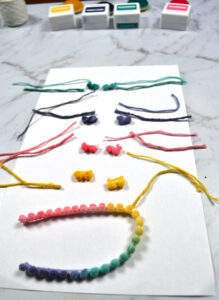
Final thoughts… If you are nervous to try all this on that larger scale, remember these things…
- Paper has two sides. Don’t like it or made a mistake? Turn it over and try again.
- Have an area that didn’t come out great? Cover it up with other elements of your layout.
- Like part of it but not all of it? Cut out the areas that you do like and use them as page elements.
- If all else fails, recycle it. It is just paper. Cardstock is generally less than a dollar a sheet and if you compare that to college prices these days, I’d say that is a pretty cheap art education right there. (Guess who is currently putting a kid through college right now?
 )
)
Do you want other fabulous fun ways to think outside the box when crafting? Our team is all about the interesting solutions this month. Be sure to check them all out, but you can get started with Alison’ post. She’ll tell you how meal planning can help your crafty life!
Until next time, have an artful day!